

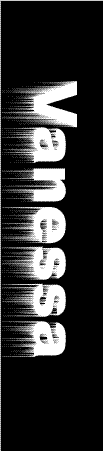
Okay, first off, create a new document, whatever size you choose. Just make sure that is is slightly bigger than the text you are writing, so that the icicles can fit. Note: the mode must be grayscale!
1. Set the background to Black and reset your colors (press D on your keyboard).
2. Pick up the Text Tool and type in your text. For more predictable results, use a thick font.

3. Go to Image > Rotate Canvas > 90 CW.
4. Go to Filter > Stylize > Wind. It will ask you to Rasterize the type. Select "OK". Use the Wind filter with Method: Wind and Direction: From the Right.
5. Press Ctrl + F.
Your image should now look like this:
6. Use the Wind filter again, but this time, instead of choosing "From the Right", choose "From the Left". Hit Ctrl + F.
Your Image should now look like this:
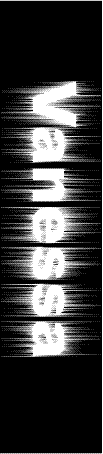
7. Now go to Image > Rotate Canvas > 90 CCW.
Your image should turn right-side-up again!
8. Go to Filter > Stylize > Wind. Use the Wind filter with Method: Wind and Direction: From the Right.
9. Use the Wind filter again, but this time, instead of choosing "From the Right", choose "From the Left".
Your image should now look like this:
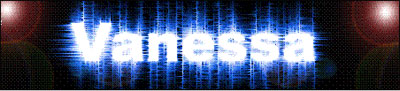
10. Nearly done! Now, go to Image > Mode and select RGB Color. It will ask you to flatten the image. Select "OK".
11. Pull up the Hue/Saturation box by pressing Ctrl + U. Make sure that the "Colorize" box is checked (ticked, selected, whatever...) Use these settings: Hue: 220 and Saturation: 80.
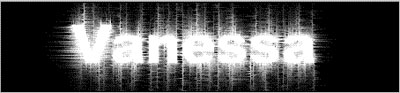
This is the final product:

And here's a sample of it with lens flares:
Okay, we're done. Experiment to get different effects and please post your finished products here. This is my first tutorial ever and I hope I was clear enough!