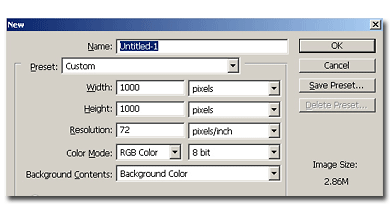
Start with a new document, 1000×1000 pixels white background.
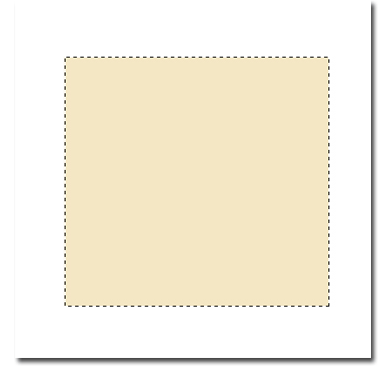
On a new layer, using the rectangle marquee tool, draw a rectangle as big as you want the map to be. I used around 750×750 pixels. Fill it with #F4E7C4 color
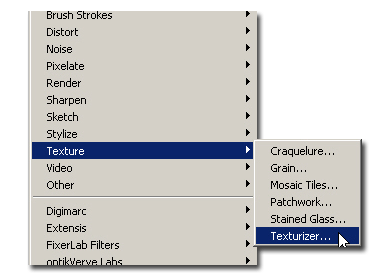
Go to Filter>Texture> Texturizer and apply these settings. Texure: Canvas, Scaling: 101, Relief: 5 and Light Direction: Top right.
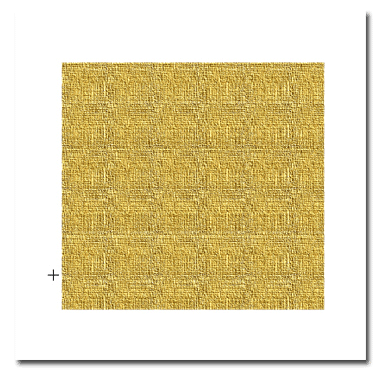
Your image should look like this:

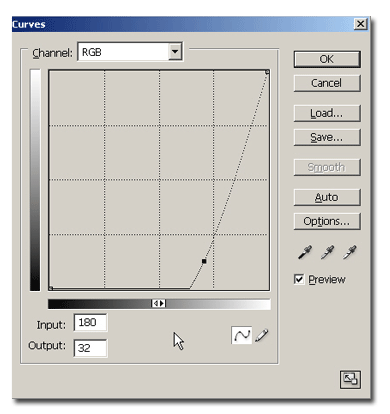
Now go to mage> Adjustments>Curves, or hit Ctrl+M (Command +M on macintosh) to bring the Curves dialogue box up. Make a curve like in my example:
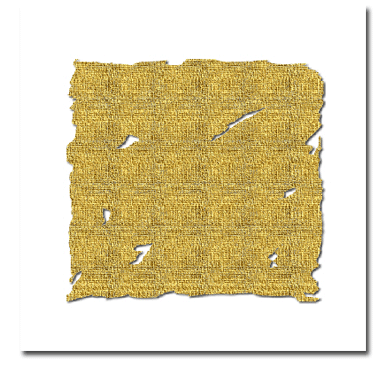
If you followed the steps correctly, your image looks like this:
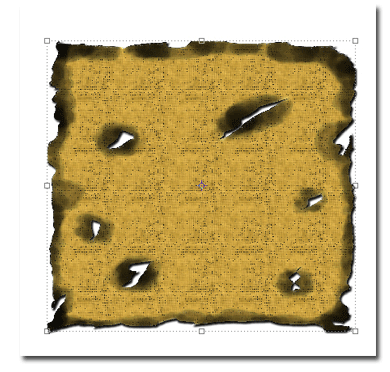
Take our ur Lasso tool and on your paper layer draw our some jagged sections on the corners and edges and using your delete key or by pressing backspace delete your selections. Do this a few times around your paper until you get a good looking piece of paper. I went ahead and added some drop shadow to my paper to give it some dept.
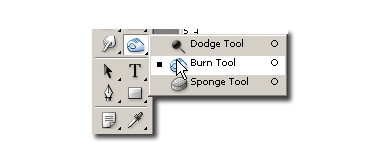
Now, duplicate the map layer and select the burn tool and a brush jagged. From the burn tool options select Range Highlights and Exposure 100%. Now go painting the cuts of the paper, passing 3-4 times in the same place with the brush.
Now go to Filter> Brush Strokes>Accented Edges and apply Edge Width: 2, Edge Brightness: 22 and Smoothness: 11. That's it.
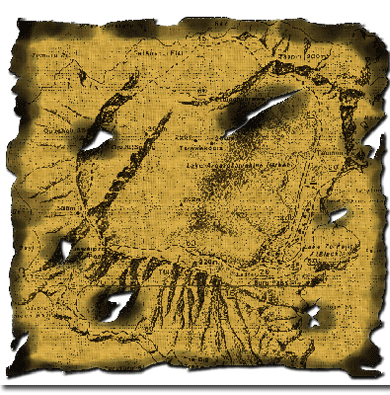
I've added a BW map found on google on a multiply layer to increase the realism. Here is a treasure map.