

1. Start by creating a new page at any size. Mine is 350px by 150px.
2. Then selecting the Text tool
![]() and type the text you want the animation to be on.
and type the text you want the animation to be on.
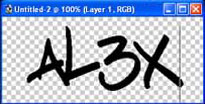
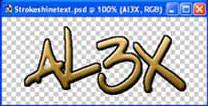
3. Then for your test you can change its blending settings to whatever you want. I just put on a single gradient, color change and level.
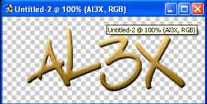
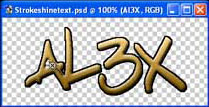
4. When you are happy with your text, select the Magic Wand
![]() and select the outside of the text. Then right click on the marquee and select inverse.
and select the outside of the text. Then right click on the marquee and select inverse.
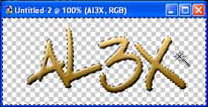
5. Now you need to create a new layer under the text layer and call it stroke. Then go Edit > Stroke with these settings 3px, Black, Center, Normal, 100% and Preserve Transparency unchecked. Then deselect the Marquee Ctrl+D.
6. If you have any inside parts of a letters like A, e, o, d, etc. you need to used the magic wand again to select inside the letter then repeat the above step. (You don't need to create a new layer you can do it on the stroke layer)
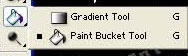
7. Next create a new layer on top of your stroke layer and call it gradient. Select the gradient tool under the paint bucket
Then apply these settings. Then click and drag to make a thick white line.
![]()
![]()
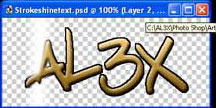
8. Now you have your gradient line you move it to the far left of your text. Then group it with the stroke layer Ctrl+J. You should now be able to drag the gradient layer across the
text and it will look like it is shinning. You now have to switch to Adobe Imager
![]()
9. Ok, make sure that the gradient is just to the left of the text then duplicate the frame by clicking
![]() then select the gradient layer and hold Shift and drag it across the text. When you have done this click on the Tween button
then select the gradient layer and hold Shift and drag it across the text. When you have done this click on the Tween button
![]() next to the duplicate frame button and put in these settings.
next to the duplicate frame button and put in these settings.
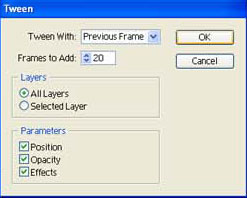
To test it click on
![]() . The more frames you add the slower the shine will go and vice versa.
. The more frames you add the slower the shine will go and vice versa.
10. Your animation should now look like the outside is shinning. When you are happy with it click File > Save Optimized. Then give it a name and you are done.
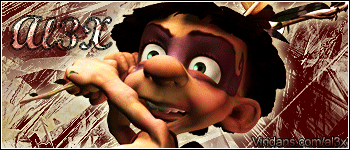
I used this affect on the text in this sig
I hope you have liked this tutorial and find it useful.