

1. Start of with opening a new picture 80x20
![]()
2. Fill it with a color you like. I'm going to use a bluish color for this tutorial (#006CFF)
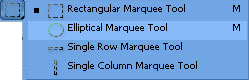
![]()
3. Take out your Elliptical Marquee Tool and make a little selection at the top of the button.
![]()
4. Make a new layer by pressing Ctrl+Shift+N and fill the selected area with white
![]()
5. Set the layer opacity to 50%.
![]()
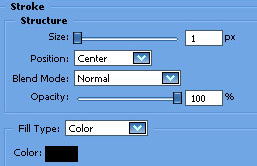
6. Now right click the button layer (the one below) and open Blending Options.

7. Now take out the Custom Shape Tool and get in the "Arrows" menu.
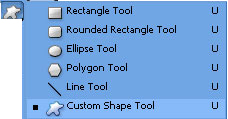
8. Get out the "Arrow 2" and set two arrows at each side.
![]()
9. Now set the arrow shape layers to "Overlay" and set down the Opacity to 70%
![]()
10. Now add a little text and save it.
![]()