

Step 1: Make a new document, size 400x90 and fill the background with black (#000000)

Step 2: Grab the pen tool
![]()
and select the color white (#ffffff) and just go crazy all over the page, until you have something like this. (You might get confused when doing this, but its just trial and error) after you get something similar to what i got, right click on the layer that says "Shape" and click "rasterize layer".


Step 3: Go to Filter<Blurs<Radial Blur<60, zoom,best. Then Go to Filter<Blurs<Gaussian Blur<0.6
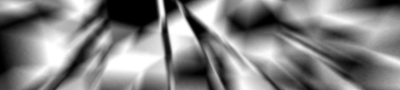
Step 4: Then Redo steps 2 and 3, but with a different color, try a blue. Then after you do then steps again set that layer to "Soft light, 100%"

Step 5: Then again redo steps 2 again but this time choice a bright orange, but then go to filter<blurs<motion blur<Angle 70, distance 18, then set this layer to screen, 100%

Step 6: Merge all the layer together, then go to filter<distort<twirl<angle -35

Step 7: Duplicate the background, then go to filter<distort<wave and put in the number i have. Then you should have something like i have, then change the layer to "lighten 100%"


Step 8: Merge all the layers again. Then go to filter<Sharpen<sharpen. Then go to image<adjustments<brightness/contrast<brightness -13, contrast +27

Step 9: Duplicate the background, then to go filter<blurs<gaussian blur<radius 5.0., then set the layer to "lighten" then merge the layers

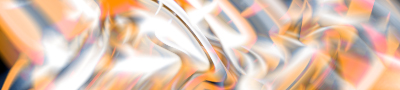
Step 10: Go to Image<adjustments<hue/saturation, 0,-70,0. Then to go image<adjustments<color balance and play with the shadows, midtones, highlights until you get something you like.

Step 11: Duplicate the layer and go to filter<blurs<Radial Blur<70,zoom,best. Then set the layer to "lighten" and merge the layers.

Step 12: Duplicate the layer and go to filer<blurs<gaussian blur<radius 5.8. Then Set layer to "lighten" and merge layers, then apply another sharpen.

Step 13: Go to filter<distort<pinch<amount 39. The duplicate the background and go to filter<blurs<motion blur<angle 70, distance 18. Then set layer to lighten, and then merge. Go back into the color balance and change the colors again if you like.

Step 14: Go to image<adjustments<hue/sat and set the hue to -180 and sat to -40. then add a border, go to edit<stroke<width 1px, color white, inside, normal, opacity 100%

Now your done, I just showed you some simple ways to make a pretty good looking sig, now you can switch up these layer setting ands colors and blurs to match your ideas, but this is just the general ways to make a sig