

In this tutorial, we will learn how to make fresh icon to add in your website or just to add on your desktop.
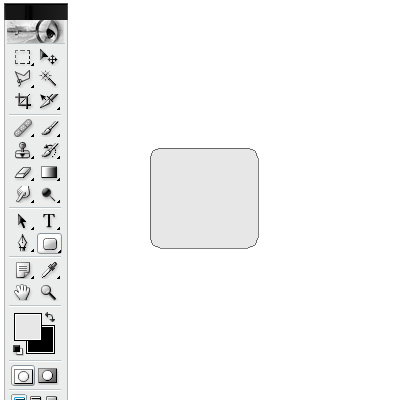
#1
Open a new document 400x400. Take the rounded rectangle tool and make a rectangle with a light gray (#E7E7E7) in the center of your document.
This will be the base of the icon.
#2
Now, we will make the blending options of the icon. This will add some effects to our icon. Right-click on the shape layer and select "Blending options".
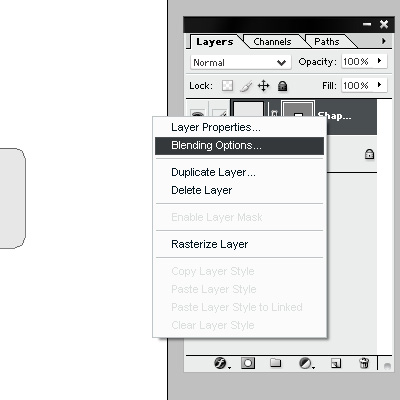
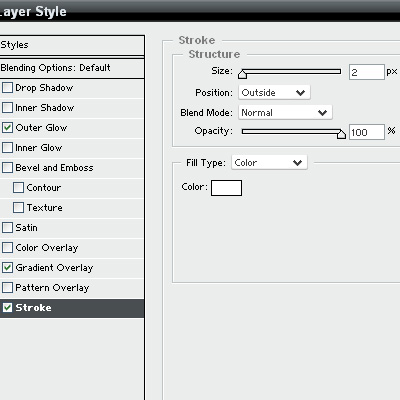
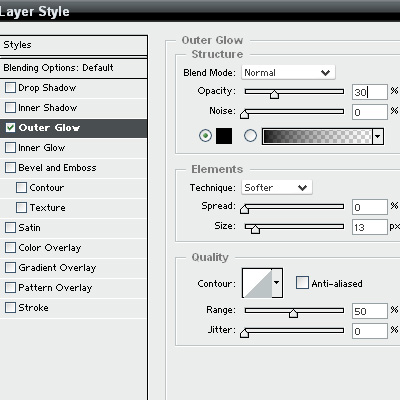
Blending Options
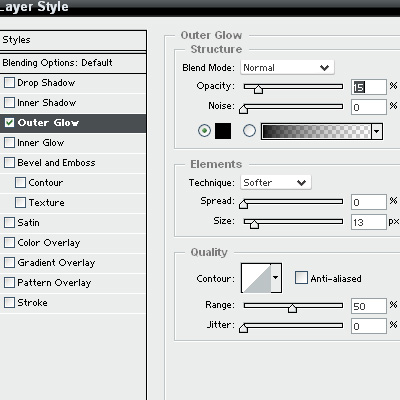
Set up a outer glow with theses settings. This will add a shadow to our icon.
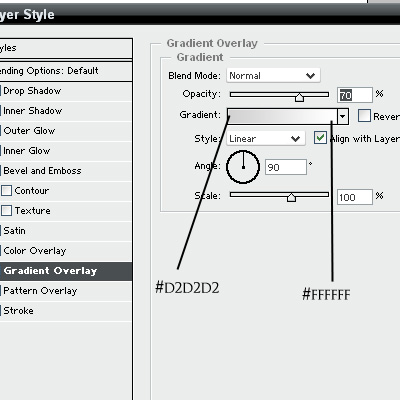
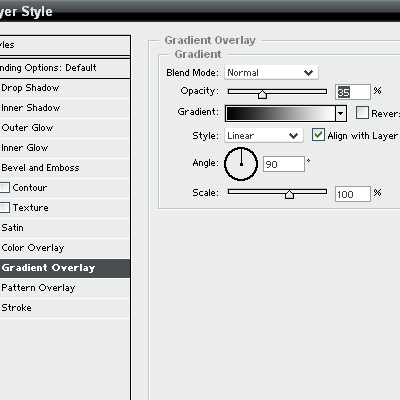
After you set the outer glow, we will set up a gradient overlay.
Put theses settings in the blending options.
And finally set up a stroke with theses settings.
You should have this result:

#3
Once you finished to set the blending options, we will add the icon on the base.
Take the custom shape tool and go in the little drop menu at the top.
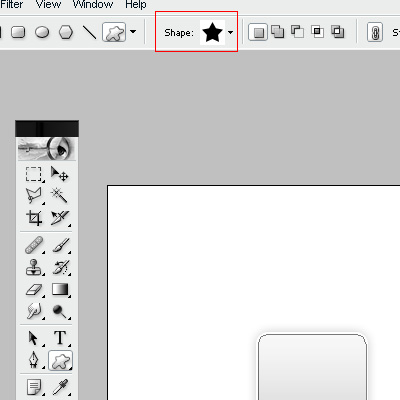
Click on this menu. You should see a little arrow at the right. Click on this little arrow.
A long list should be there. Search in the list, the word "All" and click on this word.
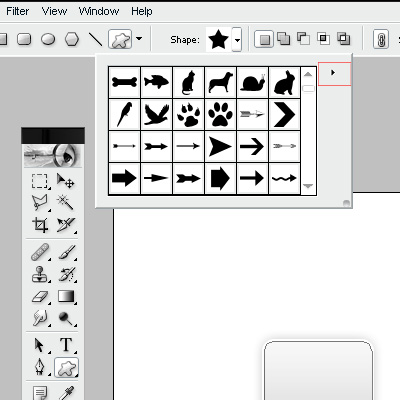
Now, you set all the custom shape in your database.
#4
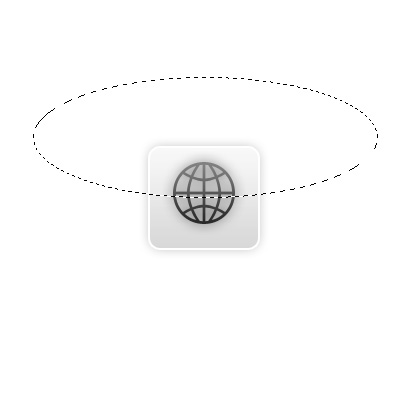
Take the custom shape tool and return in the little drop menu. Search in the list, the shape you see on the image below.
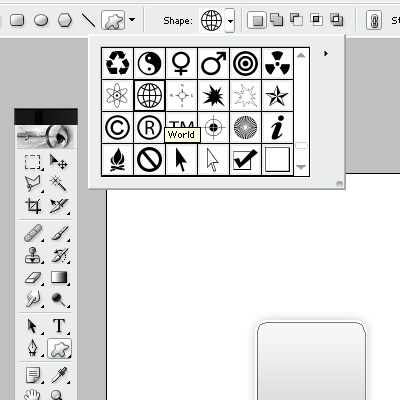
Return on your document. Make the shape you selected but make it smaller than the base of the icon. Select a dark gray to make this shape (#3E3E3E).

#5
Now, we will add some effects to our shape. Right-click on the new shape and go in "Blending options". We will set up a outer glow with theses settings.
Now, we will set up a gradient overlay with theses settings.
#6
Now, we will add glass effect to our icon. Make a new layer. Take the elliptical marquee tool and draw a selection at the top on the icon.
Fill it with white color. After, set the opacity at 50% and the blend mode at overlay. Right-click on the layer and select duplicate. Move your new layer at the below of your icon.

#Final
Now, you have your fresh icon. You know, you can change the icon with your needs. I hope you learn something in this tutorial. Be sure to check out my other Photoshop Tutorials!

Good Luck!