

In this tutorial, I will teach you how to make text seemed to be using multiple layers, even if the document that you wanted to use has just 2 layers. The way we will achieve this effect is by using a background layer and then a text layer with a layer mask on it.
Layer masks allow you to show specific parts of a layer while hiding other parts. Using adobe photoshop, we can "Mask" parts of a layer so that they do not show up.
Using this strategy is very handy in accomplishing many different types of effects. By using layer masks, we can give our text a more 3 dimensional feel!
Lets begin by opening the document we are going to use. Feel free to use the same one we are for learning purposes.
Now it is time to prepare the image!
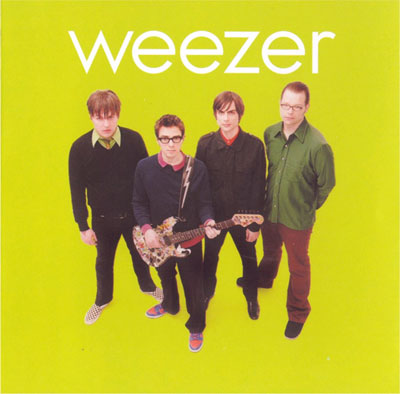
Prepare your image. My prepared image, seen below, is the album cover of the band "Weezer".
There was already text, so I put that on a separate layer by using the "Magic Wand" tool to select the text, "CTRL + J" to duplicate the layer and then the "Healing Brush" to remove where the text used to be.
My document now had the two layers required - the first layer, the green background with the band on it, the second layer the "Weezer" text.
My prepped image looks like this.
Add a layer mask by going to "Image -> Add Layer Mask -> Reveal All".
![]()
This box will now show up.
The white box is the layer mask.
There are a few simple effects you can use with layer masks to simulate multi-layer text.
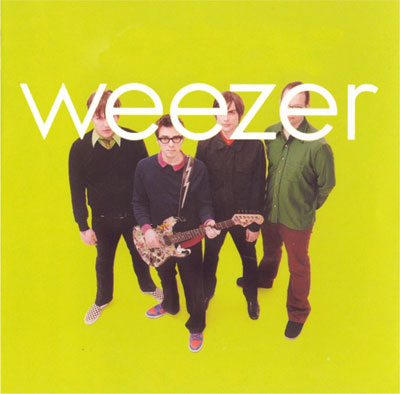
Select a black brush and draw on the parts you would like to be hidden. I brushed over the band members in black and by doing so caused the text to be appear behind the band members.
You may now "Unlink" the layer mask by clicking the "Chain" in between the layer and the mask and the layer preview.
This will keep the layer mask stationary when you move the layer, and the layer stationary when you move the layer mask.
![]()
"Unlinking" the layer mask is caused by clicking the link. "Linking" the layer mask is caused by clicking where the link used to be.
The final result - text behind an image in just two layers.
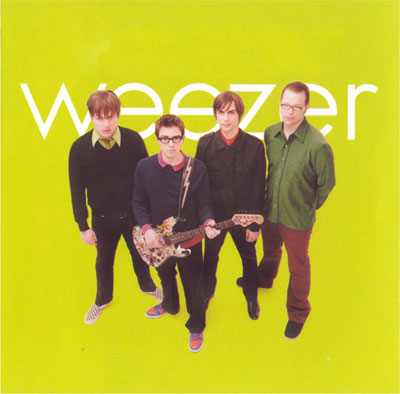
Alternate Ending
The "3D" text. This step involves simply covering the text back up to make the text seem like it is in front of some parts of the image and behind others.
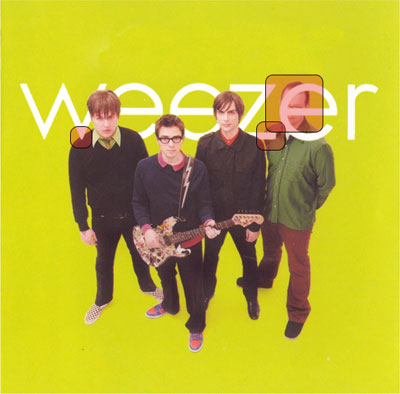
Notice in this sample image the boxes in which the text is in front of the image.
It can be used to create a unique text effect, which gives depth to the background. This can be quite a good effect to use in signatures, as depth is often a hard effect to achieve.
Good Luck!