
When GreyCobra Productions was in the process of being upgraded from version 5 to version 6, we had many promotional banners lying around the site with this special effect. The effect combines a few simple techniques in Adobe Photoshop to create a stunning blend of lighting and motion. Here is an example of the effect in use:
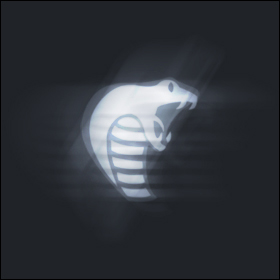
This tutorial will show you how to duplicate this effect on your own with the aid of Adobe Photoshop. For best results, I would recommend that you use a dark background color, and a light color on your layer you would like to add this effect to.
Step 1
Begin by creating a new document in Adobe Photoshop. Select your Paint Bucket Tool from the toolbar (
 ). Now set your foreground color to a dark background color of your choice (such as #202328).

Step 2
Click anywhere in the document to fill your canvas with the selected color with your paint bucket tool. You should now have a blank canvas with a dark background. Create a new layer in Adobe Photoshop, and then select a light color for your foreground.

Step 3
This step requires some creativity on your own part. While I will be using a brush from our Free Photoshop Brushes Database (Which has many free Tech Brushes, Grunge Brushes, Abstract Brush Packs, and many others), you may choose to use something else. If you would rather use a brush like I have in this example, please feel free to visit GreyCobra's Free Photoshop Brushes Downloads. I will be using the Official GreyCobra Logo from the GreyCobra Photoshop Brushes Brush Pack. With a light color selected, create a design in your new layer somewhere on your canvas.

Step 4
Set this layers blending options with your design on it to "Overlay". Just in case you are wondering what the "Overlay" Blending mode does, The Overlay blending option will either multiply or screen the colors in the selected layer based upon what the base color is. The colors will overlay the existing colors but will preserve the highlights and shadows of the base color. Although the base color is not lost, it is mixed with the blend color to reflect lightness or darkness of the originally selected color.

Step 5
Duplicate your layer that is set to overlay 2-3 times in Adobe Photoshop. Select one of these layer copies, and apply a Motion Blur (Filter > Blur > Motion Blur) with the following settings.
Step 6
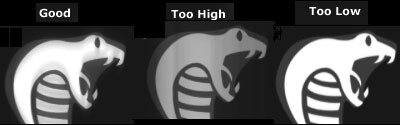
Depending on the size of your initial canvas size and design size, you may need to adjust this motion blur filter effect just a bit. When you apply it, you want to be able to notice a slight blur both above and below your design, but not anything to dramatic yet. Going to high in your blur amount will make your glare be spread out to far to begin with, and you will hardly see it. Not setting the blur value high enough will result in an image that appears very blurred.
Step 7
Select another copy of this layer, and add another Motion Blur to it, this time with these settings rather than those listed above.
Step 8
This one unlike the first motion blur should appear much more stretched out (to give our effect more of a glare). Duplicate your bottom layer several more times, and continue to add motion blurs to each layer. You may want to duplicate some of your blurred layers as well to make them appear brighter. If you create two many layer copies, your image will appear to bright however, so use your own judgment when you are designing. Try experimenting and having some of your motion blurs go in different directions, and at different amounts. In the end, you should end up with something like what I have created below.
The only changes I made to the document we had created by step 7 is that I duplicated the motion blur layer from Step 7, and duplicated the original design layer, and added another motion blur with an angle of 0, and amount of 500. I played with the opacity a little to make it look nicer, and that is how I created this Light Motion Glare Effect. Good Luck with your Designing! Feel free to discuss this technique and many other great design techniques at the GreyCobra Community Forums.