


Learn how to design your first flash introduction!
1. Decide what you want your intro to be like before starting. You can add onto or take off of this as much as you want because flash will show you what it can do after you've started. Lets start with what mine was going to look like. The difficulty of this is that you can't show the timeline very well with just one picture so try making a few.
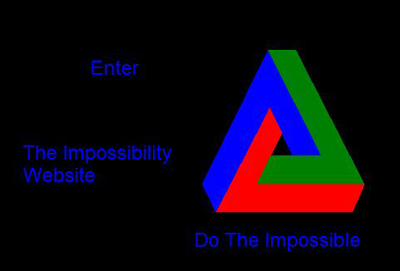
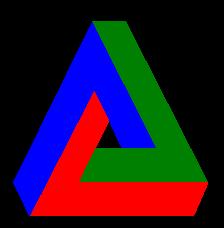
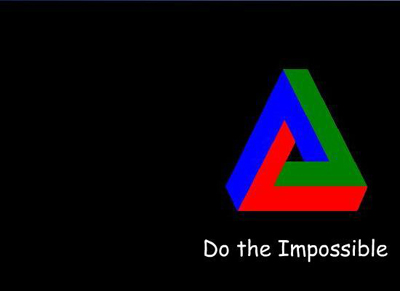
2. Get some sort of logo and/or a saying to use in there. For mine I'm going to use the below image and the saying "Do the impossible".
3. Assuming you have something like 'Enter' or 'Welcome' along with your site logo you might try a website such as flamingtext.com for words that look cool because they let you get them for free and there is much customization available. Don't forget to donate!
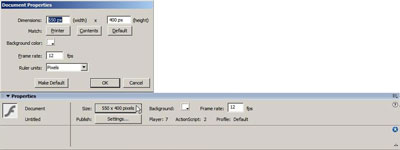
4. Ok now we're ready to start the actual flash part of it. Open up flash and create a new document, the preset size (550 x 400) is what most people use but you can make it bigger or smaller if you want. (click on where the cursor which is near the bottom then change the dimensions to what you want)
5. You can also change your background color through this, under background color you can choose any of a number of colors shown (plus windows color chooser in the top right of that box) as well as any that you know the hex (#xxxxxx) value for or any color on the screen at the time including the windows color picker in the top right hand corner.Do not forget your best friends in looking cool either, gradients. They're at the bottom of the default chooser, choose a default one and mix up the colours or try and make your own. This really adds to the effect that you spent a lot of time on it. (note: you can't do this with fonts)
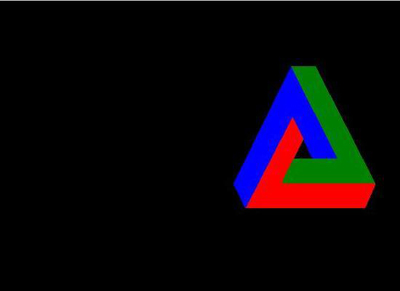
6. Lets add you preliminary images, open it up in paint or another program and hit CTRL+C then ctrl+v while in flash. Put this image where you think it will be at the beginning, you can always move it around in flash or during the presentation. I've started with this.
7. Now lets add some text, do the same thing as with the image if you are doing it that way or on the side bar click the A. At the bottom choose your font, size and color as well as anything else you might want (alignment, bold, italics, alliasing etc.). This part is pretty simple, type in the text you want. Your flash document should now look like this.
8. Now lets add that nice image you got from flamingtext.com. If you have a .gif, don't. It is simply really hard to do it because you have to edit every frame of your .gif . You can do it by editing the coordinates at the left of the page if you want to get into it but you can't repeat it as easily.
![]()

9. You still have the top left area for other things if you'd like, or you could move all of that stuff around. Lets start some timeline effects. Right-click on one of your images (I'm using my logo), timeline effects -> effects -> and lets choose to blur this one. the default setting are good but you might want to make it only blur horizontally or some such, whatever you choose shouldn't effect the rest of this tutorial. Also lets set the frames to 20.
10. Now let's edit the "The Impossibility Website" image, do the same thing but this time let's explode it. Use the default settings or mess around with them a bit, make sure the frames are the same as the one before.
11. You still have that slogan left, right? Lets transform that. Do the same thing but instead of going to effect go to transform/transition. Use transform do the same frames as before, change the final Alpha to 0% and at the top make change position by change it to move position keep it at 0,0 though. You can change some of the other stuff if you want as well.
12. Well now you've done all that you need to at the beginning. Lets move to your ending.

At the bottom left here, hit create new layer. Select 21 frames, right-click and insert frames. Add you last image such as welcome or enter into that frame, move the frames at the top to make sure there are no other frames where this image is. Make your 21's one a key frame.
![]()
This is my welcome message for the last frame. Now above properties you have actions. Make sure you have nothing selected then hit the little + then ->global functions -> timeline control -> stop (or press esc then type sc). Now it will stop at this frame instead of looping.
13. We're almost done, now we just have to link this to your main page, let's assume that this will be on index.html and your main page is index2.html. Click on your welcome logo or whatever you're using. Now on the right side there is a box that has behaviors as it's title. Click on the little + here and go to web -> Go To Web Page. Put your url in and where you want it to open in (frame, self, new window etc.).
14. You're done now, but let's say you want to add music, go back to the first frame, don't select anything. Go to behaviors again then, sound -> load streaming mp3 file, tell it where the file is and name it something you can remember try "back". This will load the file with the rest of the flash file. Now to start it up, in behaviors add sound -> play sound. This is where you remember something you can remember something like "back", type it in and it should play with your flash file.