


This tutorial will guide you through the process of designing a cool content box for high tech websites. This is a great theme for layouts!
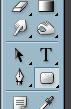
1. In this tutorial, you will learn how to create a great content box for a graphic or website layout of your own. Using these easy step by step instructions, you will learn how to use the rounded rectangle tool, and adjust the blending options to change the appearance of your layers. First, select the Rounded Rectangle tool from your tool bar:
2. This tool is used to create a vector shaped as a rounded rectangle. Vectors are graphics that can be resized to any size without ever losing quality. In this tutorial, we will simply use it to make a rounded rectangle for our content box though. Create a new document (400x200), and drag a rectangle inside of it:

3. Usign the rounded rectangle tool is the easiest and most accurate way to make a rounded rectangle for your works. Go into the blending options of your rounded rectangle (right click the layer with your rectangle, and click blending options). Set up your rectangle like shown below:
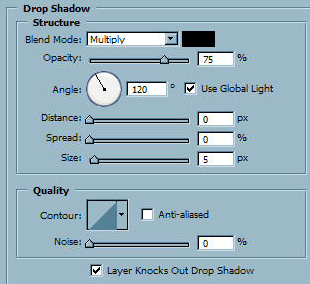
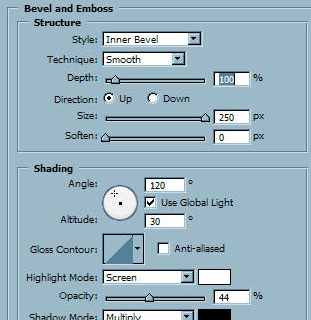
4. Click ok to apply your blending options to your rounded rectangle layer:

5. Now we need to create a pattern to overlay our content box. Create a new document (3x3). Zoom in (Ctrl +) and using the pencil tool, draw in 3 black squares like so:

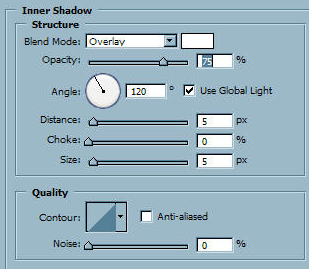
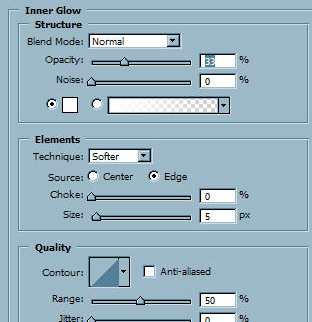
6. Go back to your original document, and go back into your rectangle layers blending options. Set it up as follows:
7. Click ok to apply the settings to your layer:
8.Here are a few tips to help you customize this for your own personal website layout:
- Change your content boxes colors to match your layouts theme, when designing a website, it is always good to stick to a theme!
- Save your files as .gif images to decrease loading times
- Try playing around with Photoshop's Blending modes until you find something you like!
Good Luck! I hope that you enjoyed this Tutorial.