

1. Open a picture of clouds:

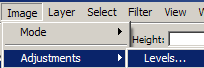
2. Notice it seems really dull. I took this picture on a very sunny day, and it still turned out looking like it is about to storm! To fix it, we will use our level adjuster (Image > Adjustments > Levels):
3. Pull the arrow on the far right over to the left until your clouds seem bright enough:
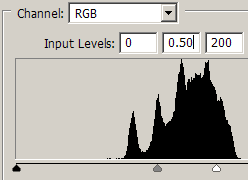
These were my values

And my result.
4. There is still a very dark area under my clouds! Open your curves adjustments tool (Image > Adjustments > Curves). Create a curved slope like the one shown below:

5. Now your clouds should look more like this:

6. Using the Dodge and Burn tools, we can fix up some of the area that still seem a little dark and light:

Perfect! Now we have much better looking clouds!