


This tutorial will teach you how to create the popular abstract structure lights technique just like the experts use in their designs. Even though it is an easy technique to learn, you will be able to design an amazing effect!
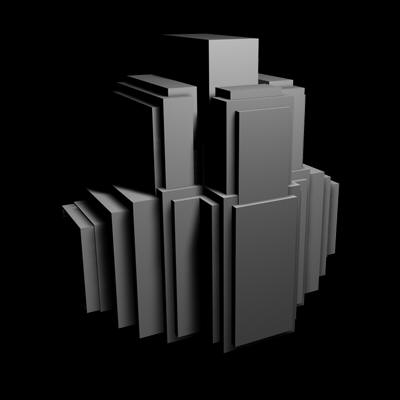
1. First we will need a structure to work on. For practice, you may use the image provided below:
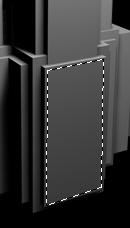
2. Now we need to decide where to place the light(s). I have decided to place a light in the front and center of my structure. To do this, I first need to make a selection around that area. Select the Polygonal Lasso Tool (
![]() ) and then make a selection around your desired area:
) and then make a selection around your desired area:


3. Contact this selection by 2 Pixels (Select > Modify > Contract).
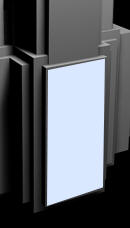
4. Now create a new layer above your structure. Using the Paint Bucket Tool (
![]() ), fill your selection in your new layer with a very light color (In this tutorial I want my light to be blue, so I will be filling it with an RGB value of EEF4FF):
), fill your selection in your new layer with a very light color (In this tutorial I want my light to be blue, so I will be filling it with an RGB value of EEF4FF):
5. Duplicate this layer, and then apply a Gaussian blur (Filter > Blur > Gaussian Blur) with a value of 35:

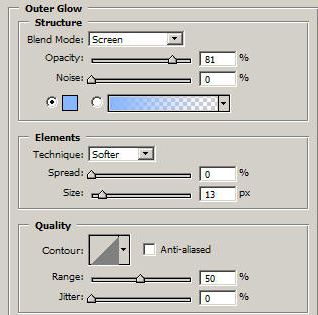
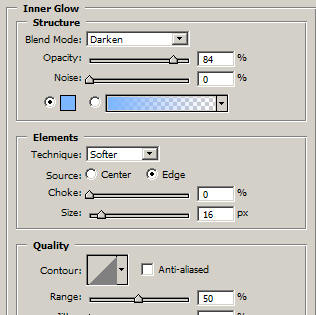
6. Now apply the following settings to your first light layer (not the one you just applied the Gaussian Blur to:
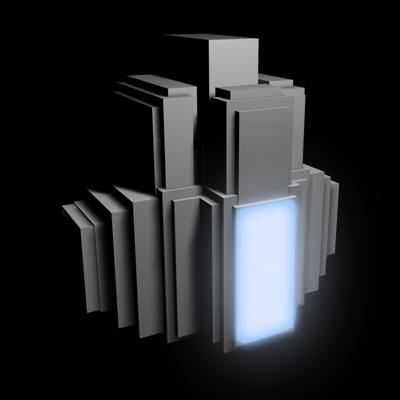
7. Your light should now look something like the one shown below:
8. We can continue to add detail to our light by erasing parts of it with the polygonal lasso tool:

And that's it! Of course you can keep adding details to your own lights, or more lights to your structure. Using grunge brushes on top of your lights sometimes results in cool effect. Experiment and Good Luck!