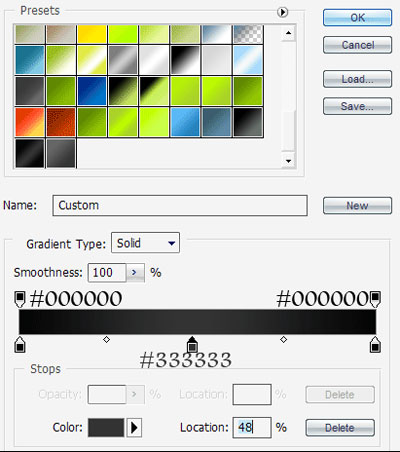
1. Lets begin by opening up a new canvas, I'm going with 1024*768 dimensions. Next get your gradient tool (g) and double click on your gradient to take out the gradient editor. Use the following settings to create a new gradient:
2. Now fill your canvas with your gradient and then make a new layer. Get your Rounded Rectangle Tool (u) and make rounded rectangle in the middle of your page.

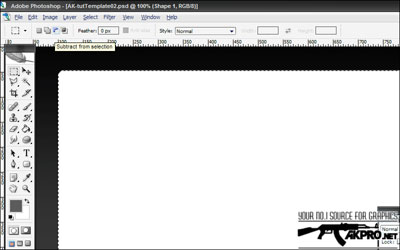
3. Next make a new layer, get your rectangular marquee tool (m) then click subtract from selection:
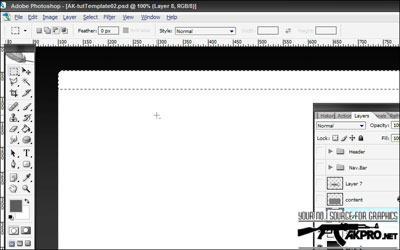
4. Now remove the selection from the bottom of your selection to the top, BUT leaving about 30 pixels of space from the top.
5. Now on a new layer, fill the selection with black. Now select this layer and go to the original rounded rectangle layer from before and press delete.
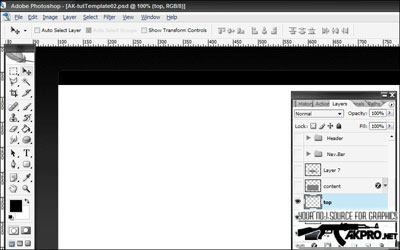
6. Next select the first rounded rectangle you made and get your marquee tool, click on subtract from selection. On a new layer, name it 'header'. Subtract about one third of the selection, and then fill it with #151515.
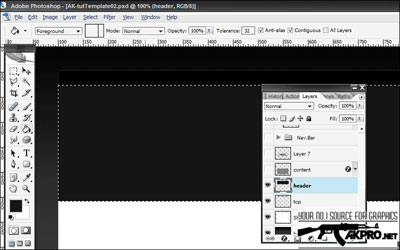
7. Next select the header layer and go back to the first rounded rectangle layer and press delete. Now make a new layer, name it 'nav.bar'. Again the same process as before, only leave about 50 pixels of selection. And then fill it with 4e4e4e.

8. Now select the nav.bar layer and go to the first rounded rectangle layer and press delete. And now that we are done with the bases, lets begin with the details, the fun part :). Lets begin with the top, so double click on the top rectangle layer, to take out the Layer Style window, click on Gradient Overlay and put in these settings:
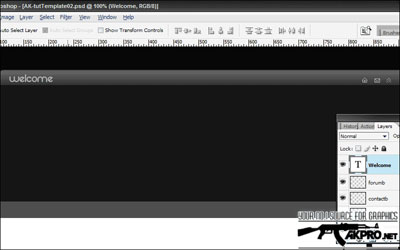
9. Now you can add in some icons for buttons, you can download them as brushes here. I also added text, with the font 'Rez' and size 24.
10. Now, we are going to skip the header because that's something you want to do to suit your template's theme. So go to your nav.bar layer and add in the following layer style settings:
11. Next we are going to add a shine, so get your rectangular marquee tool (m) and hold ctrl and click on the nav.bar layer, so that it will select the layer. Now just hit the up arrow a couple of times so that it reaches a bit more than half of the nav.bar.
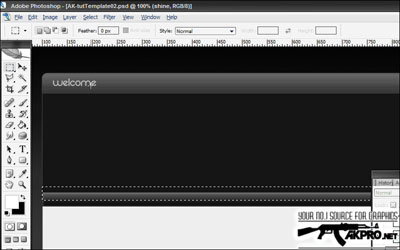
12. Now make a new layer, with the selection on, fill it with white. Then lower the opacity to 15% and you should have something similar to this:
13. Next, i added text using Andalus as my font and size 14.
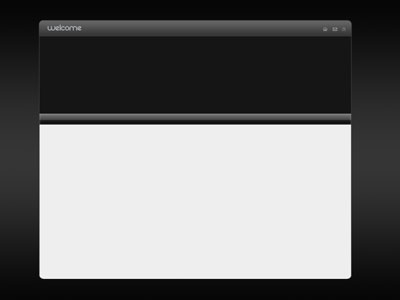
Note: Make sure that your text is under the shine layer.
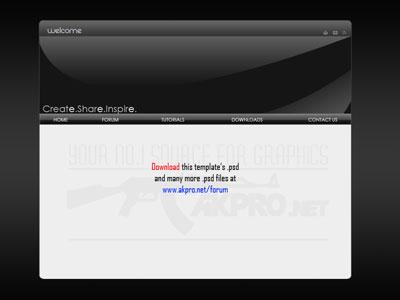
This concludes our tutorial, you should have something similar to this: