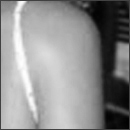
1. To begin with, start off by opening the image you want to edit. In this case, Beyonce Knowles' shoulder =P
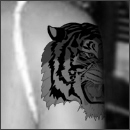
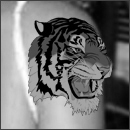
2. Next, import the image you want to tattoo. In this case, the tiger.
Note: The tiger was originally coloured before the import of it. If you wish to make it have a base colour (preferably dark green or black), select the layer, hit Ctrl + U or go to Image > Adjustments > Hue/Saturation. In the panel, make sure Colorize is checked before you go ahead and play around with the settings.
3. Next, place the tattoo layer where ever you want it to appear on the layer that's being tattooed. Make sure you're happy with the positioning, because the next step of this tutorial will be masking...basically, if you mask once and you wish to move the layer, the selected layer is going to take the layer under it's fragments.With the tattoo layer {the tiger in this case} already being selected, head on to Layer > Add Layer Mask > Reveal All.
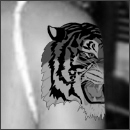
4. Next, go to Image > Apply Image. Enter these settings:
Layer (layer of the object being tattooed)
Channel RGB
Blending Multiply
Opacity 100%
And you're done =)