1. Open a new document 500 x 500 pixels, 92 dpi, RGB
2. Set the foreground color to a light blue (I used #97E5F3) Set the background color to a ocean blue (I used #3E90F6) Select the Gradient Tool. Make sure "Foreground to Background" and type: linear are selected. Now in a downward motion fill the canvass with the gradient. You now have your background sky.
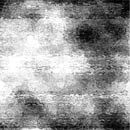
3. Make a new layer (Ctrl + Alt +Shift + N) and call this layer "Water". Reset the Foreground and background colors to default (d) (x) Apply the following Filter: Filter/Render/Clouds
4. Duplicate the "Water" layer and name this new layer "Water texture" With the the current layer selected Apply the following Filter Filter/ Texture / Grain Use these settings: Intensity: 40 Contrast: 50 Grain Type: Horizontal
5. With the current layer (water texture) selected Apply the following Filter: Filter / Distort / Ocean Ripple Use These Settings: Ripple Size: 9 Ripple Magnitude: 9
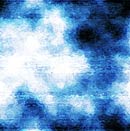
6. Hide the current layer and select the "water" layer. Apply the following: Image / Adjustments / Hue/Saturation with these settings: Make sure colorize is checked Hue: 210 Saturation: 60 Lightness: 0
7. View and select the "water texture" layer. Set the layer mode to Overlay. With the current layer selected choose merge down from the layer panel drop down list. This will merge the "water" layer and the "water texture" Layer.
8. Show Rulers (Ctrl + R) and open the Info Pallet. Under Properties in the info drop down list set the ruler units to pixels. Pull down a horizontal guide to about 300 Pixels. With the (merged) "water texture" layer selected Choose the rectangular Marquee Tool. Select All of the canvass above the guide line you have made and delete. Deselect (Ctrl + D)
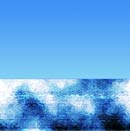
9. Apply the following Filter: Filter / Distort / Twirl Use these Setting: Angle: -30
10. You have the start of your wave! But don't go surfing yet there are still a few more steps to go. Create a New layer and Call this layer "spray". Draw a Square selection (Hold down shift to get proportions) about 60 pixel wide and 60 pixels high, 300 pixels down and 350 pixels across on your canvass. Feather the selection by 5 and fill the selection with !00% WHITE. Now Deselect (Ctrl + D)
11. Apply the following filter to the currently selected layer (spray) Filter / Stylize / Wind Use these Settings: Method: Wind Direction: Right Apply this filter twice more (Ctrl + F)(Ctrl + F) Apply the following Filter: Filter / Stylize / Wind Use these Settings: Method: Wind Direction: Left Apply this filter twice more (Ctrl + F)(Ctrl + F)
12. Apply the following Filter to the currently selected layer (spray) Filter / Artistic / Sponge Use these Settings: Brush SIze: 1 Definition: 25 Smoothness: 5 I find the sponge effect a bit dark so I change it like this: Edit / Fade Sponge (Shift + Ctrl + F) and set the Opacity to 50%
13. Apply the following Filter: Filter / Distort / Twirl Use these Settings: Angle:-230 Merge down the "spray" layer with the "water texture layer"
14. You could stop here but why? It's not finished yet... Rotate the Canvass 90%CW Apply the following Filter: Filter / Distort / Shear Make sure Repeat Edge Pixels is selected. Bend the top node Slightly to the left and the middle node slightly to the right and down. Follow the diagram below. Now Rotate the canvass 90%CCW Note: You could go back a step and Repeat the Filter for a higher wave or just play with the Shear settings.
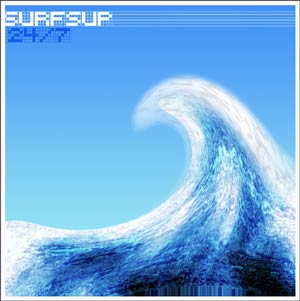
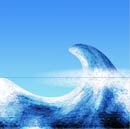
15. That's it you're done! I hope you enjoyed the Tut.
This is how mine turned out... Surfs Up!