

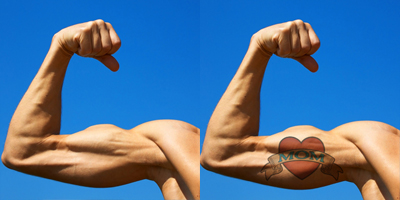
Jack London once said "Show me a man with a tattoo and I'll show you a man with an interesting past." With my needle phobia, the only way I'll ever get tattooed is with Photoshop. Here's a tutorial on how to add "an interesting past" to a photo.
Step 1
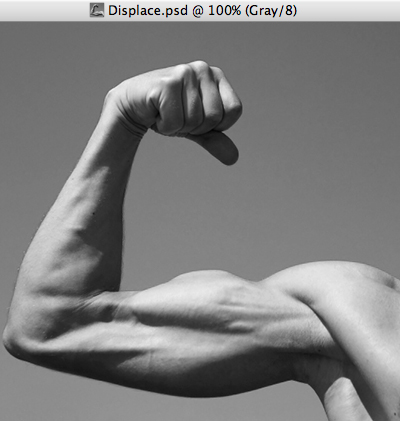
Open your image, select all and copy. Paste the copied image into a new document, and name the document Displace. (When you copy something to the clipboard and create a new document, Photoshop automatically creates the new document the same size as the clipboard image.) Change the image mode to Grayscale (Image > Mode > Grayscale.)
Step 2
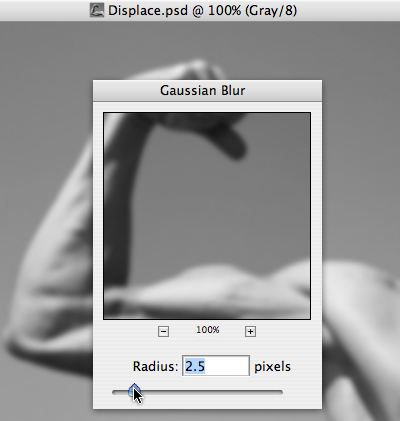
Run a slight Gaussian Blur (Filter > Blur > Gaussian Blur). We'll be running a Displace filter using this image as our displace map, and a too sharp displacement map looks harsh and fake— a little blur takes care of that. Save and close Displace.psd.
Step 3
Place the tattoo artwork— this is an Illustrator file of mine. Size it to the muscle and hit OK to place.

Step 4
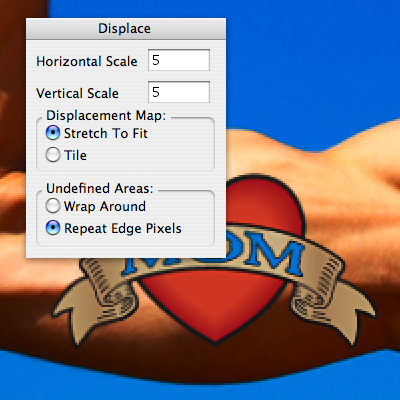
With the tattoo layer selected, go to Filter > Distort > Displace. There's two steps to this filter— first, type in the amount of horizontal and vertical scaling you want Photoshop to perform. I used 5 for this example— your mileage may vary. Next, select the Displace.psd file as your displacement map, and hit OK.
Step 5
For the final step, set the Tattoo layer blending mode to Multiply, and reduce the opacity to show a little of the skin texture. A great way to get "an interesting past" - without the needles.

 Rich Harris is a designer, illustrator, and teaches classes in Photoshop and Illustrator to teenagers for Saturday Academy and to graphic design students at Mt. Hood Community. He also plays a mean jazz trumpet, and can be reached at