

This is the finished product from this tutorial:

I am going to show step by step how to do it. Create a new layer, call it "body", and with the Rectangular Marquee Tool (M), create a rectangle and fill it with any color.

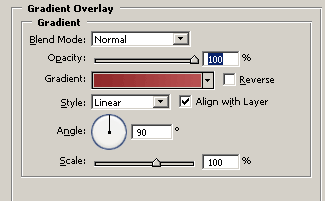
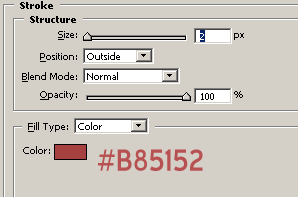
Now Right Click on the "body" layer and choose "Blending Options..." Add a Stroke and Gradient Overlay styles as shown in the above pictures:
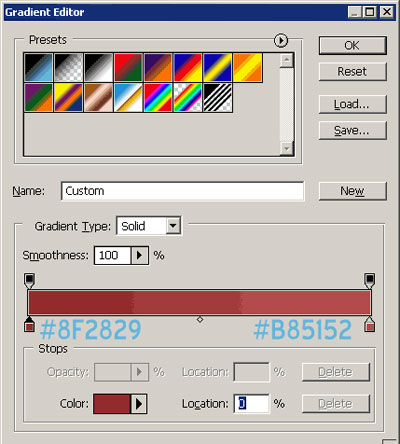
(The above picture is a gradient with two colors, looklikes three because of the image's poor quality)
Now create your text, I used font "Blue Highway" and set it as "smooth".

The last part now, create a new layer, call it "divide".
Create a black vertical line of 1 px. Then duplicate this layer, ctrl+click it to get the selection and fill with white. Position the duplicated one pixel at the left of the other.
Now set a little down both layers opacity.

It's done!
I hope that you enjoyed this tutorial.