


Please follow this tutorial as is. The font sizes and styles used in this tutorial complements each other. If you follow this tutorial, and apply the styles on a really small font, the results will be different. so follow the tutorial properly.
Start a new document 800x550.
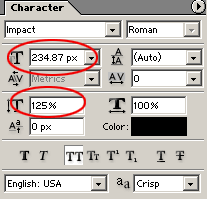
Use the type tool, and create your text.
Use the following:
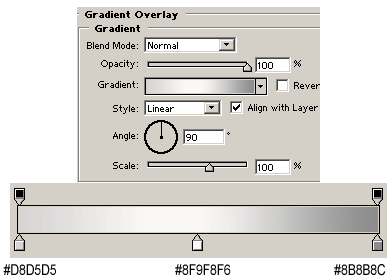
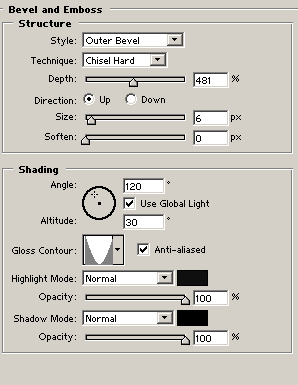
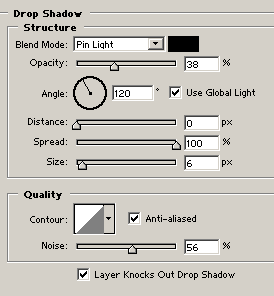
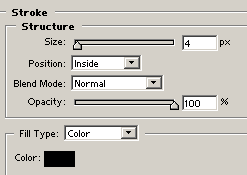
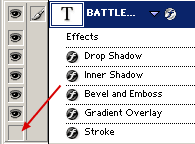
Now apply the following Layer styles to the font.

You should have something like this:

Now, click on the EYE icon of "stroke" style in the text's layer styles to hide the stroke style for now.
Now CTRL+CLICK on the text layer in the layers palette to make a selection of the text.

Now go to Edit->Copy Merged to copy the selection, then CTRL+P to paste it to a new layer.
You can click on the EYE icon of the stroke to enable it again now.
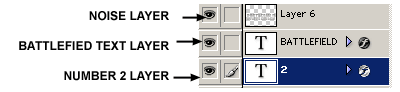
Now that new layer you just pasted should be overlaying your original text layer, if not, move it so that it is.
Now CTRL+ CLICK on the new layer you just pasted to make a outline selection of it.
Now go to Filter->Noise->Add Noise:
Amount: 20
Distribution: Uniform
Monochromatic: Checked

Then go to Filter->Blur->Motion Blur:
Angle: 0
Distance: 30
Now press CTRL+D to deselect.
Now go to Filter->Sharpen->Unsharp Mask: Amount: 500%. Radius: 5. Threshold: 50
Now set this layer's blending mode to Overlay.
You should now have this:

Before we can continue with the next step, we need to create a stroke for the scanline effect.
Create a new document: 10x10px (yes, that small)
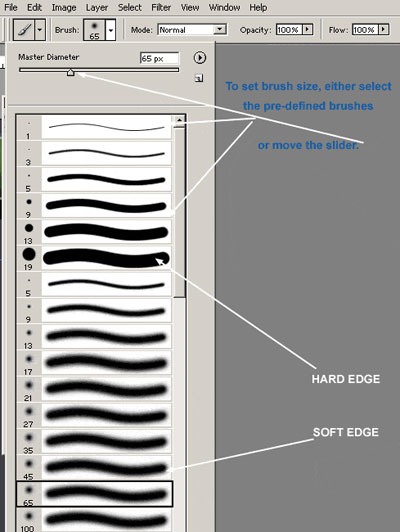
Now select brush tool,
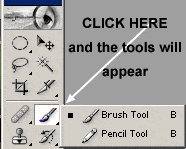
and set your brush to
Set your color to #A01A2D and then draw a horizontal line across the canvas:
This is what you should have now:
![]()
Now go to Edit->Define Pattern. Give it a name: "Scanlines" . That's it, you can just close that document without saving now.
Lets go back to our other document.
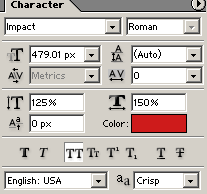
Now lets create the number 2:
Use the text tool and type in number "2" with the following properties:
The text color should be : #CE1B1B. Place this new text layer UNDER the battle field text.

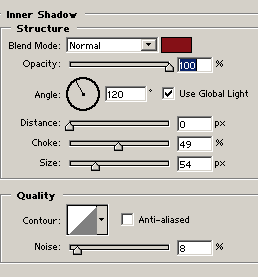
Now apply the following layer styles to the number 2:
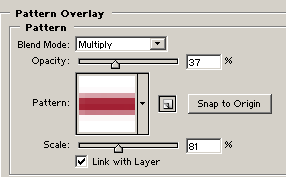
For "Pattern", select "Scanlines", the one you just created in the previous step:
That's it. You should now have something like this:

Something I made:

Click here to download my .psd file.