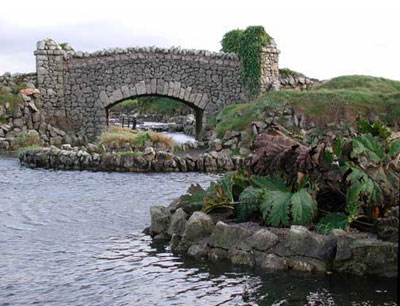
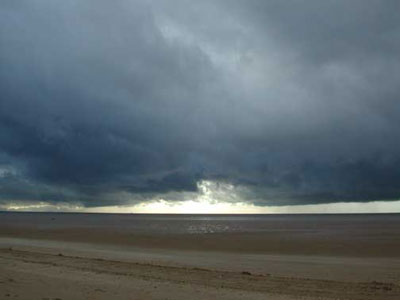
Our original image of the bridge was taken with the Coolpix 990 at Lytham St Anne's just as a storm was brewing. There was something quite appealing about the bridge and combined with an image of the sky we took a little earlier, we can completely transform our original image.
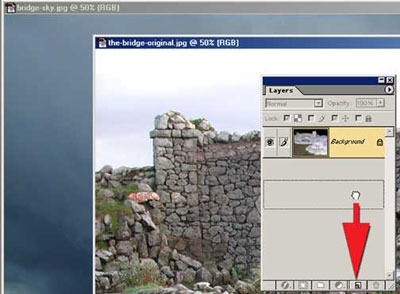
With both images opened in Photoshop we select the Bridge image and duplicate the background layer by dragging it over the create new layer icon.
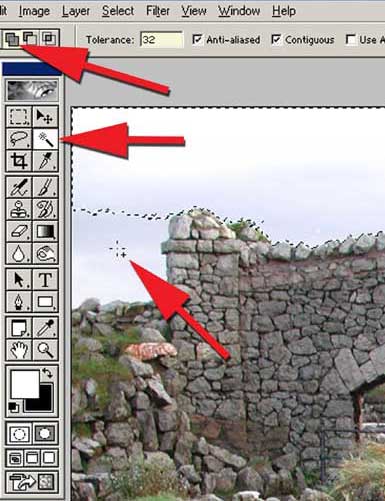
Working on our new layer we call up a Wand tool from our toolbox. By clicking in the area of the sky the marching ants will appear as the sky is selected. If you need to add to the selection make sure the Add to Selection button is pressed on the options bar or hold down Shift on the keyboard. The + sign will then appear with the Wand tool.
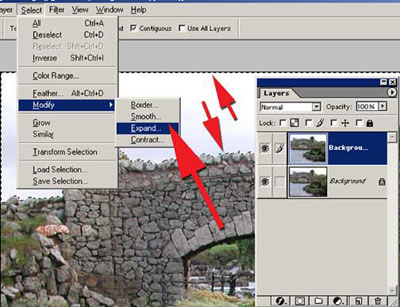
We need to achieve a smooth join when we paste in our new sky, so from the Select menu choose Select > Modify > Expand and enter an amount of 1 pixel. Now we feather this by choosing Select > Feather and enter an amount of 2 pixels.
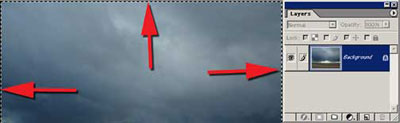
Calling up our 'sky' image from the Select Menu we choose Select > Select All shortcuts Ctrl A, this will put the marching ants around our image. From the edit menu we choose Edit > Copy shortcuts Ctrl C which will copy our sky image to Photoshop's clipboard. We can now close down our sky image.
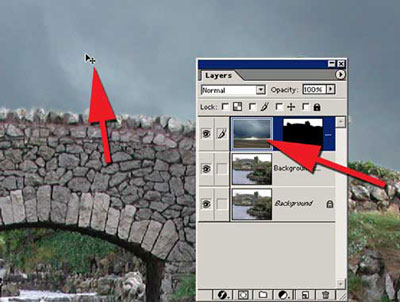
To paste our new sky into the Bridge image from the Edit menu we choose Edit > Paste Into, this will paste the sky into our selection as a new layer. The Move tool can be used to adjust the position of the sky, or try pressing Ctrl on the keyboard which will turn the cursor into the Move Tool.
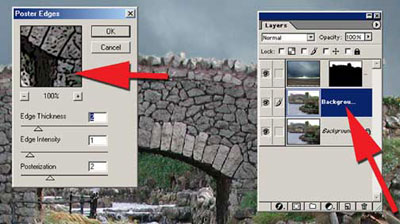
A great filter for adding more definition to stonework is Poster Edges. First of all we must make sure we have our bridge layer selected in the layer's palette -- this is now our live layer. To apply Poster Edges from the filter menu we select Filter> Artistic >Poster Edges which opens our dialog box. The Edge Thickness is set to 2 and Edge Intensity set at 1 and Posterization is set to 2. But as with any of these filters it's always worth experimenting with these figures.
Tip. …If you find the effect a little bit too heavy once applied you can make any adjustments from the Edit >Fade Poster Edges and reduce the amount using the slider until you are happy with the effect.
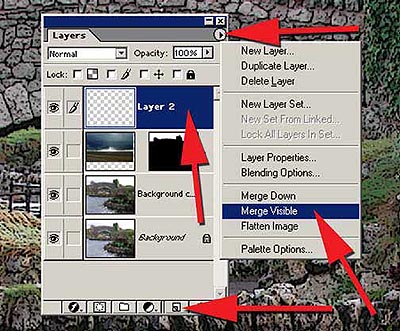
We can now combine all our layers together which will make it far easier to continue whilst leaving our original layers untouched in the Layers Palette. This is a great way of working as it will enable us to make any changes if required. Create a new empty layer above our sky layer by clicking on the Create New Layer icon, then holding down Alt on the keyboard and from the fly at menu on the Layers Palette we select Merge Visible. This will combine all the visible layers into one new layer -- layer 2.
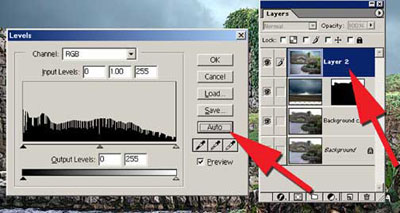
As we now have all layers combined into one new layer - Layer 2 we can check out the tonal range of our image by calling up the Levels Dialog Box. Found under the Image > Adjust > Levels. For this particular image we find the Auto button gives us the best results.
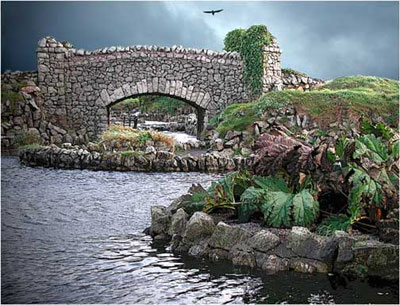
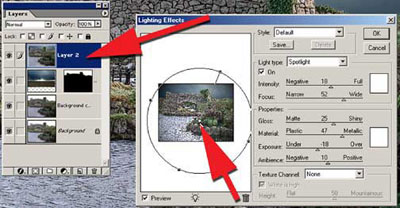
To increase the sense of drama to our image we can use Photoshop's lighting effects, found under the Filter > Render >Lighting Effects. With the lighting effects dialog box open we choose the lighting type as Spotlight. It is important that we follow the natural direction of the light in our image as closely as possible. In the preview window we can adjust the position and direction of the light by moving the grab handles. Try experimenting with all the sliders since very small adjustments can make quite dramatic changes to the image
As a further finishing touch to our image we can add a seagull. This particular seagull was selected from another image and saved as PSD file in our stock folder. We can now call up our seagull and using the Move Tool drag it into our new image, the seagull is then copied as a new layer. By using the Transform tool, Edit >Free Transform, any adjustment can be made to both the position and scale of our seagull.

Our finished image of 'The Bridge'