It's always a good idea to keep an eye on the weather forecast as snow or a heavy frost can dramatically change the landscape. But what if it's not as much snow as we expected - don't worry, we can always improve things using Photoshop.
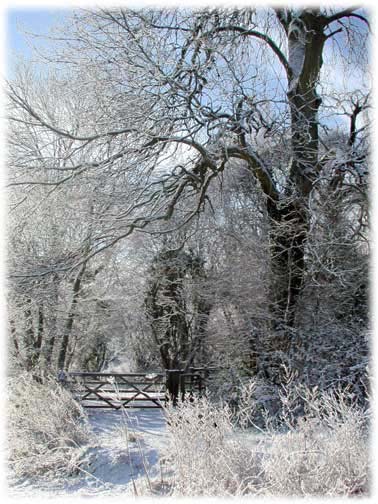
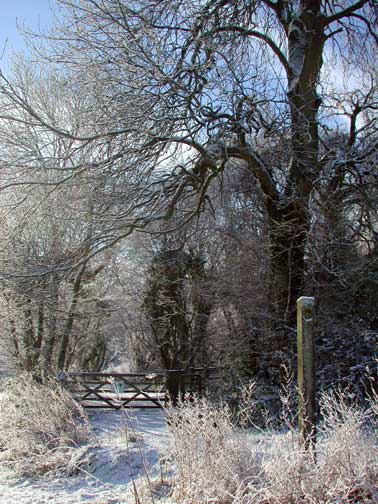
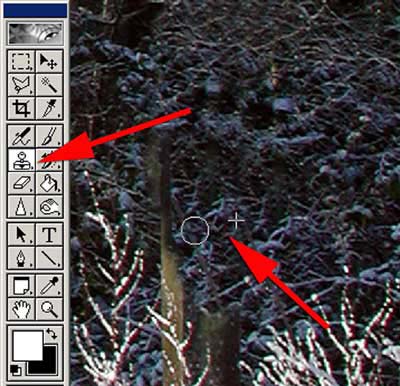
Our original image was taken with the Coolpix 990 after a light snowfall. We can further enhance the snow on the trees adding to that wintry feel, but first we need to deal with a few distractions eg the post and the sign on the gate. The importance of these little touches shouldn't be underestimated when improving an image.
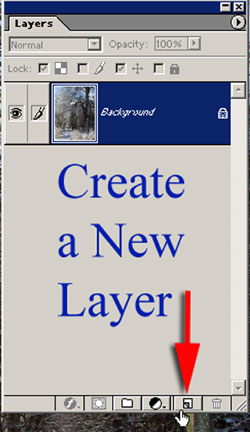
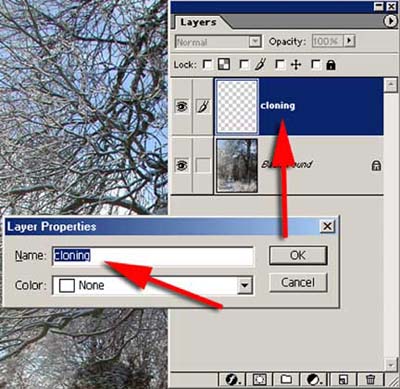
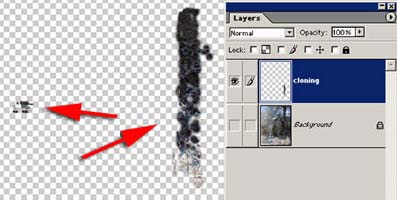
Before we start to use the clone tool, click on the Layers Create a New Layer in our Layers Palette to create a new empty layer (see above). . Make sure we tick the 'Use all Layers' under the option palette as this will enable us to use the clone tool on our new layer. You can also rename the new layer by right clicking and selecting Layer Properties (see below) and enter a name of your choice
Using the Cloning tool (short cut S) and working on the new empty layer, choose a soft edge brush we can begin to remove the distractions. Continue cloning and re-adjusting the target area regularly to avoid repeat patterns. Take your time with the clone tool as it can make all the difference to the finished image.
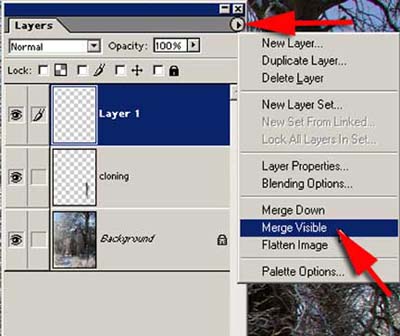
At this stage we could either flatten our image, or if we want to continue working in layers, create a New Empty layer above our cloning layer . Under the layers palette select Merge Visible from the menu and hold down our Alt key. This will copy all our visible layers into one new layer. This is a great way to keep working in layers while leaving the option open to change things if we are not happy with the end result.
Right, now to add to the snow. From the filter menu choose Filter > Stylize >Find Edges and click OK. Don't be alarmed, this effect does look rather strange at this stage with its black edges, but by inversing the find edges filter Select >Inverse it begins to look a lot more like the effect we are after.
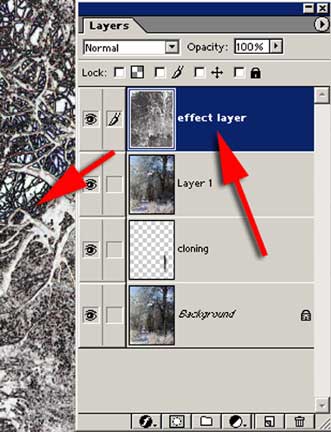
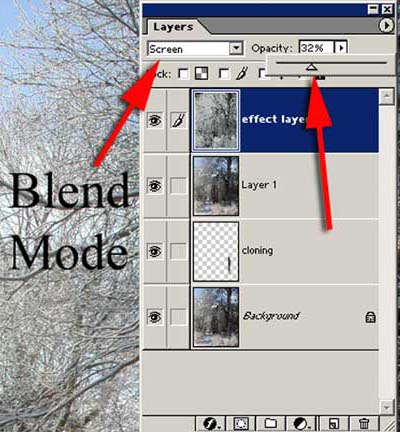
In the layers palette select Screen from the drop down menu of the blend mode and reduce the opacity to around 30% and the image will be transformed.
If you've not used the Blend Mode before it's worth trying a few of the modes settings to see what effects can be achieved. You'll be amazed!
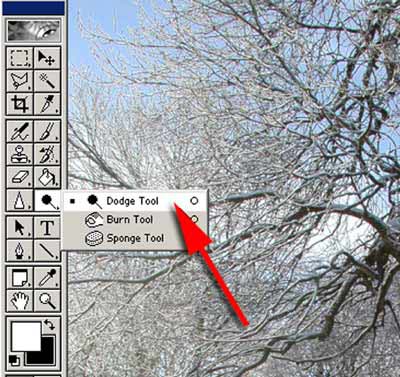
Using the Dodge and Burn Tools (shortcut O) we can bring out further detail from our image. They perform a similar function to their darkroom namesake and are ideal for localized tonal control. Take care when using these tools and slowly build up the effect. Start with the Exposure set at around 10% in the options palette and Midtones selected in the Range option and select a soft edge brush to work with.

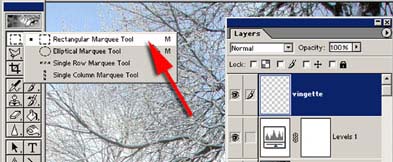
A soft white vignette would look ideal for this image. Click on the new layer icon on the layers palette to create a new empty layer. From the tool box select the Rectangular Marquee Tool, short cut M. Drag it over our image just inside the border.
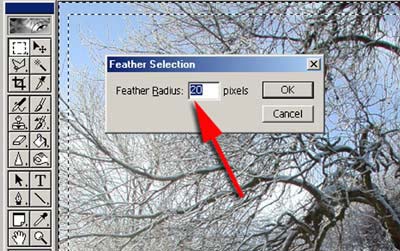
Inverse our selection choosing Select > Inverse or short cut Shift Ctrl I, and from the menu bar choose Select > Feather setting the radius to around 20. This may vary depending on the file size so try experimenting. We now have two lines of marching ants around our image. Set our foreground colour to White in the Tool box and call up the Paint Bucket. Click inside the line of marching ants with the Paint Bucket and this will fill the area with white. Press Ctrl D to remove the marching ants and our vignette and image is complete.
The finished image (rollover the image to see the difference).