
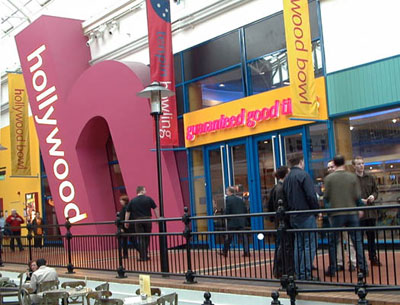
I have always liked the look of the ‘artist’s impression’ used by architects, and thought I would like to try and find a way of achieving a similar effect using digital imaging. The image I chose was one I took in the Hollywood Bowl with the Coolpix 900 camera.
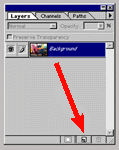
We start in Photoshop by calling up the Layers Palette (short cut F7) then dragging the Background layer over the center icon to duplicate the layer. We then renamed it by double clicking on the word Background copy and naming it Drawing, or any name that you like that will identify it to you. I always like to keep a copy of the original just in case it doesn't work out.
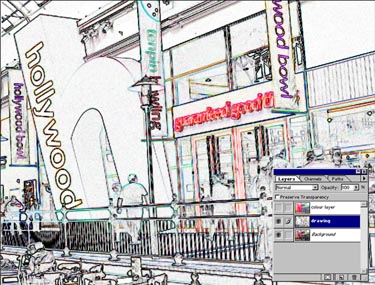
Now, working on the new Drawing layer, we apply the Find Edges filter by selecting Filter > Stylize > Find Edges.
When working on a layer make sure the brush symbol is on the layer you wish to be active (on) and also highlighted in blue. In image above the top layer is the active one. To switch the layer off click on the eye icon.
Make another copy of the Background Layer by dragging it over the center icon in the Layers Palette and re-naming it as before. This one we will call our Colour layer. We need to switch off the Drawing layer by clicking on the eye icon in the Layers Palette which will enable us to see what we are doing in the new layer. Now working on the new layer go to Filter > Blur > Gaussian Blur and set the radius to 9.0. Applying the Gaussian blur filter will help to blend the colours slightly into each other.
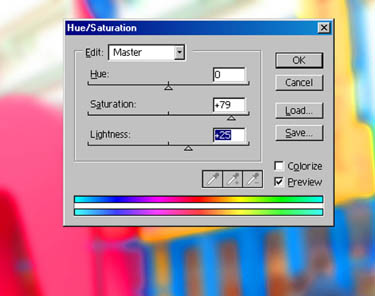
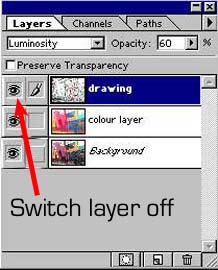
Calling up the the Hue Saturation Palette - found under lmage> Adjust > Hue /Saturation (or short cut Ctrl-U). Adjust the Saturation to around -79 and lighten slightly to +25. We can switch back on the Drawing layer again by clicking back on the eye icon. Why not try experimenting with the Hue setting as well, as you may find that a different colour suits your image and even changes the whole mood of your image.
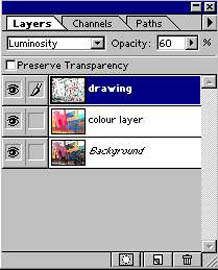
We can now blend the layers together using the Layer Palette. Within the Blending Mode we chose Luminosity from the drop down menu and set the Opacity slider to 60%. Now click on Merge Visible in order to combine all the layers together leaving us with the finished images. If you want to add a touch more definition to your image why not try adding Filler > Artistic > Poster Edge. Don't forget that you can always reduce the effect by using Fade which can be found under the filter Menu.
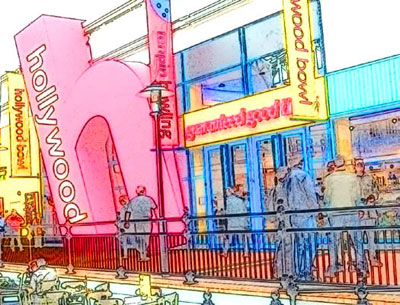
The finished Image