1. Open a new document 400 x 400 and fill it with (#72828b). Now make a new layer from Layer - New Layer. With your Rounded Rectangle Tool make a shape not very big, as big as your box should be. Fill it up with (#e7ebeb).
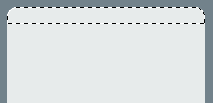
2. Now Rasterize the Layer. You do that with a right click on the layer and you have an option there "Rasterize Layer". Now Ctrl+click on the layer to select it all. Pick the Rectangular Marquee Tool, hold Alt, and select the upper part of the shape.
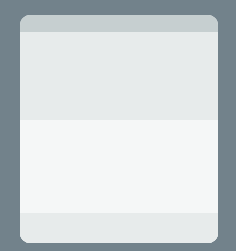
3. Fill it with (#c6cfd0). Now do the same thing but this time select the half down part. and fill it with (#f5f7f7). Now this is the third time but the last. Do the same thing and select the half down part of the new white part. And fill it again with (#e7ebeb). You should have this:
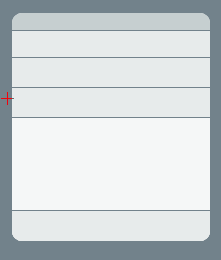
4. Now with the Single Row Marquee Tool selected, we will divide the box. Be careful to divide it equally. For this you may wanna go to View - Extras. Put the selection were do you want to cut and press "Delete" and after that Ctrl+D to deselect.
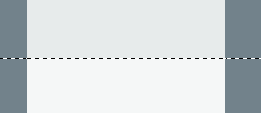
5. Divide it like this.
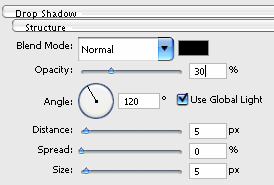
6. Next go to Layer-Layer Style - Drop Shadow.
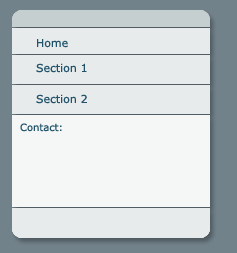
Add some text and content and here we are