Step 1
Create a new document
Width: 500 Pixels
Height: 500 Pixels
Background: White
and change your Foreground Color to #008B03 and Background Color to #232323
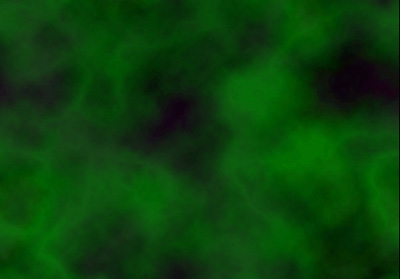
Step 2
Let's render some clouds then use the Difference Clouds Filter and repeat it several times until you get something like what we got below.
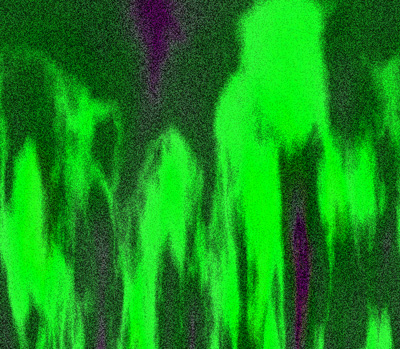
Step 3
Apply the Polar Coordinates. Select Polar to Rectangular) filter then the Film Grain Filter with the following settings:
Grain: 6
Highlight Area: 2
Intensity: 6
Wowie we used like 4 filters in 2 steps
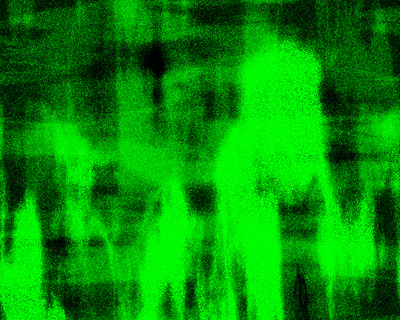
Step 4
Duplicate the current layer, change it's Blending mode to Soft Light, and then rotate the image 90 ° CW. Do this 2 more times and when your done you should have 4 layers.
Step 5
Merge Visible the layers and press CTRL + U to bring up the Hue/Saturation box:
Hue: 74
Saturation: -51
Lightness: 0
Step 6
Duplicate the current layer, change it's Blending mode to Soft Light, and then rotate the image 90 ° CW. Also add Gaussian Blur with Radius: 6.5 then merge visible.
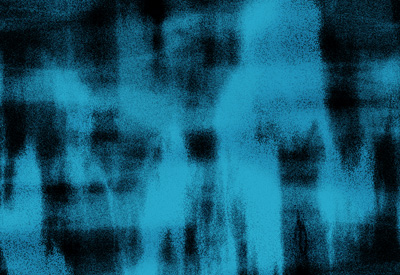
Step 7
Okay this is going to sound repetitive, duplicate the current layer, change it's blending mode to lighten, and then rotate the image 90° CW. Now add a Motion Blur:
Angle: -8
Distance: 124
Step 8
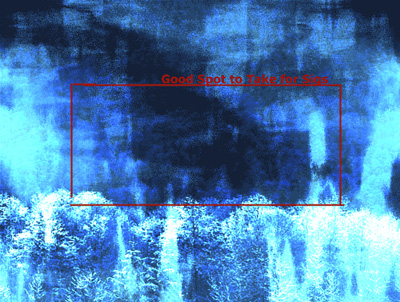
Finally now we are going to add another image into this. I used this Windows wallpaper.
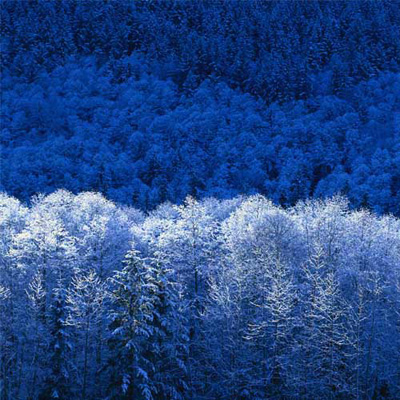
Take that image and paste it onto another layer in your existing image, it should be on top of everything.
Step 9
Finally change it's blending mode to either Color Doge or Overlay and there you have it, look for the parts that you like the best and use them for sigs etc...
Final Product
There you have it, hope you enjoyed this tutorial, please comment!