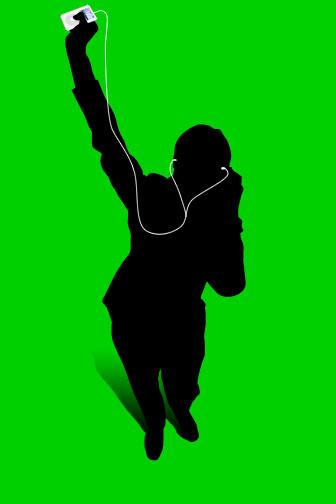
So we've all seen those Apple iPod commercials on TV. Crazy silhouetted people dancing around with white iPod's attached their ears with white strings. It's a pretty easy photoshop effect, so I'll show you how to create your own crazy ad.
So we've all seen those Apple iPod commercials on TV. Crazy silhouetted people dancing around with white iPod's attached their ears with white strings. It's a pretty easy photoshop effect, so I'll show you how to create your own crazy ad.
Let's start off with our person photo. I found this one at www.photospin.com. We're going to want to start by masking the image. Masking is when you basically hide a portion of the image, leaving what you want to see, visible. It's a lot easier than "deleting" the unwanted area. Start by making your selection around the object.

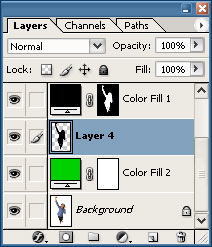
Create a Solid Color Adjustment Layer by clicking on the Adjustment Layer icon at the bottom of your Layers Palette. You'll see the Color dialog box. Select black.

Select your Background Layer again in your Layers Palette. Press Ctrl + D to deselect your selection, just in case. Create another Color Adjustment Layer, but this time choose bright green, or red, or orange, or whatever you want your iAd color to be. I chose green.

You can stop after this point if you want, since you get the basic effect. But I'm going to add a few extra things.
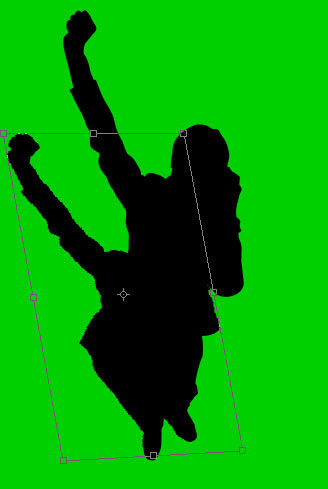
First is going to be a shadow. Hold Ctrl and click on the Layer Mask of the black Color Adjustment Layer you made. Create a new layer under that layer Ctrl + Alt + Shift + N. Press Ctrl + D to select the default colors. Alt + Backspace fills the new layer with black. Ctrl + D deselects.
Now let's transform that layer. Press Ctrl + T to bring up the Free Transform bounding box. Hold Ctrl and select the top-middle box. Shrink and twist the box to resemble a shadow.
Add a Layer Mask to the shadow layer and press G to select the gradient tool. Select the default gradient settings, and drag across your shadow layer. Like this:

Now, to finish it off, I added the iPod. I grabbed the iPod photo from the Apple site. Shrank and tweaked it. To create the headphone wires, I used the pen tool. After I created the paths, I stroked them with the Brush, set to 1-pixel. You can check out more on the Pen Tool here.