


The new Photoshop CS2 Vanishing Point tool is pretty cool. It can save you a lot of time from messing with Free Transform, and the Clone Tool feature is unbeatable. In this tutorial, I'll show you some of the basics of Vanishing Point.
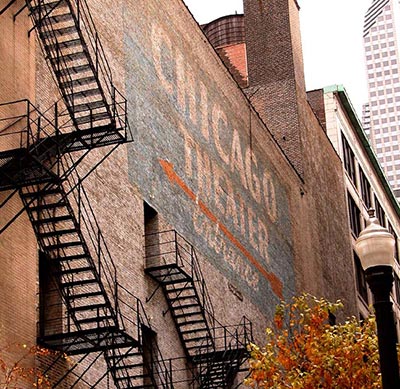
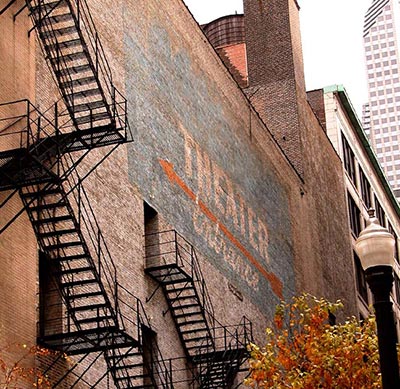
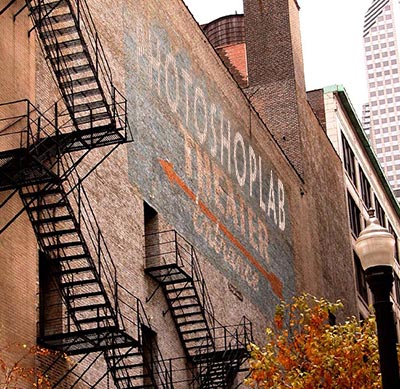
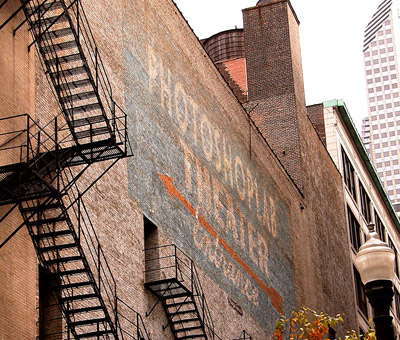
I started with this photo of downtown Chicago. My goal is going to be to replace "CHICAGO" with "PHOTOSHOPLAB."
Start by duplicating the layer (for reference and a backup) by pressing Ctrl + J. Bring up Vanishing Point by pressing Ctrl + Alt + V or Filter > Vanishing Point.
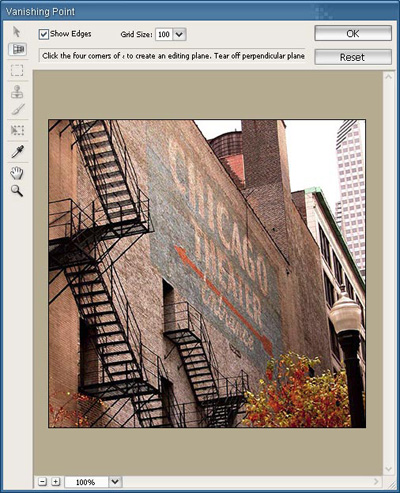
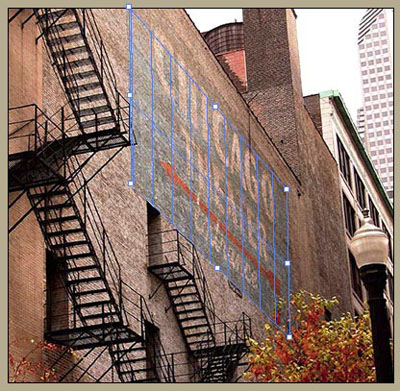
The Create Plane Tool should be selected by default. If not, select it. This will allow you to draw your Vanishing Point grid. It works like drawing a square, so start by clicking on one of the corners of what you want to outline, for me, it will be the blue on the wall. Drag and click on all 4 corners to create the grid.
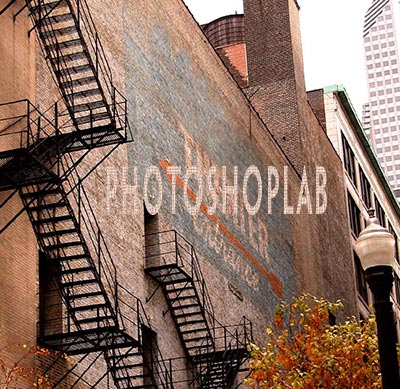
To remove "CHICAGO" I'm going to select the Stamp Tool S. The brush size is set default to 100, which is too large for me. So I'll shrink it a little bit. Now, use the Stamp Tool just like you would if you weren't in Vanishing Point. Alt - click on the area you want to sample, then click on the area you want to edit.
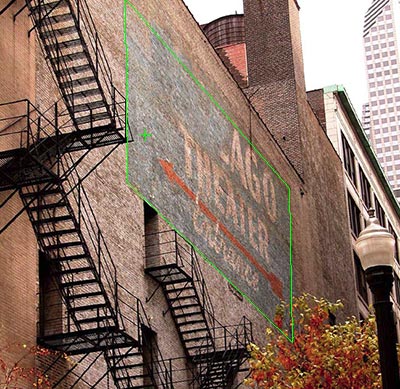
Set "Heal" to "On" to allow the Stamp Tool to work like the Healing Brush tool.
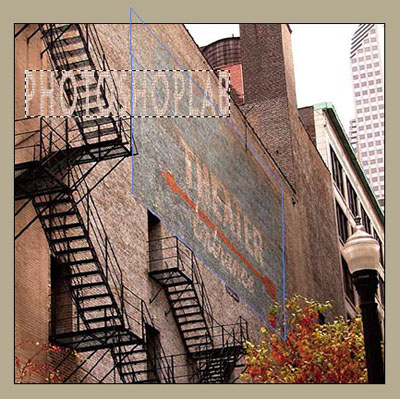
Now to add my own text. I started by choosing a relatively similar font and color.

Rasterize the type layer Layer > Rasterize > Type.
To make the text blend a little better, I added some texture by going Filter > Texture > Texturizer and choosing a Canvas Texture. I choose Canvas because the Brick texture was too large in comparison to the existing brick.
Hold Ctrl and click on the text layer thumbnail to select it. Press Ctrl + C to copy the layer and press Ctrl + D to deselect.
Create a new layer Ctrl + Shift + N and hide your text layer.
Bring up Vanishing Point again Ctrl + Alt + V and your grid should still be there. Press Ctrl + V to paste your text selection.
Drag your select over the grid and watch it transform to the angle of the building.
Select the Transform Tool T to reshape the text to fit.
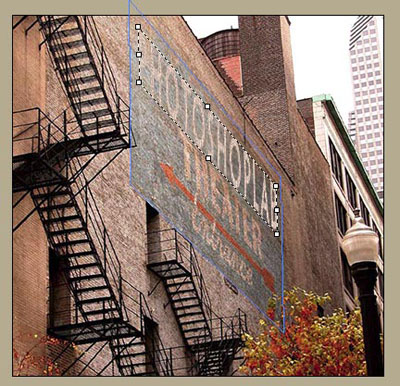
Press OK when you're done.
Set the Layer Mode to Overlay and reduce the Opacity slightly to make it blend.
And that's about it. Pretty cool feature.