A Beginners Guide to Model a Pen and Pen Cap
In this tutorial we are going to learn how to Poly model a Pen and a Pen Cap in Maya 7.0. But the tools we use are all relevant to other 3D applications. I will go through the basics of everything, so this is for the Beginner to Intermediate. Well enough of my Chit Chat, LET'S GET STARTED!
You can download The Maya Personal Learning Edition (Free) here: alias.com
Basics:
- Press and hold down Apple (for Mac) or CTRL (for Win) and use the RMB to Zoom in and out, LMB to Dolly (rotate), and (clicking) MMB to Pan in your selected view ports.
- Press "f" on your keyboard to frame any selected objects.
- Press "w" To bring up the move tool, "e" to rotate. "R" to scale.
- Tap space bar quickly to move from view ports.
Shading:
- #4 on your keyboard is wire frame Mode.
- #5 is shaded mode.
Undo:
- My favorite, press "z" on your keyboard to undo.
- To Redo: Shift + Z (Has limitations)
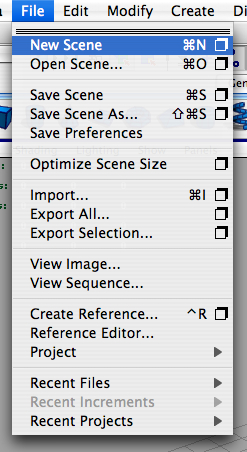
1. Ok, So Start up Maya, and go File>New Scene
2. Now we will create a new project, so that all of our files we use, Maya will arrange them all so that they can be accessed all in one folder. File>Project>New...
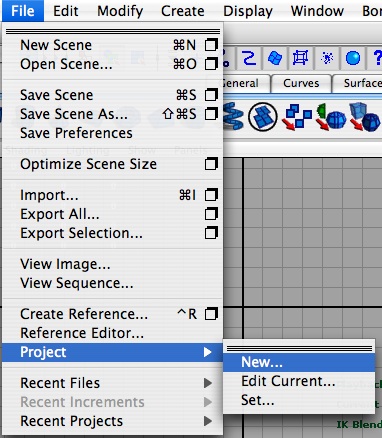
3. When the new window pops up Name your Project, WITHOUT SPACES. E.g. Mark_pen. We can name folder names for all the fields below, or we can use the Maya default names. We will just use the default names. So at the bottom of the window click Use Defaults. Now click accept.

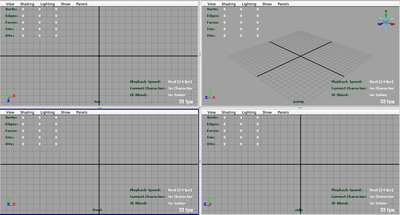
4. Now press the spacebar quickly so you get the four view ports Top, Perspective, Front, and Side respectively.
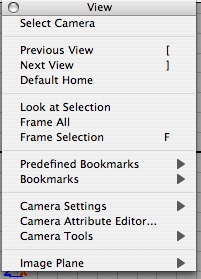
5. Go into your side view port and under View>Image Plane>Import Image...
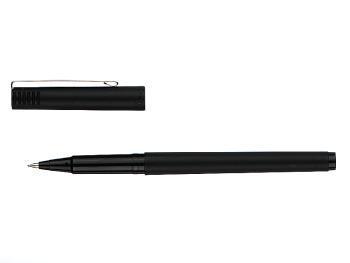
6. Now when the new window pops up we need our reference picture. Here's the one I'm using:
Now save the picture to your source images folder in your project folder (ex. Mark_pen>SourceImages)
Now find your picture and open it.

7. You should now have the picture on the Z axis in your side view port.

Now go to view in your side view port View>Select Camera
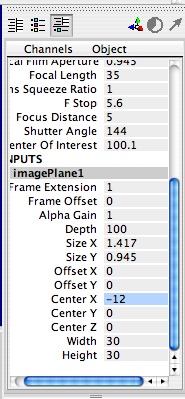
Now on the far right side the viewing area there is something called the Channel Box, this can be used to manually change properties of almost anything in Maya. We are going to move the pen picture in our side view port so it is out of our work space. If you do NOT see the channel Box hit the 3rd button at the top left of the Maya work space:
![]()
Once you have the Channel box open, Scroll until You See ImagePlane1 under INPUTS. Click ImagePlane1 And its attributes show up. Now find "Center X" and click where it says "0" and Type in -12. Now the image moves to the end of the grid on axis X.