


Result:

Eleonora from Moscow asked me to write this tutorial. Before making a realistic tear, you can watch a water drop to see all the details. The main thing is to understand all the shadows and lightness. I should say that some settings should be different for each photo. Try to play around with the settings to get better results. Open any picture in Photoshop:

Let's make a new layer in layer's window. If it's not open press F7 on your keyboard.
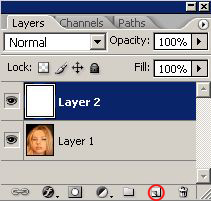
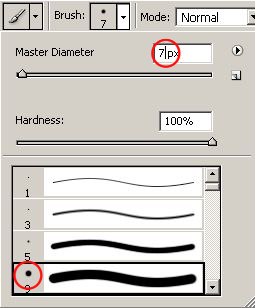
Take Brush tool
![]() , choose hard brush and a proper size:
, choose hard brush and a proper size:
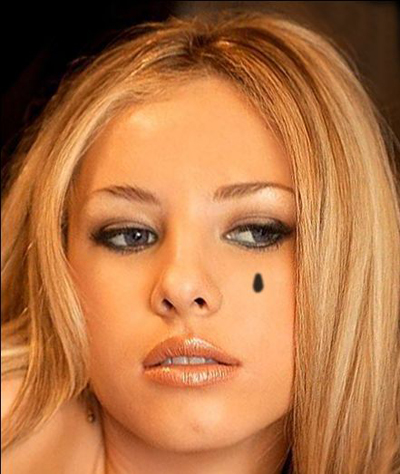
Zoom in your picture and make a tear:

Here is my tear base:
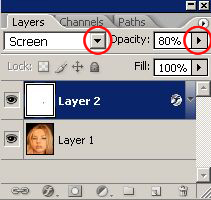
In layers window change tear layer's mode to Screen and change it's Opacity to 80%:
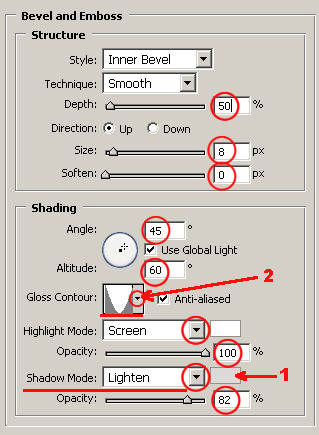
If you don't see your tear you are on a right way! :0) Now go to Layer-Layer Style-Bevel and Emboss and use following settings (try to find best ones for your picture). Change shadow mode to Lighten.
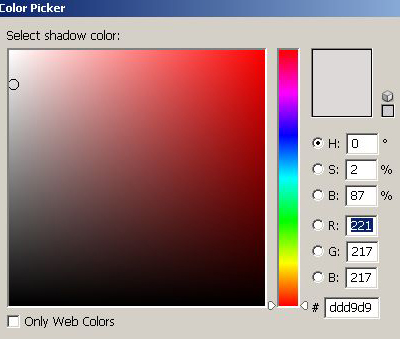
Click on rectangle where the 1 is to change shadow color, and choose light grey.
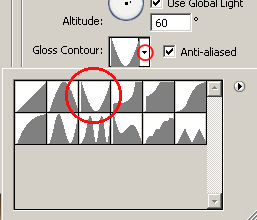
To change gloss contour click on the triangle where 2 is:
You can see your tear now:

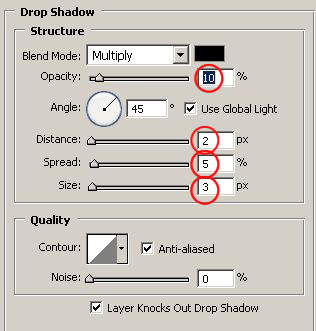
Let's make a light shadow. Layer-Layer Style-Drop Shadow and use the following settings:
Here we go:

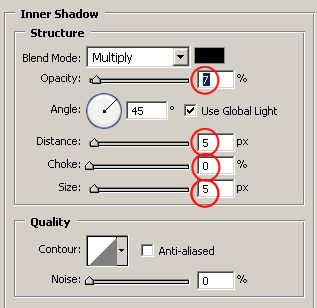
Also we should add some inner shadow. Layer-Layer Style-Inner Shadow:
Our tear is almost ready:

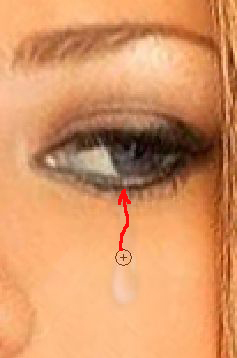
We have to add final details. Take Brush tool
![]() , and set it's Opacity to 45%. Leave the same brush size.
, and set it's Opacity to 45%. Leave the same brush size.
![]()
Zoom in your picture and draw a light way from the eye to the tear.
Here is my result:
Have a good day (with no tears! :0))!