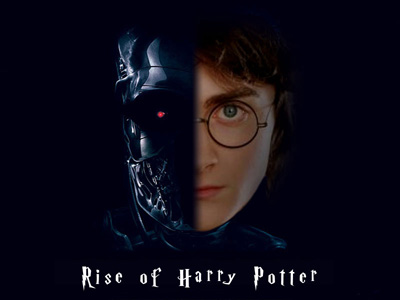
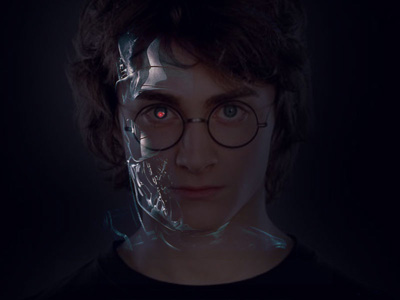
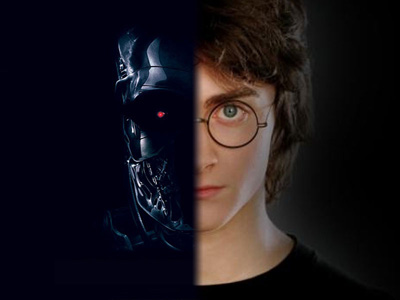
Many of you have seen videos of Harry Potter and the Terminator. I liked both films very much. So I decided to combine these two characters :)
In this tutorial I will describe the process of creating a collage from Harry Potter and the Terminator.
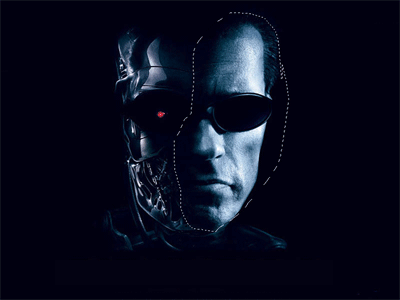
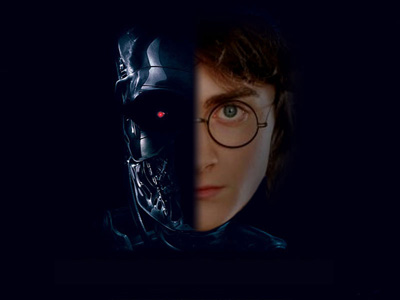
To start I will take a photo of the Terminator, as half-human and half-robot from Terminator 3, and change his human part to Harry Potter.

First of all you should remove the skin from the image. Choose Lasso tool (L) and select the area around his skin. Then fill it with the background color (#010010), then deselect (Ctrl+D).
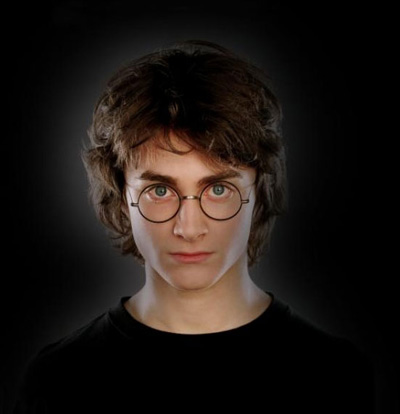
Now the Terminator is ready for some further work. I will need a new photo of Harry Potter to replace the Terminator's face.
I've chosen this photo:
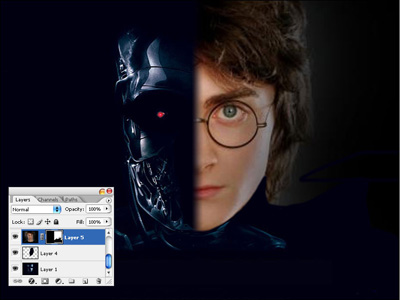
Move the layer with Harry Potter onto the working space with the Terminator.
Change the Opacity to 30% so that you can see both the Terminator and Potter. Using the Free Transform tool (Ctrl+T) change the size of the image and move the face so that it's chin and eye match the Terminator's.
Now add a Layer Mask (Layer>Layer Mask>Reveal All) and draw a gradient on it (from black to white). Move if from one nostril to the other. Then change the Opacity to 100%.
Now it's time to get rid of the Harry's neck and shirt. Using the Brush tool (B) of black color, paint his neck and shirt on the Layer Mask.
Now the final step - we need to make a gradient from Potter's hair to the background. Using the Lasso tool make selection of part of Harry's hair (on the Layer Mask).
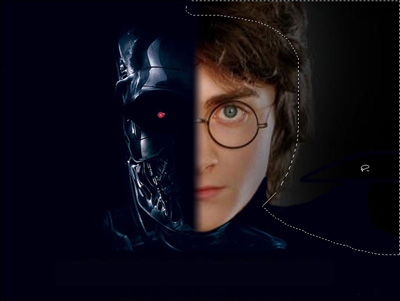
Then apply Feather... (Alt+Ctrl+D) 20 px and fill the selection with #010010 color 2-3 times. Then Deselect (Ctrl+D).
To make the colors more natural we might play with the Brightness/Contrast. Go to Layer>New Adjustment Layer>Brightness & Contrast and set these settings:
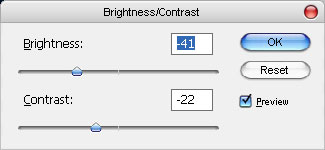
Now press Ctrl+Alt+G to apply these settings only to the top layer.
Everything is ready now. The last thing is the text. You may add some text using this font.