

This tutorial will teach you how to make and animate snow for a sig or banner.
1. Open up your image that you want to apply the snow to.
2. Make a new layer where you want your snow to be. (Most likely on top). Fill it with black #000000
3. Press Filter > Noise > Add Noise and use the following settings.
Amount: 70%
Distribution: Gaussian
Monochromatic: Yes
This will create a black background with white dots.
4. Change the layer mode to Screen. This will make it so the background can be seen through the snow layer.
5. Press Filter > Blur > Gaussian Blur, and use the following settings:
Radius: 1.5 pixels
6. Press CTRL+L to bring up the levels dialogue box. Change the options to:
Channel: RGB
Input Levels: 90, 1.00, 120
Output Levels: 0, 255
Press OK.
7. Repeat steps 2-6 by making new layers. Do NOT duplicate them, as the Noise on each layer will be the same. We want them to be different. For example, on the 2nd snow layer, make the noise on 71%. On the 3rd layer, make it 72%, etc. Repeat these steps 4 more times so you have a total of 4 layers of snow.
8. Press the "Edit in Image Ready" button
![]()
to start the animation stage.
9. Create a total of 5 frames (One frame for each snow layer). Click on the first frame, and make only the background image, and first snow layer visible. Click on the 2nd frame, and make only the background image and 2nd snow layer visible, etc.
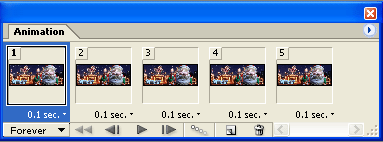
Now change each frame time to 0.1 seconds. Press File > Save Optimized As... and your done!
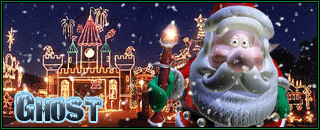
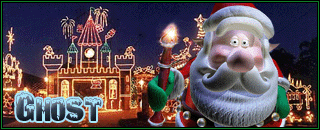
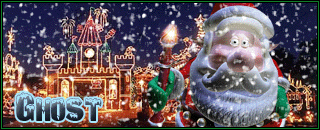
Here's my final result: