Gif Animation: Film Countdown
Final Product What You'll Be Creating
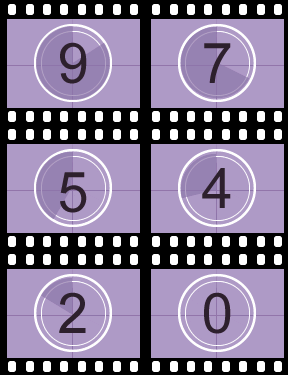
General
In this tutorial, we will build a 10-State frame by frame animation using 2 Layers: One shared layer with the "Share Layer to State" feature and one without.
In Fireworks, in order to create an animation we will use the canvas representing the "screen" ; the shared and unshared layers (each object in a document resides on layers) and the States (formerly frames) the successive frames of a filmstrip. See Figure 2.
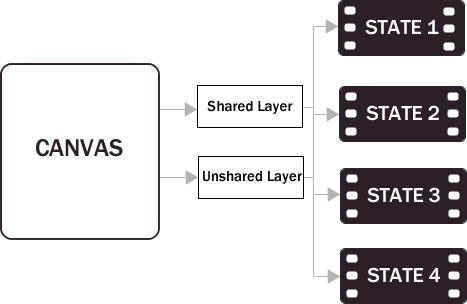
Figure 2: Canvas - Layers - States
Shared layer vs unshared layer
In an animation, not every element changes across states. For example, backgrounds or background elements often remain the same across all states and only the foreground image(s) that "move" change from state to state.
If you want to add background elements, you would draw the static, unchanging elements on one layer then share that layer to all states using the "Share Layer to State" feature. That would be our shared layer. See Figure 3.
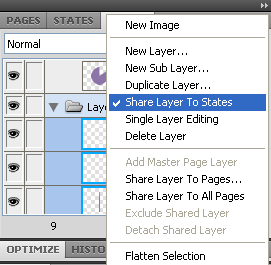
Figure 3: Share Layer to States
The objects that DO animate would be drawn on another layer that is NOT shared, then you would draw each frame of that animated object on the same layer in each of the states. That would be our unshared layer.
If you want objects that change from state to state for animation, then do NOT share that layer. Make certain that the object(s) to be animated are on a separate, unshared layer. That layer will be empty in each state until you put a unique instance of the animated object in that layer in each state.
Film Countdown
In the film countdown animation, you may download, Layer 2 is the shared layer with the "Share Layer to States" feature (with the film strip icon) and will be used to contain the common elements which will be shared across all the states: all the background elements.
The main advantage of using the "Share Layer to States" feature is that you may modify the background elements whenever you want without having to modify all the states of the animation.
Layer 1 is an unshared layer for animation that contains only unique elements: the numbers and the different wedges. See Figure 4.
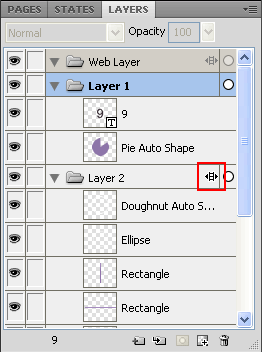
Figure 4: Shared and Unshared Layers
Wedges
To build the wedges that are linked to the numbers I used the Pie auto shape 
Animation speed
Use the States Delay controls in the States panel to set the animation speed. The state delay specifies how long the current state is displayed, in hundredths of a second. For example, specify 50 to display the state for half a second or 300 to display it for 3 seconds. See Figure 6.
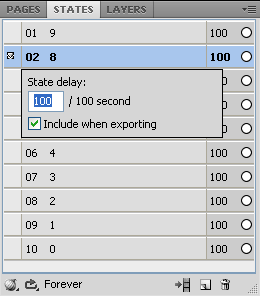
Figure 6: Animation Speed
Export an animation
After you create and optimize an animation, it is ready to export as an animated GIF. .
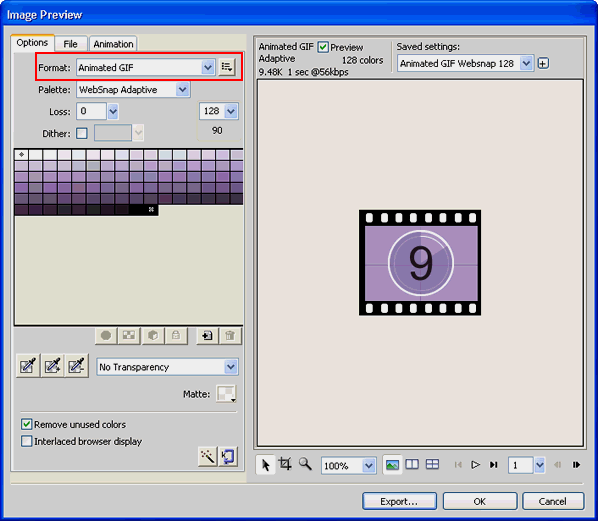
Figure 7: Export an animation
Select File > Image Preview and select Animated GIF as the file format.See Figure 7
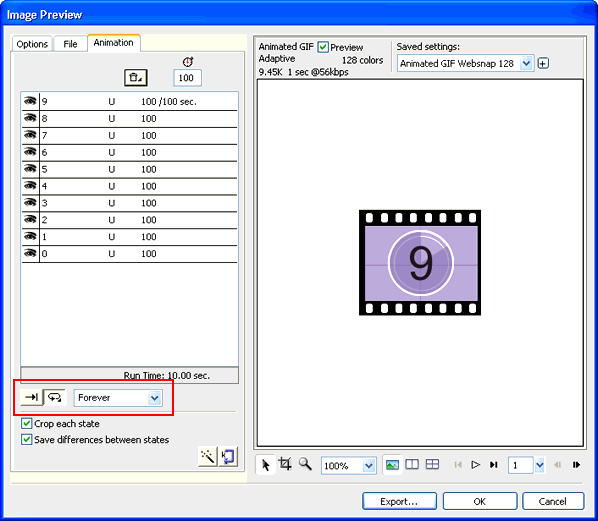
Figure 8: Looping
Looping
By causing an animation to repeat, Looping minimizes the number of states required to build the animation. See Figure 8.
Select Window > States to display the States panel.
Click the GIF Animation Looping button at the bottom of the panel.
Select the number of times to repeat the animation after the first time. If you select 4, for example, the animation plays five times in all. Forever repeats the animation continuously.
About the author
Copyright © . All Rights Reserved
