Girl of My Dreams (Exclusive Tutorial)
Step 23
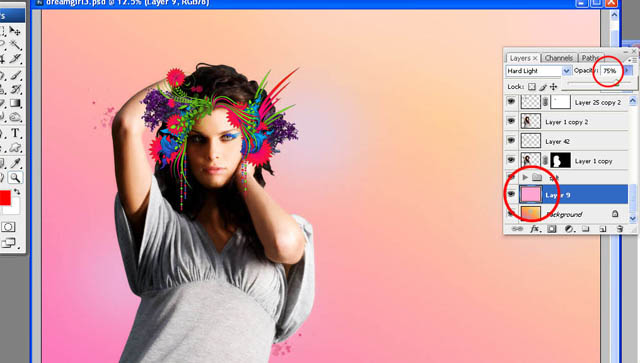
Make the background a little bit pale, add soft pink color and change the layer mode to Hard Light with 75% opacity. See the image below for further explanation.
Step 24
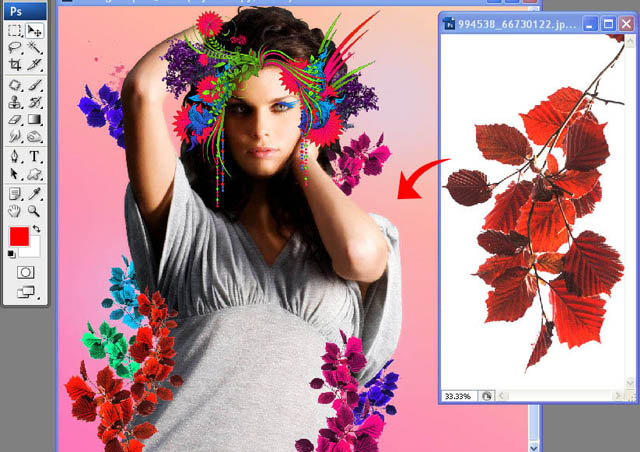
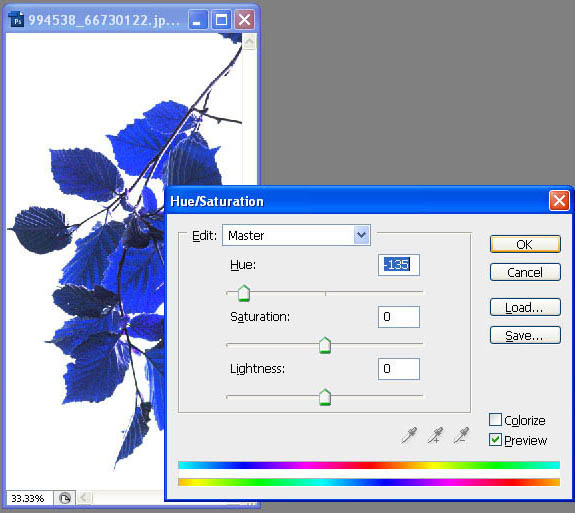
Open leaves1.jpg, erase some leaves with Masking and start to compose and place them around the girls. Change the color of the leaves using Hue/Saturation (menu Image > Adjust > Hue/Saturation), try some vivid and vibrant color to give colorful mood.
a
b
Step 25
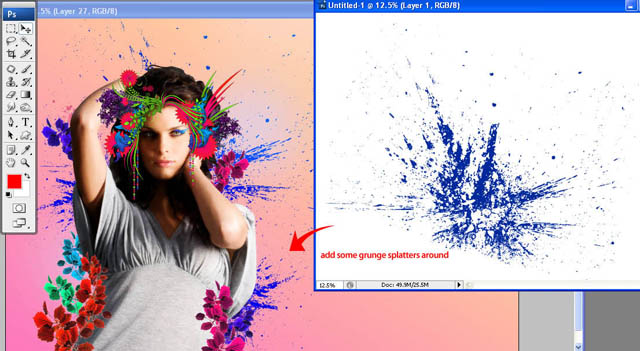
More grunge effects will give deeper dimension, open grungesplatter1.jpg, make Selection and place the grunge splatters behind the girl.
Step 26
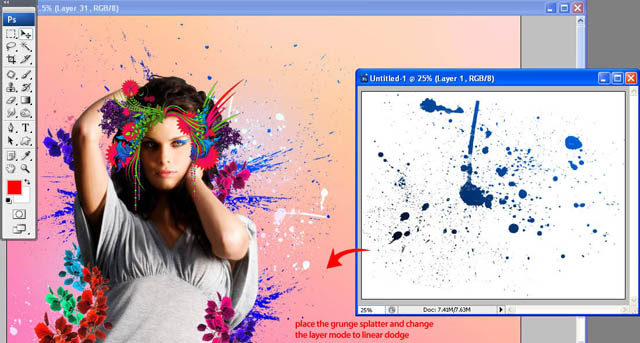
Place another grunge splatter, open grungesplatter2.jpg, make selection and place it around the girl. Change the layer mode to Linear Dodge and we will get transparant white splatter right now.

Step 27
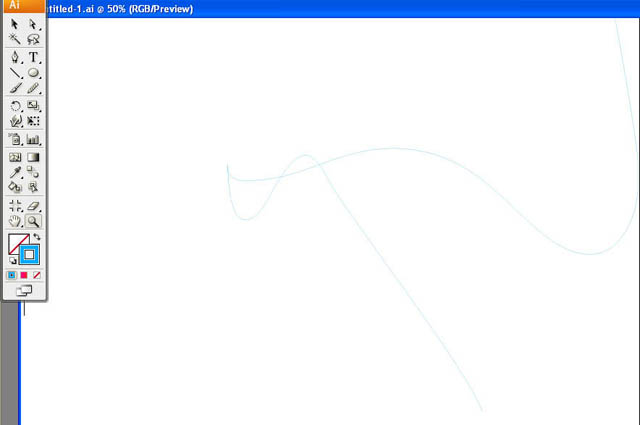
Leave the Photoshop open for a while, start open Illustrator, pick Pen Tool and draw a line like shown in the image. I'm using 0.5 point brush stroke as the outline, a thin outline.
Step 28
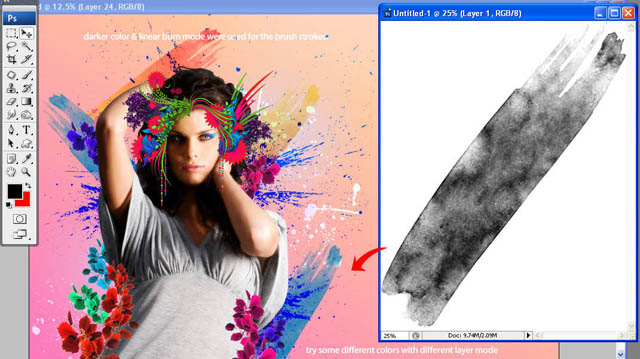
Next, let's add brush stroke effect. Open brushstroke.jpg, duplicate it with some various colors and start compose them around. Use Darker Color and Linear Burn layer mode to get darken effect like shown in the image.
Step 29
Make the second line using Pen Tool, like shown in the image below. You may also make your own line but of course different line will give different result later.
Step 30
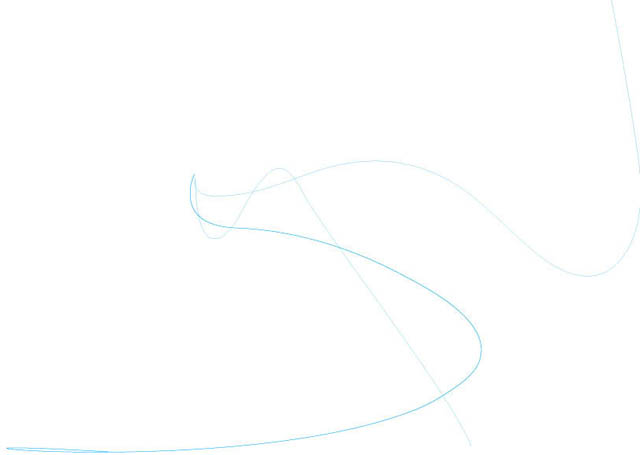
Then the last one, make the third line with thicker line, I'm using 1 point outline stroke for the third one.
Step 31
Select all those three lines, go to menu Object > Blend > Blend Options.
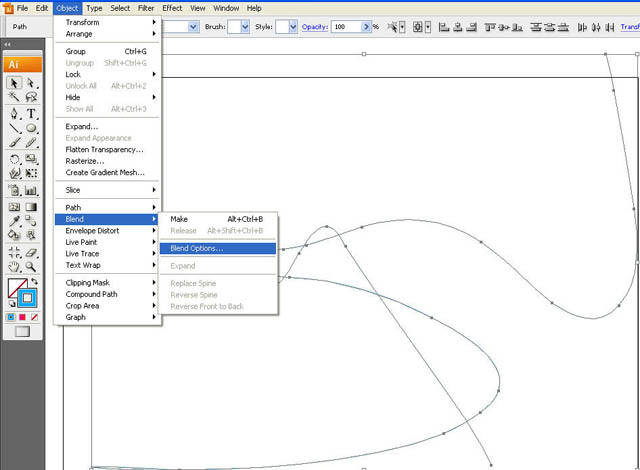
Step 32
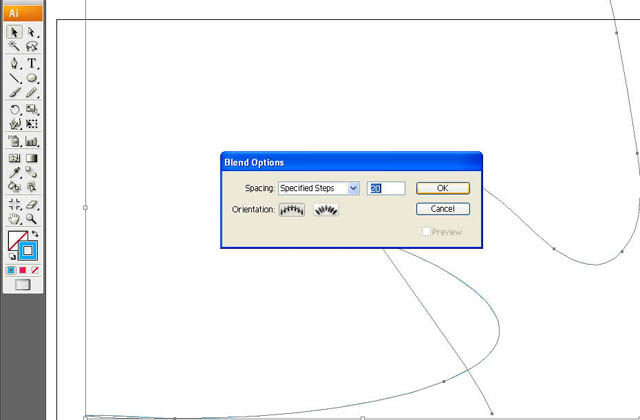
Select Spacing: Specified Steps, input 20 in the box and select the left one symbol for Orientation, click OK. Next go to menu Object > Blend > Make.
Step 33
And you will get the blend result like shown in the image below, you can try some experiments on the lines and the value of the specified blend steps also effect the blend result. Save this blend into AI file or just export it to PSD file and we will import it to Photoshop in the next step.

Step 34
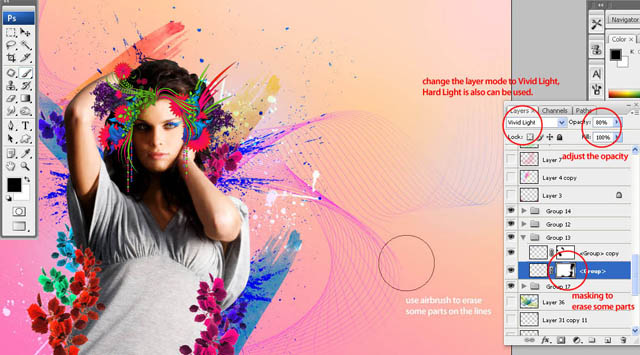
Back to the working document on Photoshop, import and place the line works behind. Try to change the layer mode to Hard Light and reduce the Opacity to 80%. Add layer masking to the lineworks layer and erase the edge of the lines using big size airbrush tool. You also can add some gradient color on the lines if you want.
Step 35
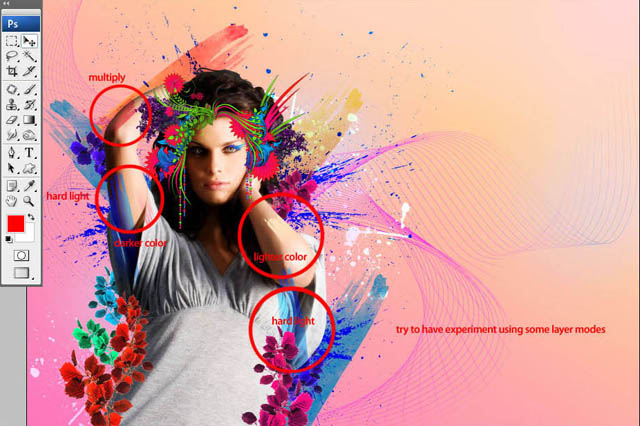
Let's continue to next step, still playing around with brush stroke, reopen brushstroke1.jpg and now duplicate it and compose them above the girl, just place them above her left and right hand and some parts of her outfit. Try many different layer mode here. I'm bluish and reddish color using different layer modes, Multiply, Hard Light, Darker Color and Lighter color, just see the red circles in the image for further details.
Step 36
Now we will make a melting skin effect using shape, use Pen Tool, draw a tear-drop like shape. Make some different shapes, maybe a long one, a thin one, a fat one, anything is acceptable. After done making all those shapes, place them on the girl's left and right elbow. Use Masking to erase the edge of the shapes to make them blend with the skin.
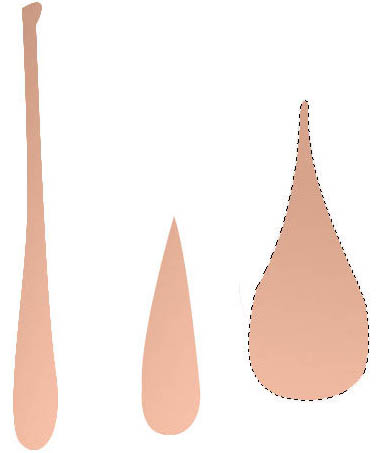
a
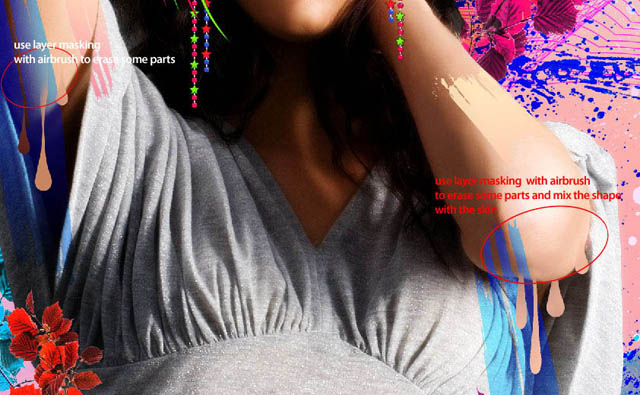
b
Step 37
Now open leaves3.jpg, make a selection of the leaves inside red circle, duplicate and place it around the girls. I place it around her shoulder, armpit and forehead.
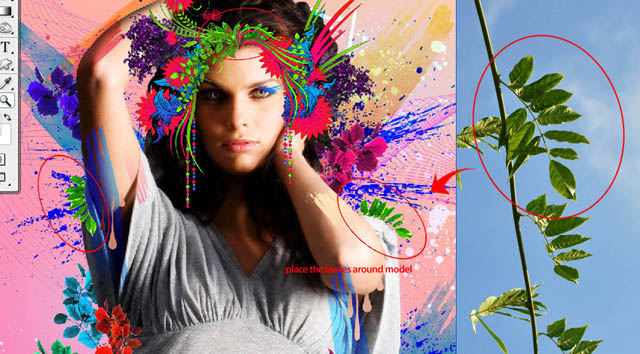
Step 38
Let's have a color adjustment for the leaves, use Color Balance (Image>Adjust>Color Balance), you can try my value Shadows +17 -17 -19 | Midtones -60 +73 -36 | Highlights -29 +31 -46 or just make your own color here.
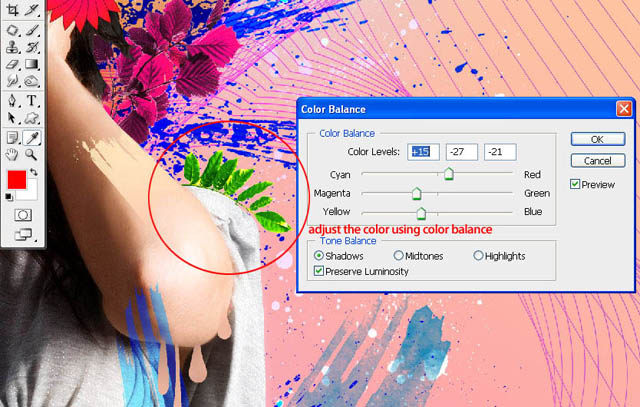
Step 39
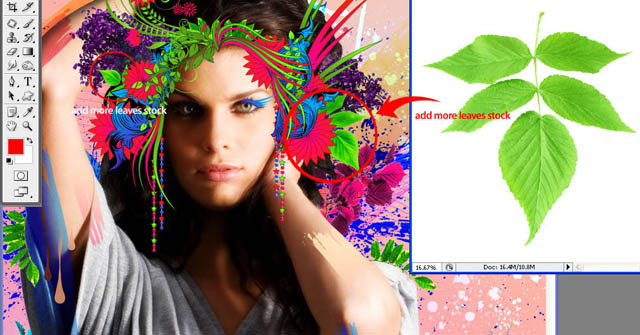
Add more leaves stock, open leaves2.jpg, make a selection and compose them with the other shapes.
Step 40
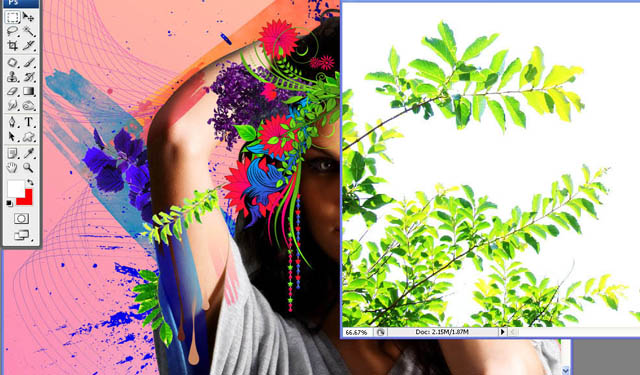
Open leaves4.jpg, try to make a selection of some part of the leaves, rotate and place them on the girl's hand.
Step 41
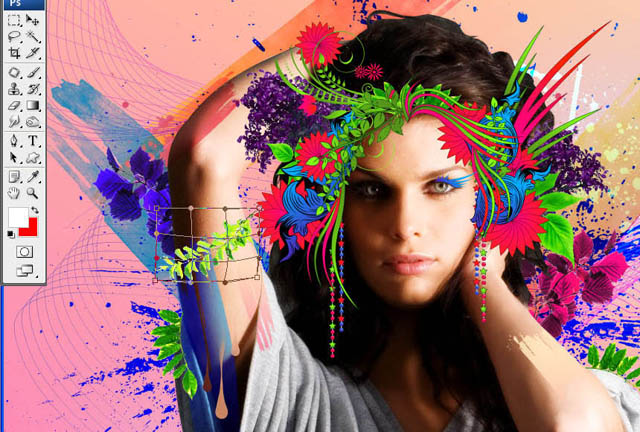
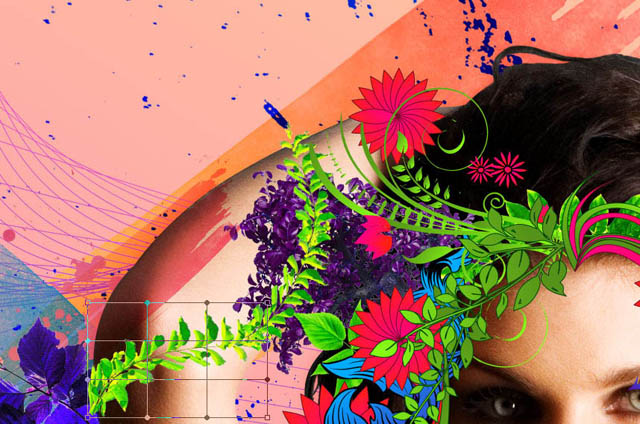
Make sure the leave layer active and go to menu Edit > Transform > Warp. Try to reconstruct the form of the leave, make it like wrapping the girl's hand.
Step 42
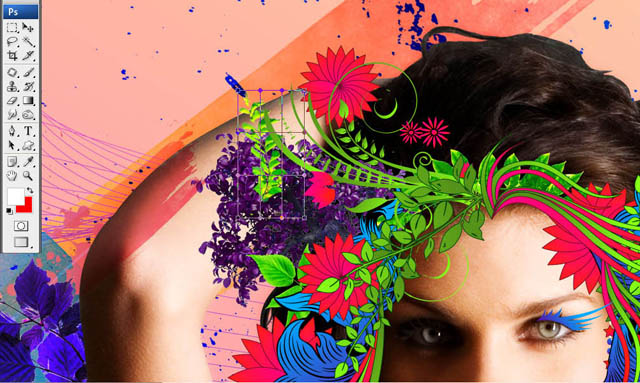
Continue with the other leaves with same step using Warp tool to reconstruct the form.
Step 43
Also try make a duplicate and compose the leaves, make the leaves flow around the girl's hand, you can see on the image below.
About the author
Copyright © . All Rights Reserved
