Creating Jeans Texture and Making Custom Brushes in Photoshop
Hello friends , Now we will create a jeans texture using HALFTONE PATTERN LIQUIFY NOISE and some useful photoshop tools . 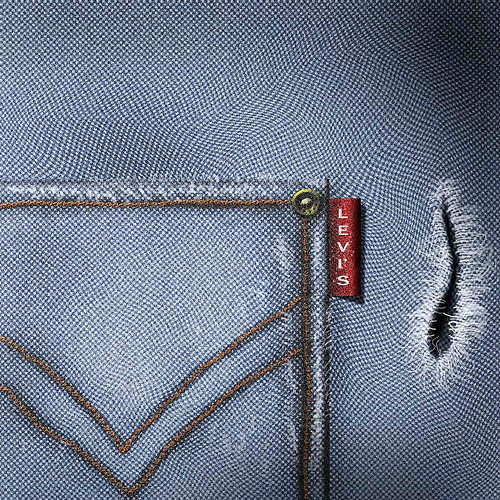
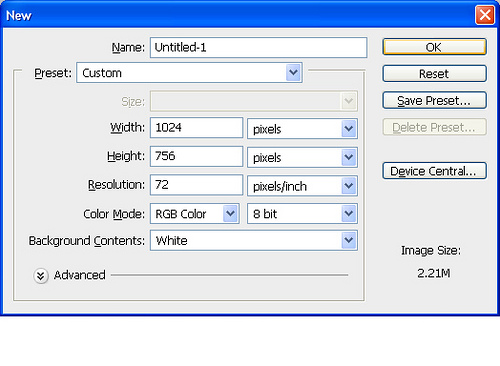
In this tutorial we will also learn to create our custom brushes. STEP 1: Now we shall get started , create a new document
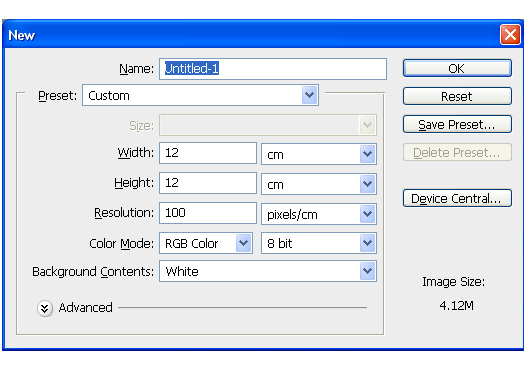
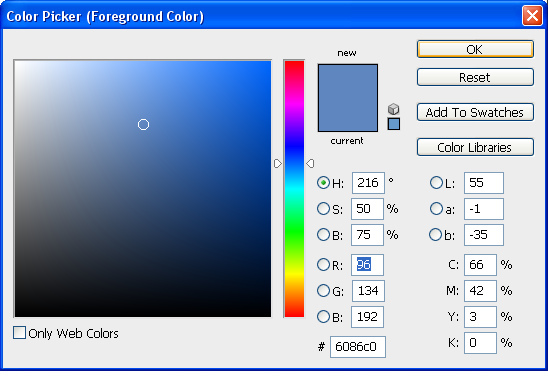
STEP 2: Now fill up stage area with following color ...no
restriction . You can choose your own color of jeans .
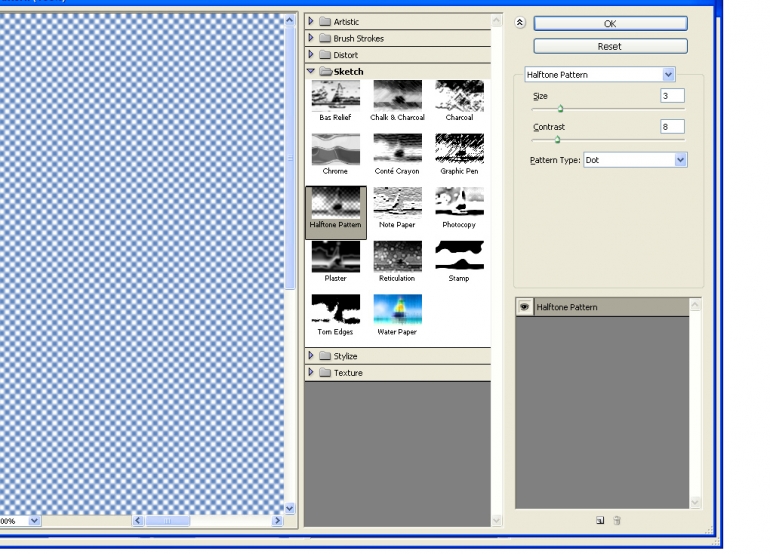
Step 3: Apply texture to our basic fabric color. Go to FILTER>SKETCH>HALFTONE PATTERN. SIZE=3 Contrast=8 Pattern type= dot
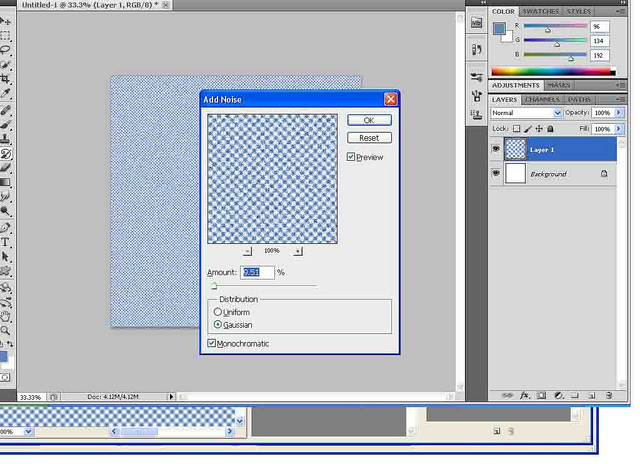
STEP 4: add some noise to texture , it will add some rough look to
fabric . Go to Filter > NOISE> ADD NOISE. Amount= 9.51% GAUSSIAN
MONOCHROMATIC
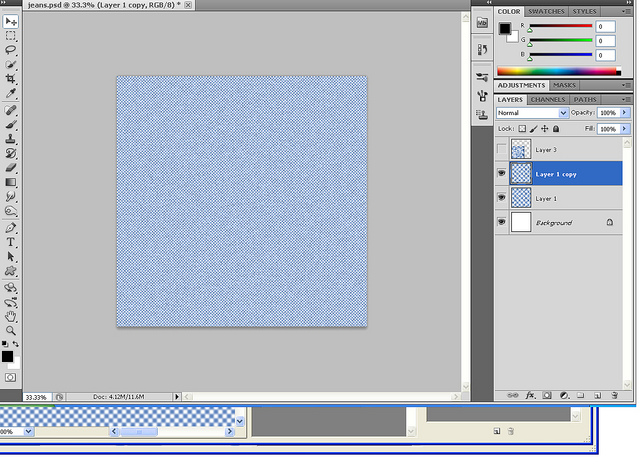
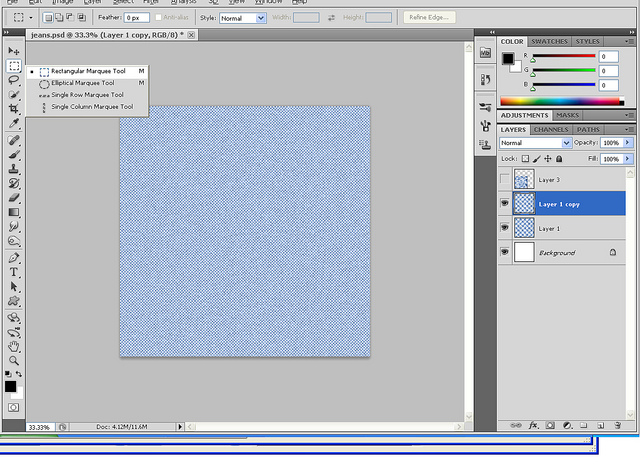
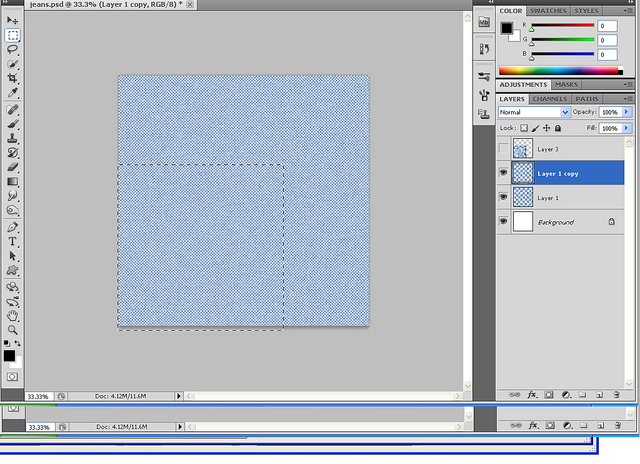
STEP 5: Duplicate the layer and Select rectangular marquee tool(M)
and Select the pocket size selection to duplicate layer . Then press
Ctrl+shift+j , this will subtract your selection to new layer .
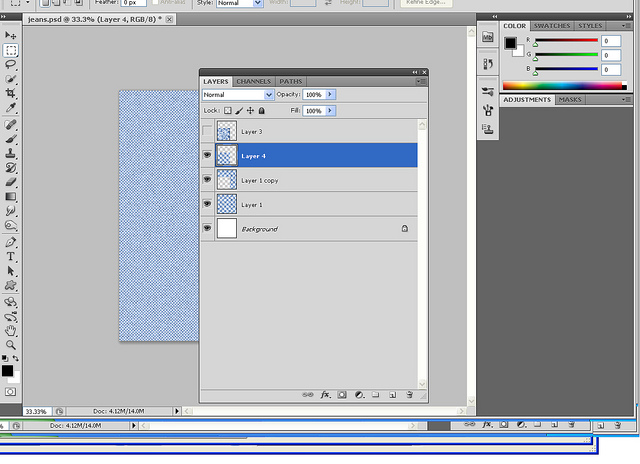
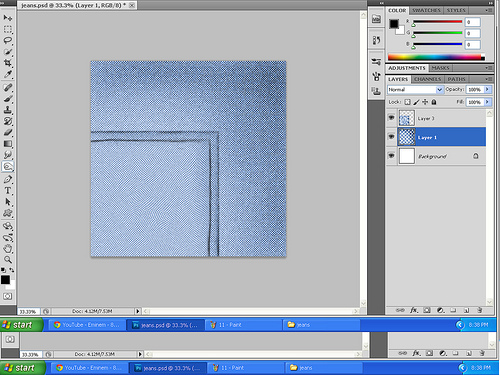
STEP 6: Now pick up soft brush tool and paint some depth to pocket layer . AS shown in pic below
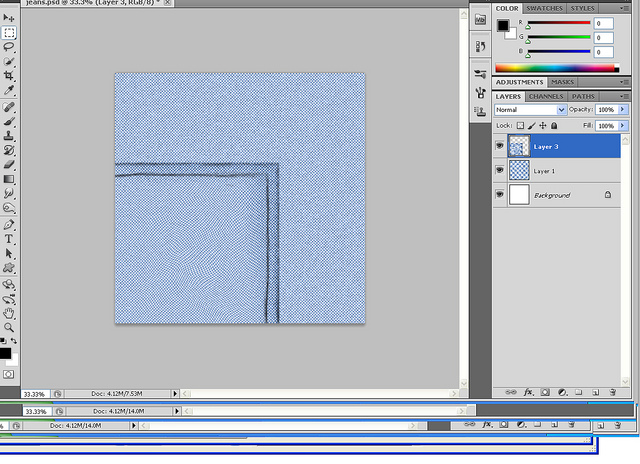
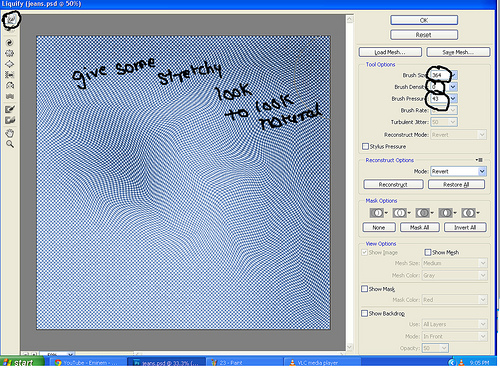
STEP 7: Now warp your pocket layer. Go to FILTER>LIQUIFY. Following pic illustrates how .. 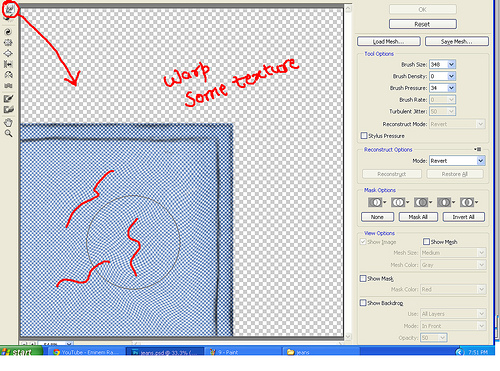
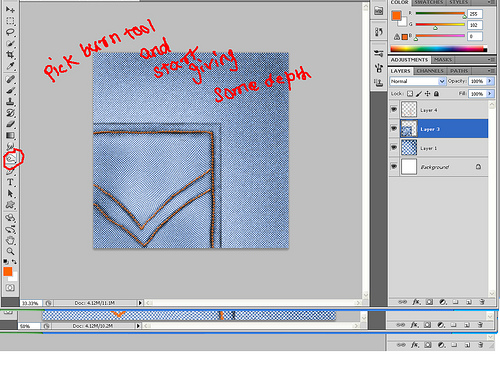
STEP 8: Give some depth/ contrast to base texture layer . Pick up BURN TOOL(O) 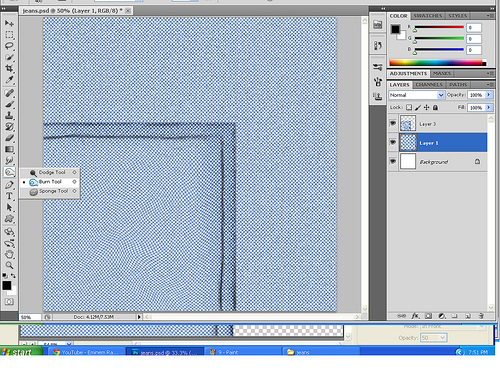
STEP 9: Now we will create a custom brush to create a thread to our jeans to give it look of stitches . Open a new document
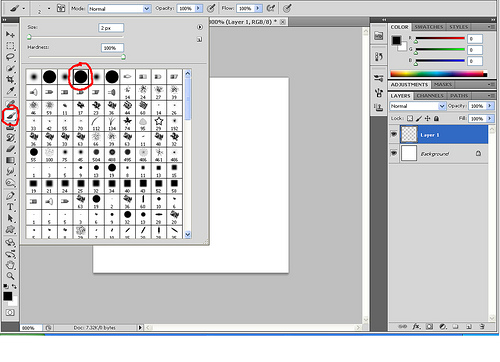
STEP 10: Now pick up hard brush tool and make a new layer . Then draw the shape of thread .
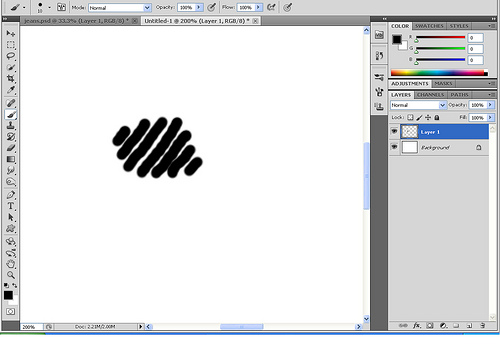
Now press and hold ctrl and click on layer on which you drew the shape , this will create a selection .
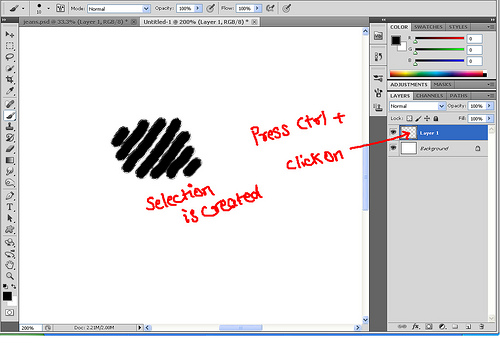
STEP 11: Now time to create custom brush . Go to EDIT> DEFINE BRUSH PRESET. Following window will appear.
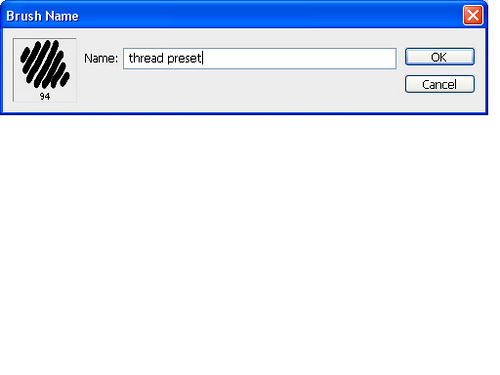
STEP 12: Now your brush is created , go back to your jeans file and
select brush tool , go to edit brush and define following parameters.And
create a new layer after selecting thread brush . Spacing =137%
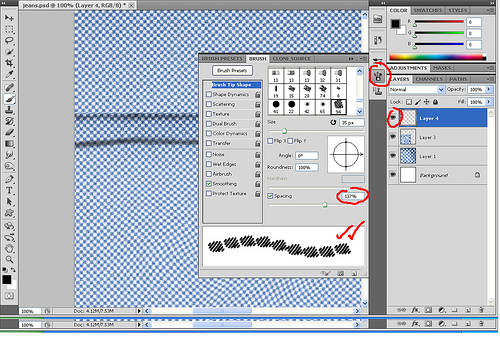
STEP 13: Choose your appropriate color and start drawing your thread in design you want it . Do not forget to adjust the angle of thread direction in edit brush tab .
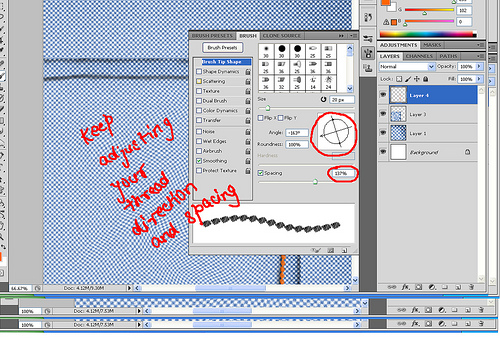
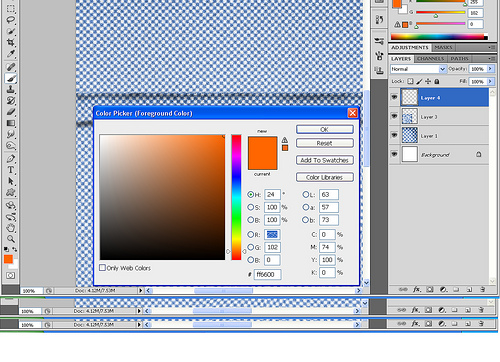

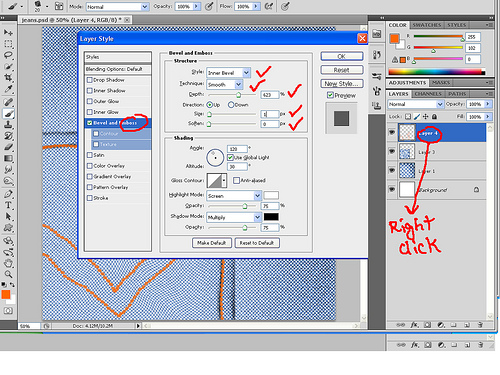
STEP 14: Now apply some blending option to your thread layer . RIGHT
CLICK ON LAYER >BLENDING OPTION . Following window will appear. Make
following changes. Style=Inner bevel Depth=623 Size =1 soft=0
STEP 15: Now pick up burn tool again and give some depth to pocket layer area under thread to give it some feeling of stitches .
STEP 15: Give some stretchy look to base jeans fabric by using liquify . Bush pressure=43 Size=364
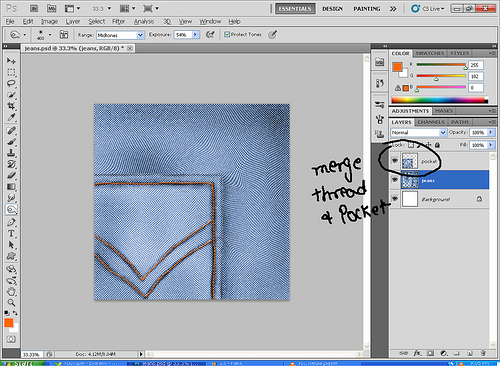
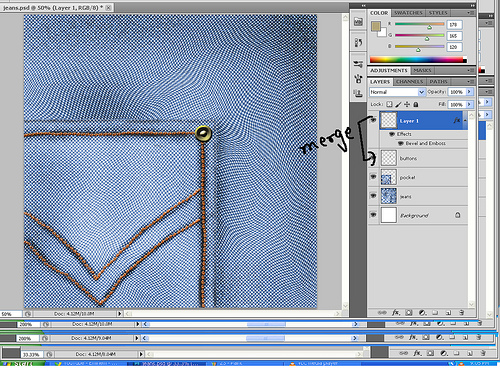
STEP 16: Now merge the thread layer and pocket layer.
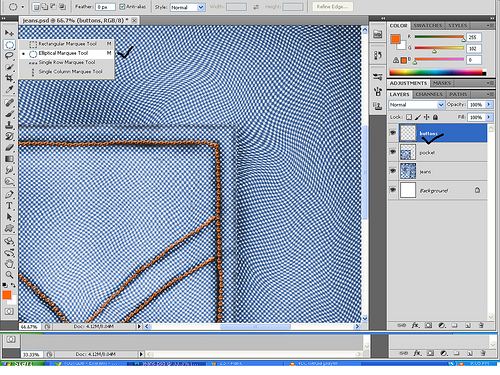
STEP 17: Make a new layer for button . Select Elliptical marquee tool (O)
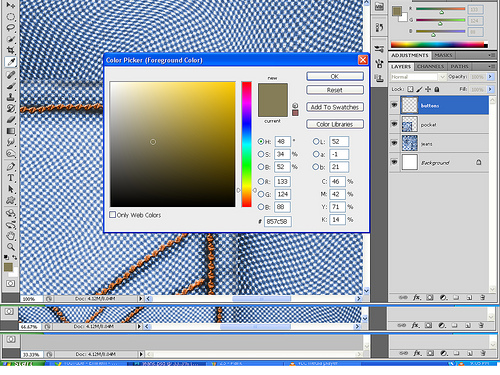
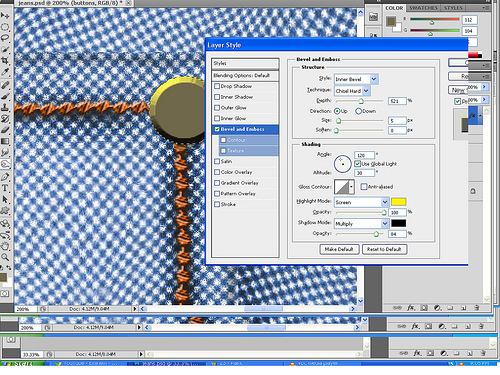
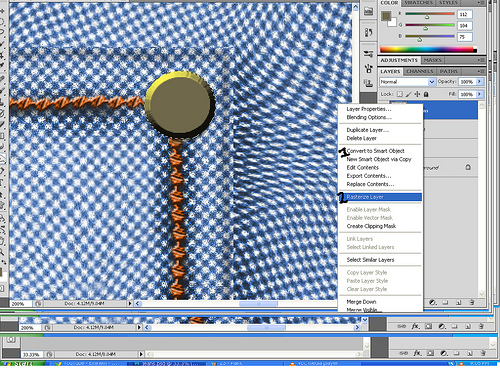
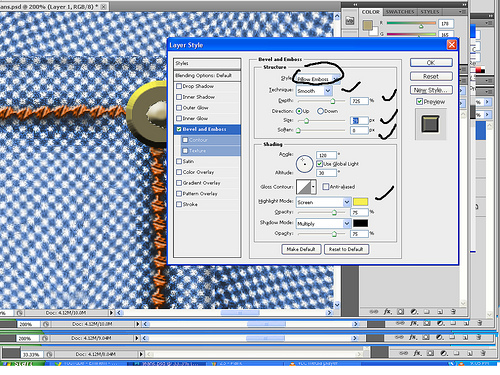
STEP 18: Fill the layer and apply blending option to it .Then rasterize the layer by right clicking to it . Style= Inner bevel Technique=chisel hard size=5 soften =0
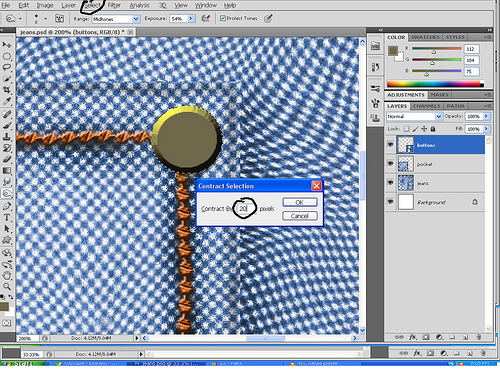
STEP 19 : Now go to SELECT> MODIFY >CONTRACT. Give the value 20
. And fill it with same color as of base button on new layer, then
apply blending option again . Style= Inner bevel technique=smooth
depth=325 size=9 soften=0
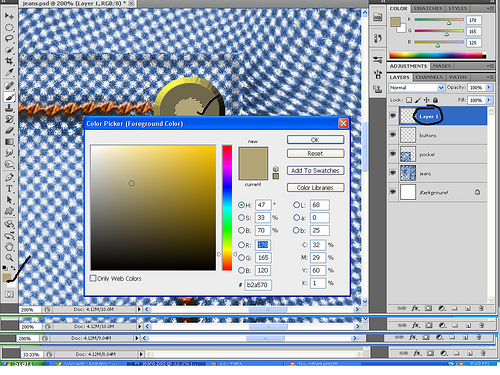
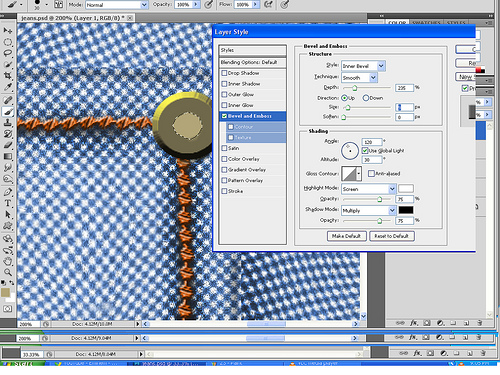
STEP 20 : Rasterize the layer again and apply blending option again
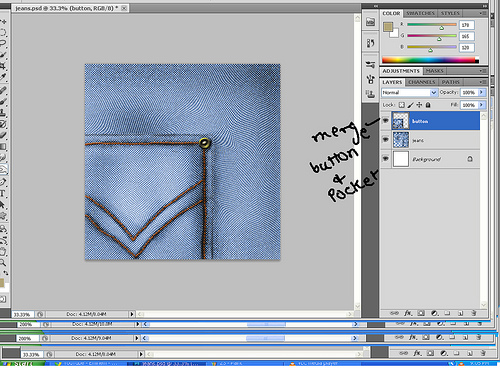
.Then merge the button layers .Then atlast , merge button layer and
pocket layer. style=pillow embross technique=smooth depth=725 size=29
soft=0
STEP 21: Make a new layer beneath pocket layer and above base fabric . Choose rectangular marquee tool and Fill it with gradient color .
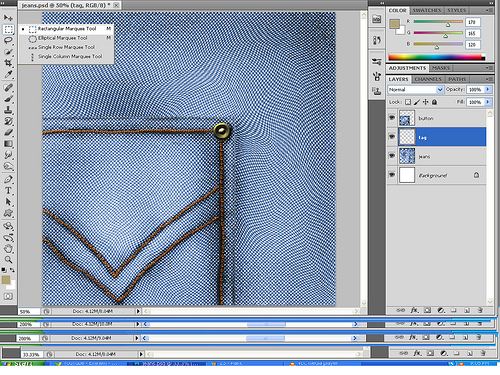
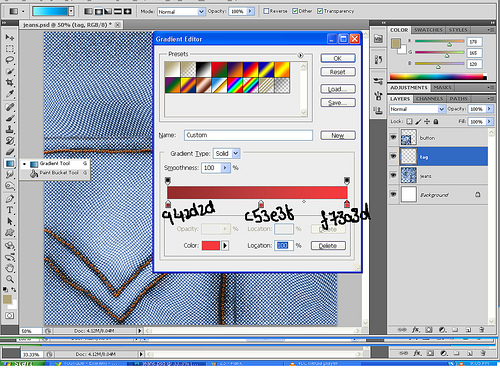
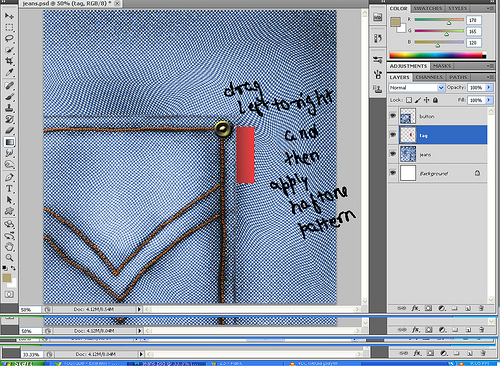
STEP 22 : Apply halftone pattern again on tag layer . Then apply noise .Burn the layer with burn tool near to pocket , to show some depth .
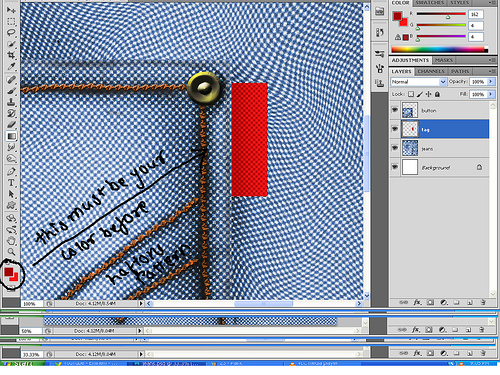
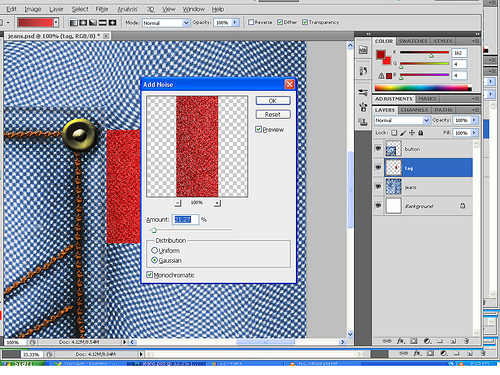
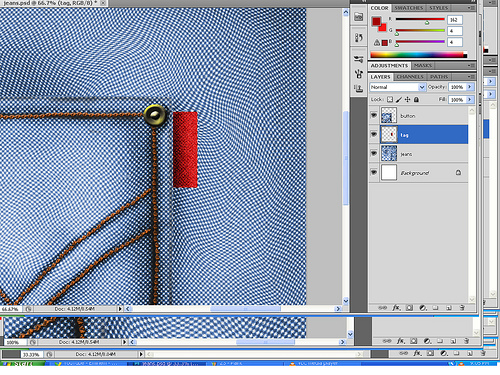
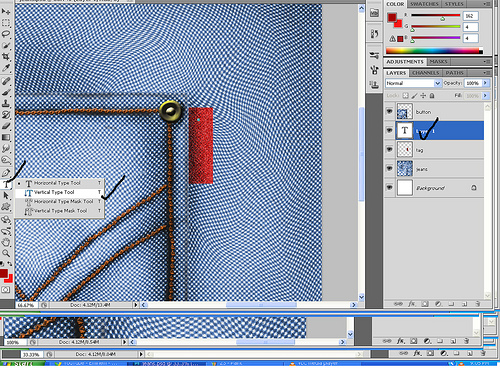
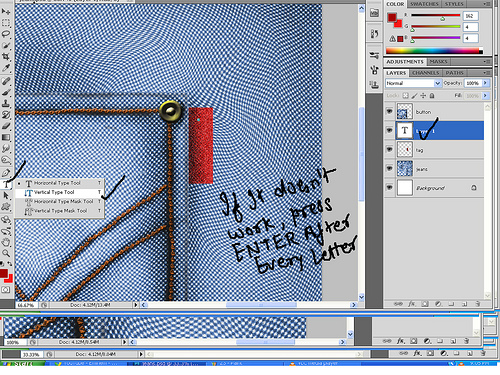
STEP 23 : type some text to your Tag . Then apply some noise ans merge the layer with tag
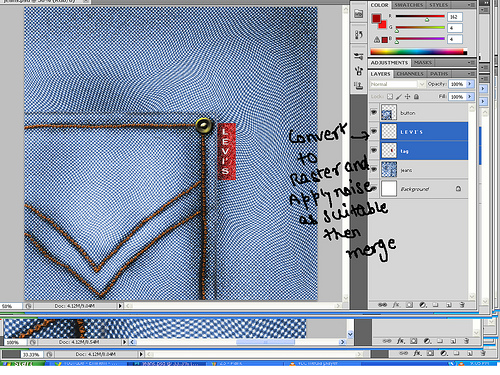
STEP 24 : Apply some depth and shadows to tag layer by selecting
shadow area using polygon lasso tool (L) after making new layer beneath
the tag layer ...then finally merge two layers. 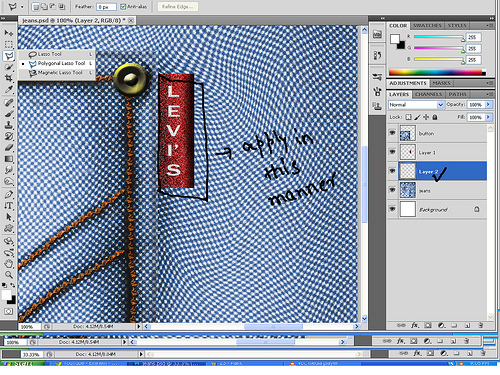
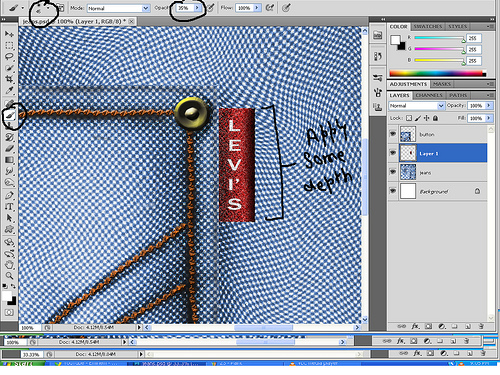
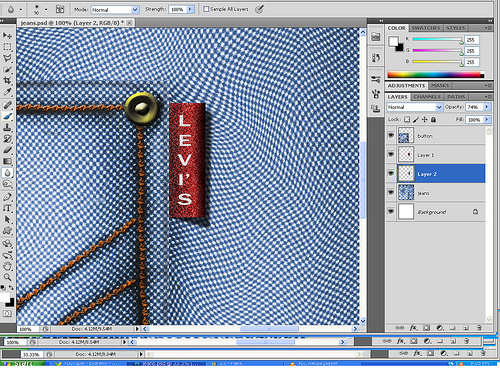
STEP 25: pick up soft brush tool and apply some depth to pocket layer so as to give some realistic look .
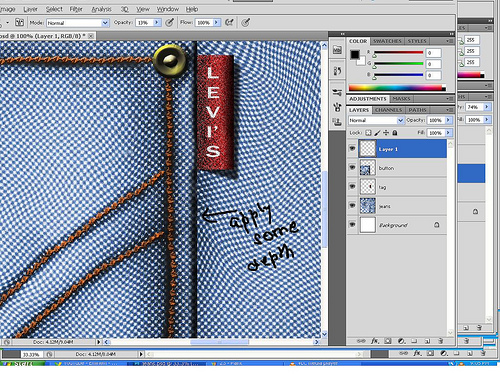
STEP 26 : Now time to add some reality through torn off threads from fabric . Pick up custom brush or u can create some as guided above . Make a new layer above all .
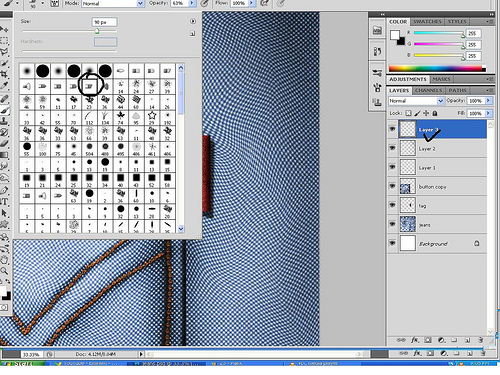
STEP 27 : draw some thread in shown style or your own style as you wish . Then apply some depth using soft brush .
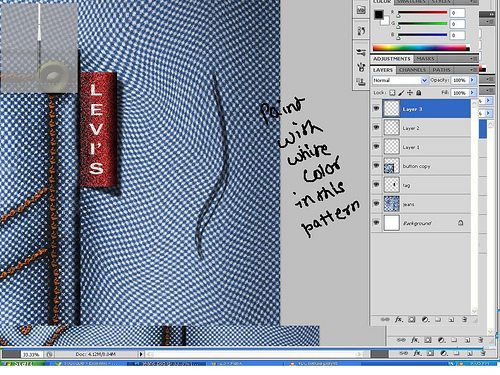
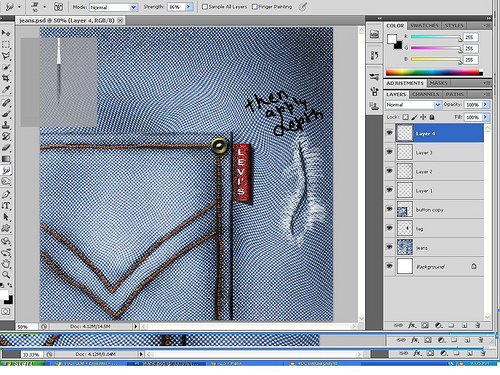
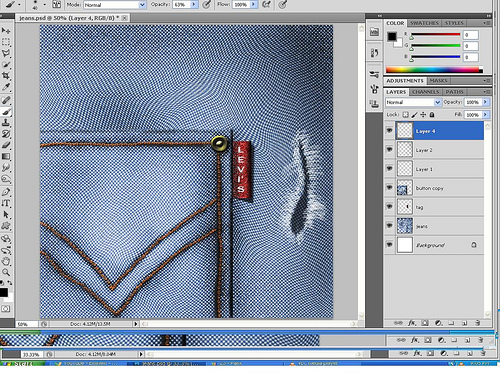
STEP 28 : apply some more threads to rest part ..DON'T ADD TOO MUCH "
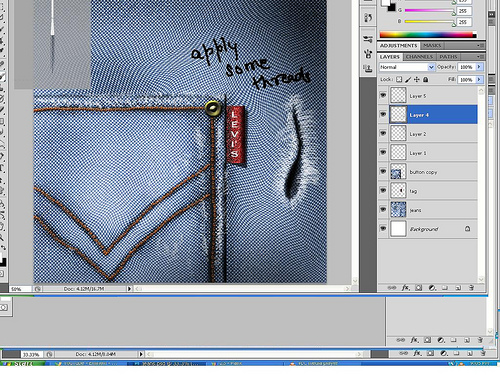
STEP 29 : Apply some more threads and finally add some noise to fabric layers .
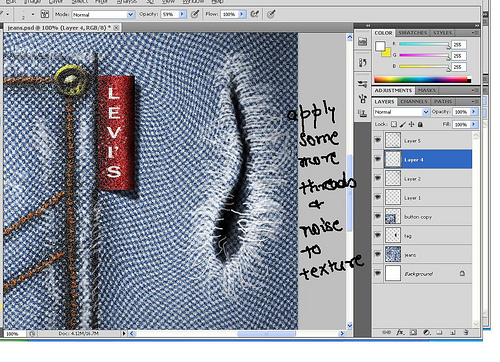
STEP 30 : Pick soft brush tool and black color and apply some depth to give it realism

SO YOU HAVE DONE WITH IT !! ..Hope you liked it and got introduced some powerful function of Photoshop . Bye till next tut . ENJOY YOUR CREATIVITY
Copyright © . All Rights Reserved