How to use gradient tool
Step 1: Open your Illustrator program and create new document. Set Size: Custom, Units: Pixels, Width: 500, Height: 500 and Color Mode: RGB.
Step 2: Click the Type Tool or press T and type anything on the artboard. Right click to the text and set Font: Verdana Bold, Size: 48. It should be look something like below:-
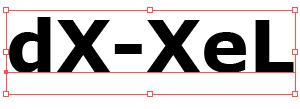
Note: I will use a text as an example in this tutorial instead of rectangle or any shape. Once you can apply this effect on text, it will get easier for you to apply it on any shapes. (the text was zoom at 150%)
Step 3: While the text is still on selected, go to Object > Expand Keep the Object and Fill checkbox in checked and click Ok.
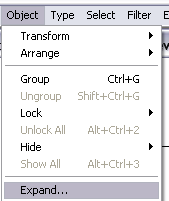
You'll get something like below:

Step 4: Ok, now go to Swatches palette (Window>Swatches) and apply the gradient effect to the text.
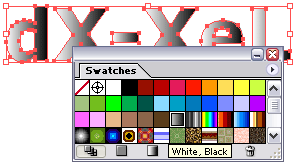
Wow, it's really great. Is that all? Of course not. We gonna change that default white, black color to another color. Ok, let's go to the next step.
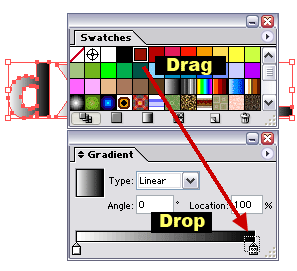
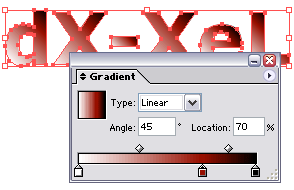
Step 5: While the gradient text is still on selected and the Swatches palette is still on the artboard, open the Gradient palette (Window>Gradient or F9). Drag the red color from the Swatches palette (or any color) and drop it to the 2nd gradient slider (the one that have black in color). See image below:-
Set the Angle: 45 and you should have some thing like below:

If you drag the red color and drop it beside the 2nd gradient slider (the black one) you'll get something like below:-
Note:
1. Location: 70% is the location of the red slider or handler. Click to the small triangle-rectangle icon to know the location of the handler.
2. Try to drop more color and see how it looks like. Set the Gradient Type: Radial instead of Linear and move the handler left or right. And try a different angle value.
3. If the color you're looking at is not on the Swatches palette, you have to open the Color palette (Window>Color or F6). For example, if you want to change the black handler to dark blue, click to the black handler. Then manually enter the RGB value in Color palette. E.g R: 0, G:51 and B: 102. You also can use the RGB spectrum below it. For more info about RGB color value, visit RGB Color Chart or RGB Color Codes website.
4. To get rid of the handler that you've just added, just drag it to the bottom of the Gradient palette.
Ok, the next steps are optional. I will show you how to apply gradient effect separately on each character using the Gradient Tool (G).
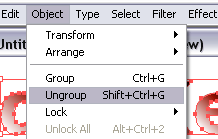
Step 6: Select the gradient text that we have just created. Go to Object>Ungroup (Shift+Ctrl+G).
Step 7: Ok, final step. Click the Selection Tool (or press V) and select any character that you want to make a change. Then, select the Gradient Tool (or press G). Click on the top left of the character (while holding the left mouse click), drag it to the center middle and release the mouse click. You should have something like below:-

Try to apply it to another character and use a different direction. Finally apply some drop shadow (Effect>Stylize >Drop Shadow ) to the gradient text or anything you want. DONE.
This is my final outcome:

Maybe next time I'll show you how to create a wave effect on text using Illustrator. Hehe..
Copyright © . All Rights Reserved