Step1:
First open adobe create a new image about 800 x 600; and change the background color to white. Press ALT+CTRL+0 to view the actual pixel of your work area. Create a new layer, Layer > New > Layer... (Shift+CTRL+N) and name it MENU. Now Click on the Rectangular Marquee Tool
![]() and add the setting below.
and add the setting below.
![]()
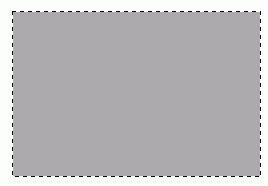
Create a rectangle using the dimensions above in your work area and fill the rectangle using the Paint Bucket
![]() with a gray color #aaaaaa. At this point, you should have the image below on a new layer.
with a gray color #aaaaaa. At this point, you should have the image below on a new layer.
Step2:
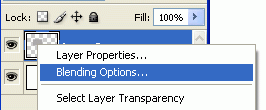
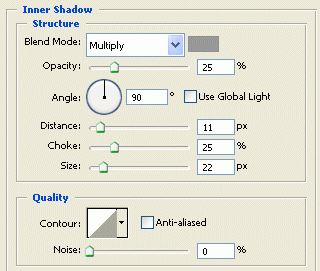
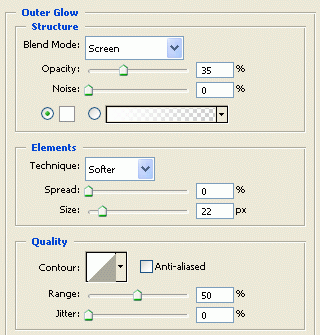
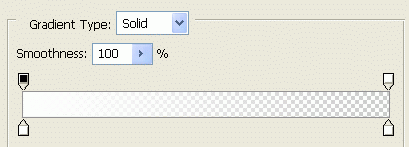
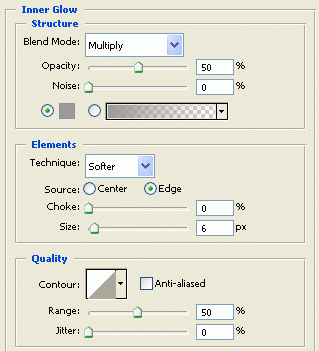
We need to add some blending option to the rectangle layer. Right click on the Layer and click Blending Option as shown below.
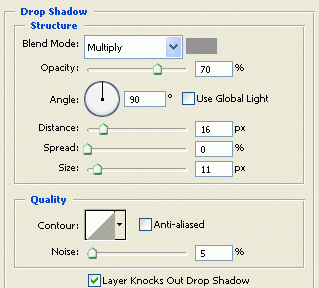
Now add the settings shown below.
Drop Shadow
Inner Shadow
Outer Glow
Outer Glow Gradient
Inner Glow
Inner Glow Gradient
Color Overlay #f7f7f7
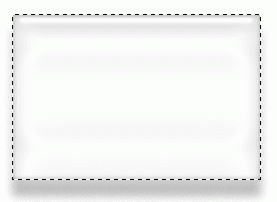
With the Blending Options added, you should have something like the image below.

Step3:
Still on the layer, you just added the Blending Option to, hold ctrl and click on the layer to select it. When it is selected, it will look like the image below.
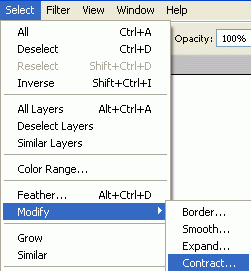
With the layer still selected click on Select > Modify > Contact, and change the contact to 6 Pixels.
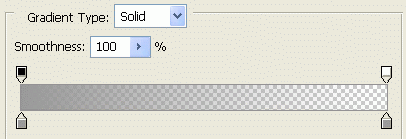
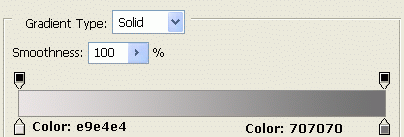
Now create a new layer, Layer > New > Layer... (Shift+CTRL+N) Name it Gradient. In addition, fill that selection with a gray color #aaaaaa. Click on the Gradient Tool
![]() and add the setting below.
and add the setting below.
![]()
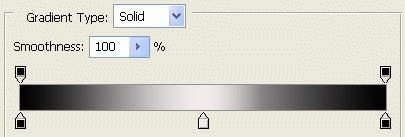
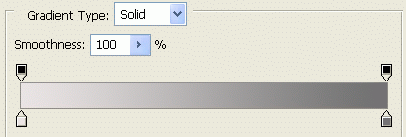
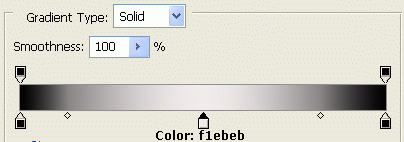
Gradient Setting (Double click on the gradient to get the window below)
Gradient Type
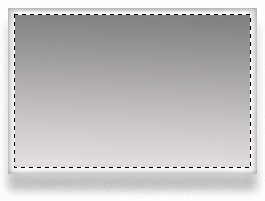
Hold CTRL and click on the layer you just created to select it. Create a gradient going from the bottom to top of your image as shown below.

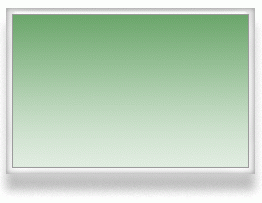
With that gradient added, you should have some thing as I have below.
Tip: Still on the same layer click Image > Adjustments > Hue/Saturation click colorize when the window comes and you can change the color of the gradient. You can come up with some nice color ranges.
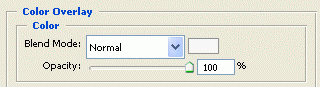
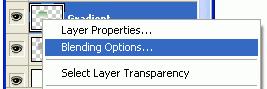
Still on the "Gradient" Layer right click on it and click Blending Option As shown below.
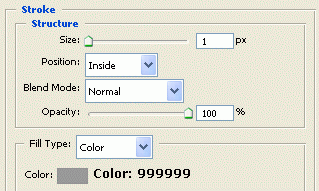
Add a Stroke to this layer using the setting shown below.
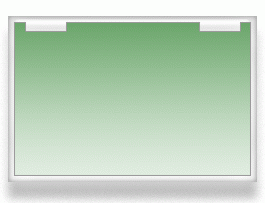
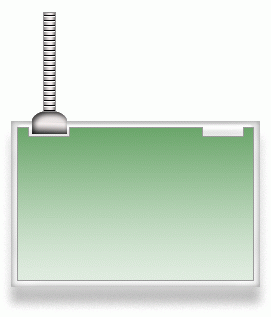
At this point, your menu should look like my image below.
Step4:
Click on the Rectangular Marquee Tool
![]() and add the setting below.
and add the setting below.
![]()
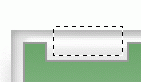
Still on the gradient layer, subtract from your layer so your image will look like the screenshot shown below.
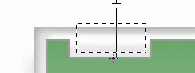
Now create a new layer, Layer > New > Layer... (Shift+CTRL+N) and Name it Hang. Create a rectangle in the cutout as shown in the image below.
Click on the Gradient Tool
![]() and create the gradient below.
and create the gradient below.
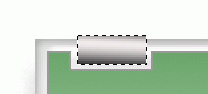
Now using the gradient you just created. Create a gradient using the rectangular selection going from the top to bottom as shown in the image below.
Gradient Direction
Gradient Result
Using the Elliptical Marquee Tool
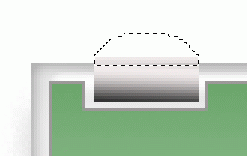
![]() create the oval shown in the image below.
create the oval shown in the image below.
Create a new layer name it Oval and fill the Oval using the gradient setting below. Your Gradient should go from the top to bottom.
![]()
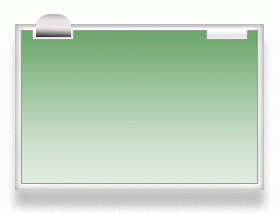
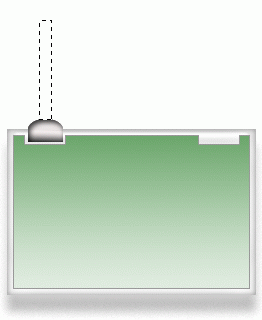
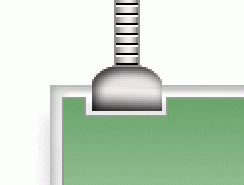
At this, time your image should look like the screen shot below.
Step5:
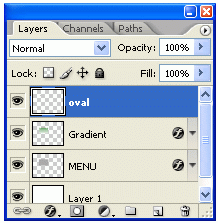
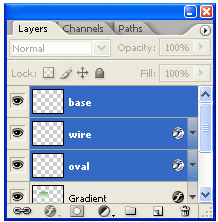
Click on the Oval and Hung layers and press CTRL+E to merge them as shown in the image below.
Selecting Layers
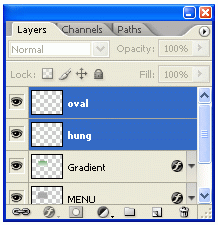
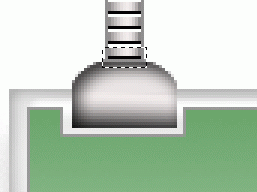
Merged Layers
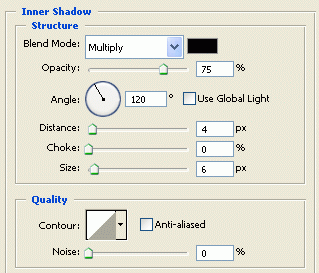
Now right click on the Oval Layer and click Blending Options, and add the setting below.
Now create a new layer, Layer > New > Layer... (Shift+CTRL+N) and Name it bar. Click on the Rectangular Tool
![]() and add the setting shown below.
and add the setting shown below.
![]()
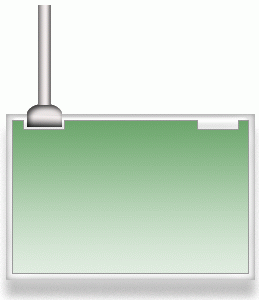
At this point, you should have something like the image below.
Click on the Gradient Tool
![]() and create the gradient below.
and create the gradient below.
Select the Reflected Gradient as shown in the image below.
![]()
Create a Gradient going from Right to Left as shown in the image.

By doing that, it should give you the effect below.
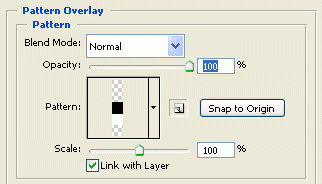
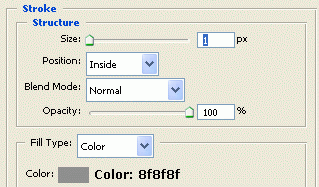
Now right click on the bar Layer and click Blending Options. Click here to download the pattern. In addition enter the setting below.
Pattern Overlay
Stroke
At this point, your image should look like the picture below.
Step6:
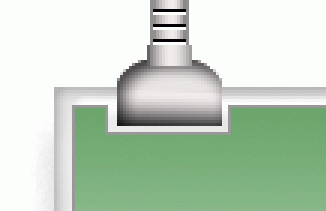
Now click on the Zoom Tool and zoom into the box as shown below.
Click on the Rectangular Marquee Tool and draw a rectangle at the base of the wire as shown below.
Now create a new layer,(Shift+CTRL+N) and Name it Base. Click on the Gradient tool, Using the Gradient below create a gradient going from left to right.
With that, you should have some thing like the image below.
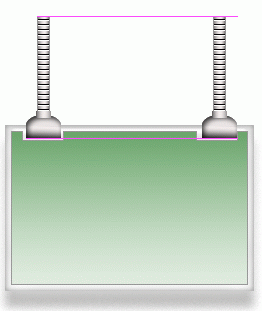
Now simply duplicate the, Base, Oval and Wire layers and move it over to the other site of the menu.
Hold CRTL and click to select
Click Layer> Duplicate Layers
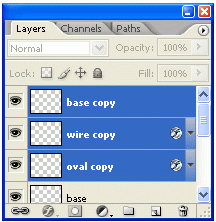
With the layers still selected click on the Move Tool
![]() and drag the object to the other side as shown in the image below.
and drag the object to the other side as shown in the image below.
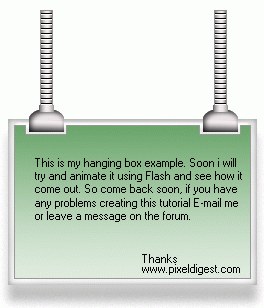
Step7:
Well that is it. Hope it came out to what you expected.