Step1: Creating the Main Shape.
Create a new image using the dimension 800 x 600. Set the background color to white. You can change the background depending on you web site color. Create a new layer, Layer > New > Layer... (Shift+Ctrl+N). I created this shape using the Pen Tool
![]() if you can use this tool feel free to draw the shape above or you can click here, download the shape, and import it into Photoshop. With the shape imported into Photoshop, Click on the Custom Shape Tool
if you can use this tool feel free to draw the shape above or you can click here, download the shape, and import it into Photoshop. With the shape imported into Photoshop, Click on the Custom Shape Tool
![]() and select the image below.
and select the image below.

Step2: Adding Blending Options
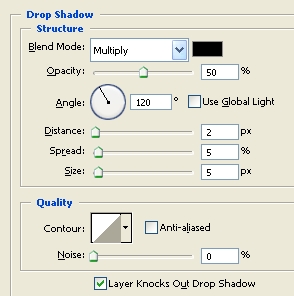
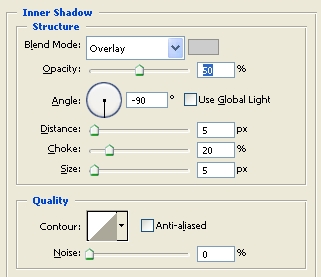
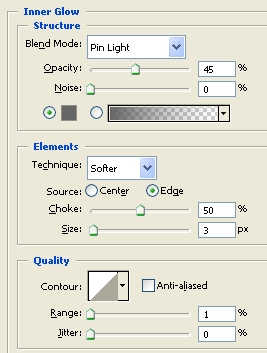
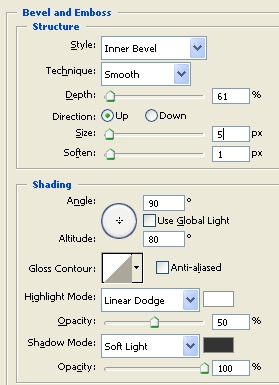
Right click on the shape layer, click Blending Options, add the settings shown below.
Drop Shadow
Inner Shadow
Blend Mode color: cccccc
Inner Glow
Color: 666666
Bevel and Emboss
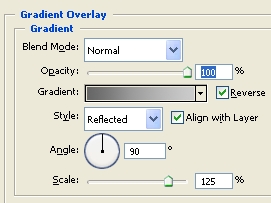
Gradient Overlay
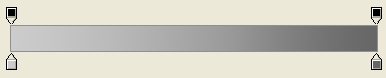
Color: #cccccc ----- Color: # 666666
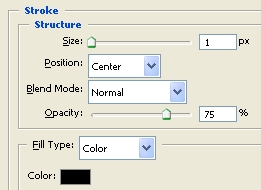
Stroke
Click ok when you added the setting.
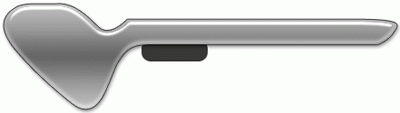
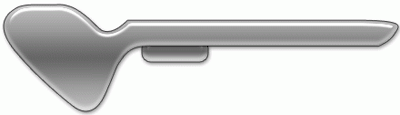
With that, you should have the effect below.

Step3: Adding the buttons.
Create a new layer, Layer > New > Layer... (Shift+Ctrl+N).
Now click on the Rounded Rectangular tool (U)
![]() and create a rounded rectangle with the setting I have below.
and create a rounded rectangle with the setting I have below.
![]()
Create the button shown below, and move the button layer under the main shape layer.
![]()
With that, you should have the effect below.
Step3: Adding the blending options to the buttons.
Right click on the button layer, click Blending Options, and add the settings shown below. (The blending option is the same as the above layer)
Drop Shadow
Inner Shadow
Blend Mode color: cccccc
Inner Glow
Color: 666666
Bevel and Emboss
Gradient Overlay
Color: #cccccc ------ Color: # 666666
Stroke
Click ok when you added the setting.
With that, you should have the effect below.
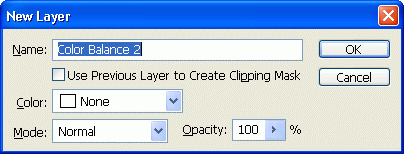
Step4: Changing the color to match your site.
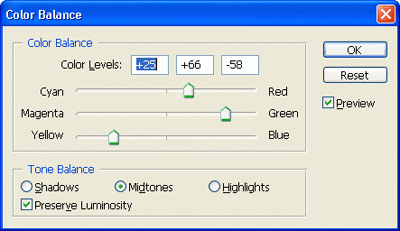
Create a new layer, Layer > New > Layer... (Shift+Ctrl+N). Above all the layers click Layer > New Adjustment Layer > Color Balance. When the window below comes up click ok.
Play around with the different colors to get the color you like.
Finished:
Well that is it, hope it came out to what you expected.