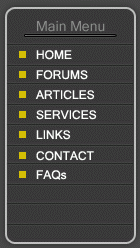
In this tutorial, I will teach you how to create the navigation menu above.
Step1: Learning how to create a simple navigation menu.
Ok, let us get started. Create a new image using the dimension 800 x 600. Set the background color to white. You can change the background depending on you web site color. Create a new layer, Layer > New > Layer... (Shift+Ctrl+N). Using the Rounded Rectangle Tool
![]() create a rectangle using the dimensions below. Change the foreground color to #d8d8d8
create a rectangle using the dimensions below. Change the foreground color to #d8d8d8
![]()
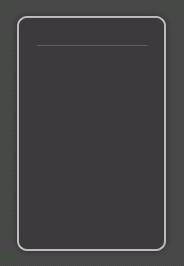
With that, you should have the effect below.

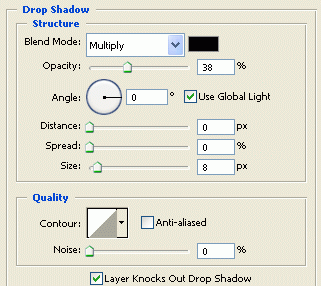
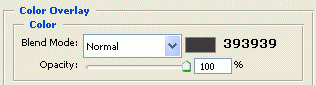
Right click on the rectangle layer and click Blending Options. Now add the Blending Options setting below.
Drop Shadow
Color Overlay
Stroke
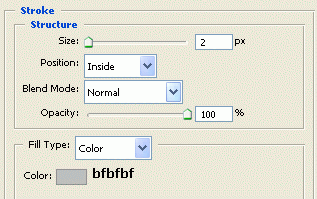
Click ok when you have added the setting. With that, you should have the effect below.

Create a new layer, Layer > New > Layer... (Shift+Ctrl+N). Click on the Line Tool
![]() change the foreground color to #666666
change the foreground color to #666666
![]()
Using the setting, draw a line as shown below.
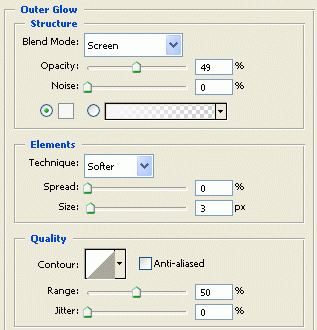
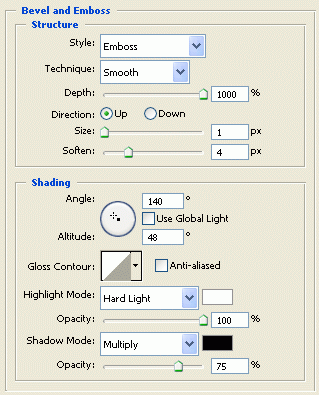
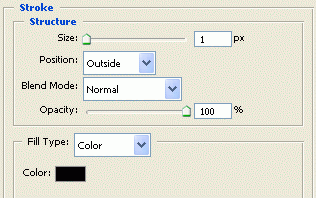
Right click on the line layer and click Blending Options. Now add the Blending Options setting below.
Outer Glow
Bevel and Emboss
Stroke
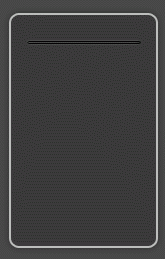
Click ok when you have added the setting. With that, you should have the effect below.
Now we need to create the lines to separate the text. Create a new layer, Layer > New > Layer... (Shift+Ctrl+N).
Click on the Line Tool
![]() change the foreground color to #424242, and draw a line going from one end to the other as shown below. Draw two more lines, the second line with #292929, and the third line with #424242
change the foreground color to #424242, and draw a line going from one end to the other as shown below. Draw two more lines, the second line with #292929, and the third line with #424242

with that you should have the effect below.

Finished:
Well that is it, hope it came out to what you expected.