

This tutorial will show you how to create the Minimize, Restore and Close icons in Windows XP.

Note: You don't have to create the exact same thing as me. Experiment with different colors, icon images, etc.
Step 1
To begin, select the Rounded Rectangle tool. Set the radius to 4px and then draw something like

Step 2
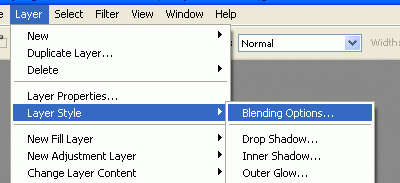
After that click on Layer/Layer Style/Blending Options as shown in the image:
Step 3
Apply the following styles:
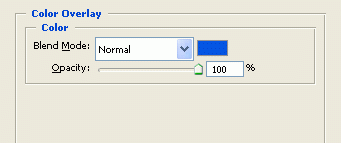
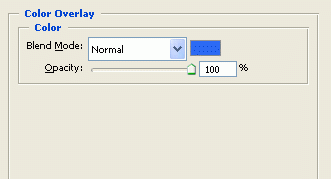
1. Color Overlay:
2. Stroke:

And it will look like:

Step 4
Again, select the Rounded Rectangle tool and draw another one at the center of the one we made before:

Step 5
Follow step 2 and apply the following styles:
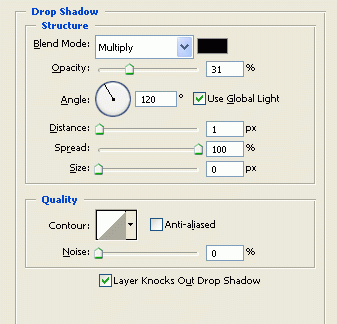
1. Drop Shadow:
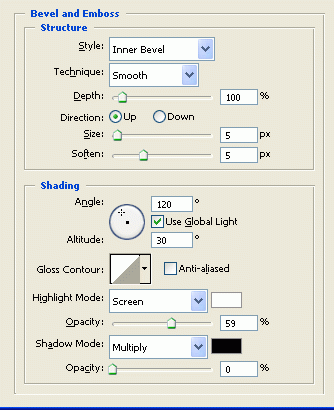
2. Bevel and Emboss:
3. Color Overlay:
And now you will get it as the XP Minimize Icon:

Completed
Simply add the Minimize and Maximize icons by screenshoting them and pasting them in. For the Close icon, change the color from Blue to Red. Result is shown below: