Create a new document of dimensions 300 x 300 px with black (#000) Background.
Select the Rectangular Marquee Tool (M)
![]() and make a selection like this. Create a new layer.
and make a selection like this. Create a new layer.
![]()
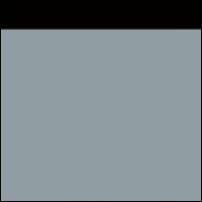
Set the foreground color to #909ea3, then press Alt + Backspace to fill the box. Name the layer as Box. Press Ctrl + D.
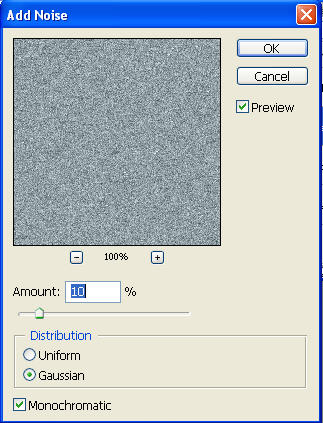
Go to Filter > Noise > Add Noise and give a 10% noise, Gaussian monochromatic.

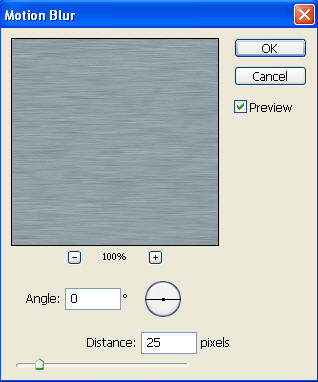
Now go to Filter > Blur > Motion blur and apply a Motion bur with this values: angle 0 and Distance 25 pixels.
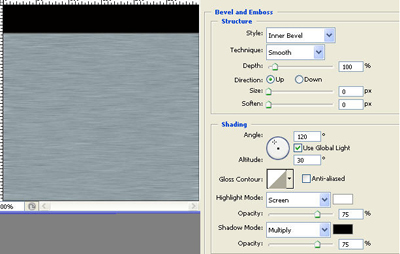
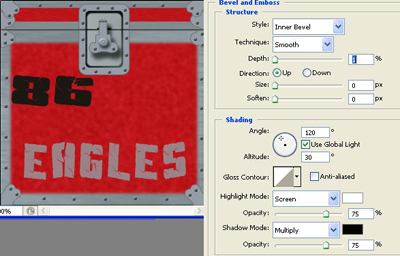
Double click on the Box layer in the layers palette. In the layer style window select the Bevel and Emboss option. Set the Style to Inner Bevel, Depth 100%, Angle 120 and altitude 30.
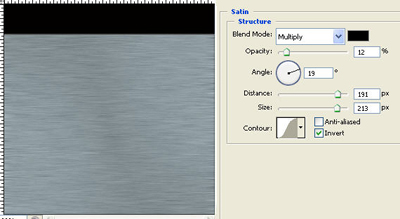
Then select the Satin option. Set the blend mode to Multiply, color #000000, Opacity 12%, angle 19, Distance 191px and seize 213px.
Right click on the Box layer in the layers palette and select Duplicate Layer.
Press Ctrl + T and resize the new layer, place it as shown in the image below and name the new layer as Lid.

Select the Rectangular Marquee Tool (M)
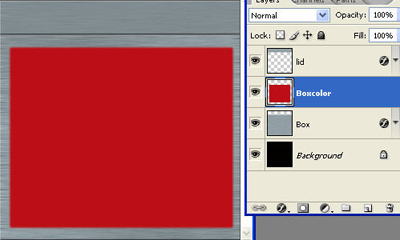
![]() and make a rectangle. Create a new layer.
and make a rectangle. Create a new layer.
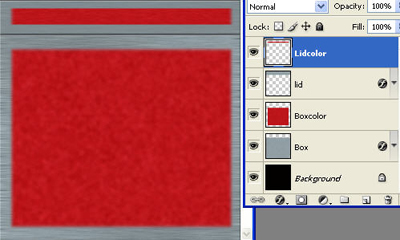
![]() Set the foreground color to c30b17 and press Alt + Backspace to fill the new layer. Name the layer as Boxcolor. Press Ctrl + D.
Set the foreground color to c30b17 and press Alt + Backspace to fill the new layer. Name the layer as Boxcolor. Press Ctrl + D.
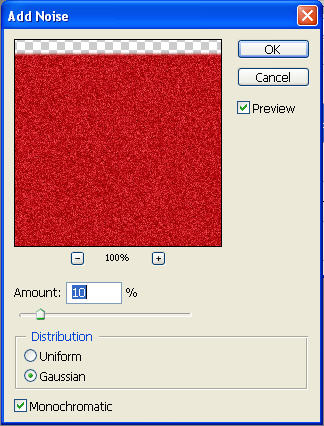
Go to Filter > Noise > Add Noise and give a 10% noise, Gaussian monochromatic.
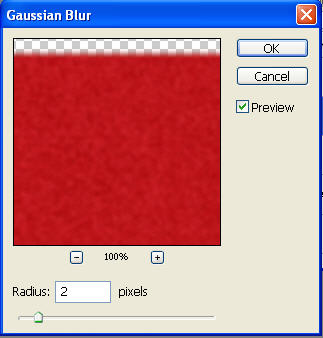
Now go to Filter > Blur > Gaussian blur and apply a Gaussian bur with this values: radius 1.0 pixels.
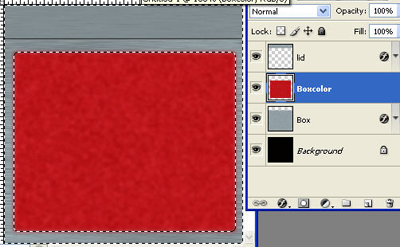
Press Select > Modify > Contract and enter 2px. Then press Ctrl + Shift + I and press Del.
Right click on the Boxcolor layer in the layers palette and select Duplicate Layer.
Press Ctrl + T and resize the new layer. Press Enter twice. Place it as shown in the image below and name the new layer as Lidcolor.
Next select the Text Tool
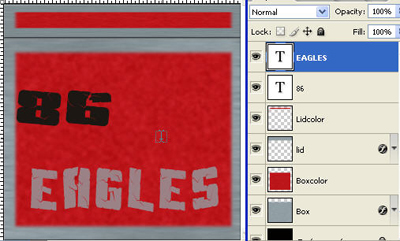
 and type 86 in color #000000 and EAGLES in #9c8186. You can use the font of your choice (I have used the font Aftershock).
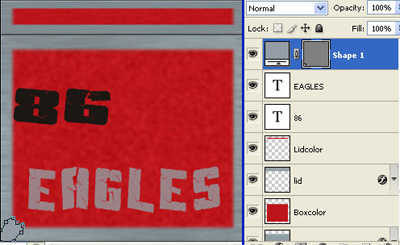
Next we will create angles for the crate. Select the Pen Tool (P)
 and create a shape as shown in the image below. Set the color as #949da6.
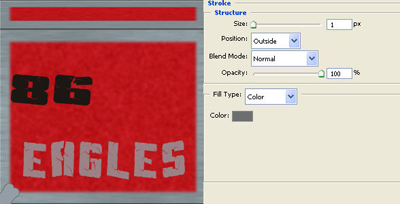
Double click on the shape layer in the layers palette and select the Stroke option. Set the stroke color to #6c6f70, size 1px and position outside. Name this layer Angle1.
Right click on this layer in the layers palette and select Duplicate Layer. Press Ctrl + T and right click on the new layer and select Flip Horizontally. Press Enter twice. Name this layer Angle2 and position it at the bottom right of the box layer.
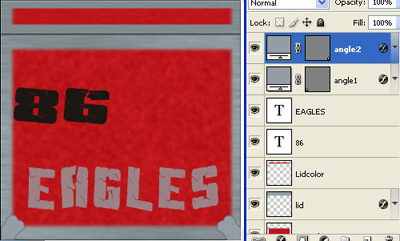
Right click on Angle1 layer in the layers palette and select Duplicate Layer. Press Ctrl + T and right click on the new layer and select Flip Vertically. Press Enter twice. Name this layer Angle3 and position it at the top left of the Lid layer.
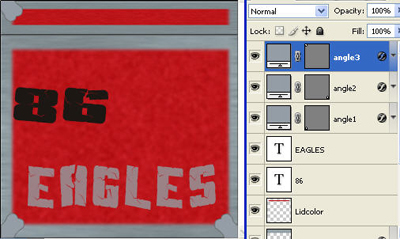
Right click on Angle2 layer in the layers palette and select Duplicate Layer. Press Ctrl + T and right click on the new layer and select Flip Vertically. Press Enter twice. Name this layer Angle4 and position it at top right of the Lid layer.
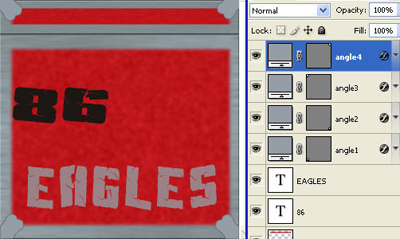
Select the Pen Tool (P)
![]() and create a shape as shown in the image below. Set the color as #949da6. Right click on the Angle1 layer and select Copy Layer Style. Select the Angle5 layer, right click and select Paste Layer style.
and create a shape as shown in the image below. Set the color as #949da6. Right click on the Angle1 layer and select Copy Layer Style. Select the Angle5 layer, right click and select Paste Layer style.
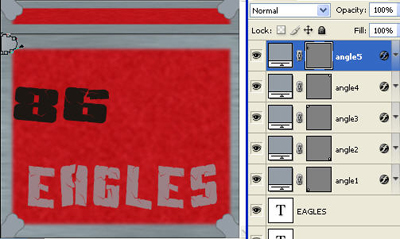
Right click on this layer in the layers palette and select Duplicate Layer. Press Ctrl + T and right click on the new layer and select Flip Horizontally. Press Enter twice. Name this layer Angle6 and position it at the top right of the box layer.
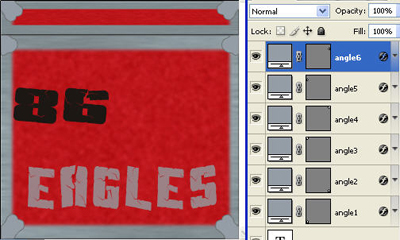
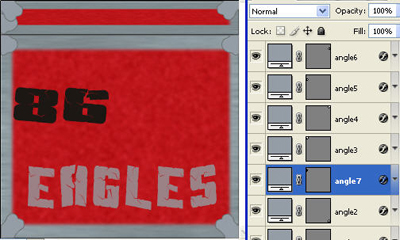
Right click on Angle5 layer in the layers palette and select Duplicate Layer. Press Ctrl + T and right click on the new layer and select Flip Vertically. Press Enter twice. Name this layer Angle7 and position it at the bottom left of the Lid layer below the Angle3 layer.
Right click on Angle6 layer in the layers palette and select Duplicate Layer. Press Ctrl + T and right click on the new layer and select Flip Vertically. Press Enter twice. Name this layer Angle8 and position at the bottom right of the Lid layer below the Angle4 layer.

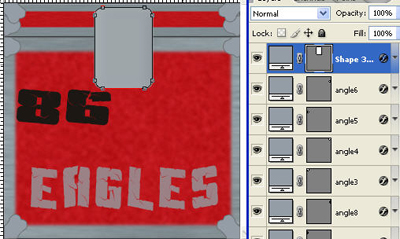
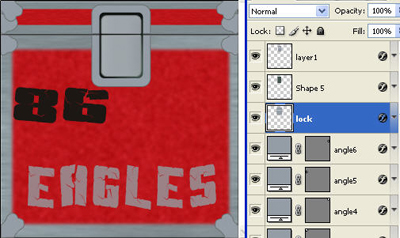
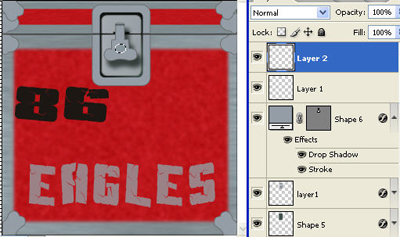
We will now create the lock for the crate. Select the Pen Tool (P)
![]() and create a shape as shown in the image below. Set the color as #949da6. Right click on this layer in the layers palette and select Paste Layer Style.
and create a shape as shown in the image below. Set the color as #949da6. Right click on this layer in the layers palette and select Paste Layer Style.
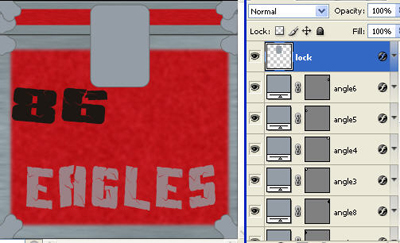
Right click on this layer in the layers palette and select Rasterize Layer. Name the layer as Lock.
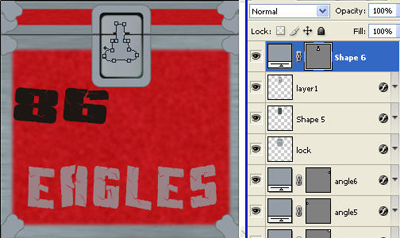
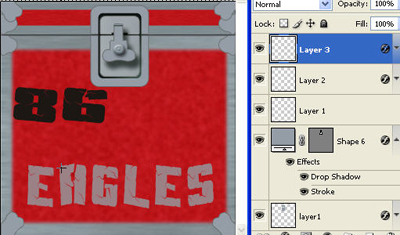
Select the Pen Tool (P)
![]() and create a shape as shown in the image below. Set the color as # 1e2823.
and create a shape as shown in the image below. Set the color as # 1e2823.
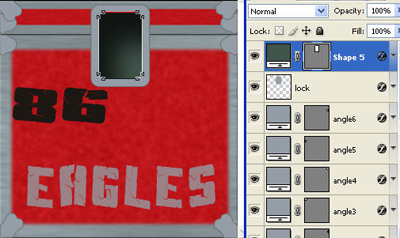
Right click on the new layer and select Rasterize layer. Press Ctrl and click on the new layer in the layers palette to load the selection.
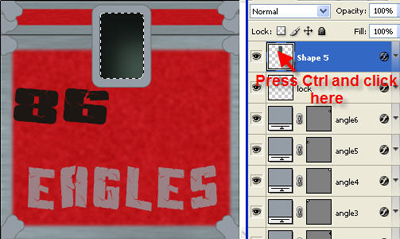
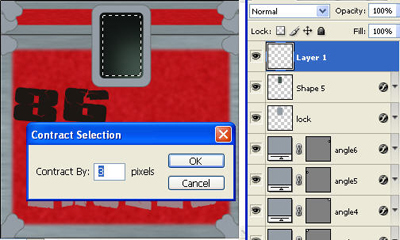
Go to Select > Modify > Contract and enter 3 pixels.
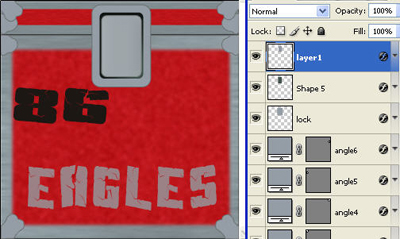
Create a new layer
![]() . Set the foreground color to # 949da6 and press Alt + Backspace to fill the new layer.
. Set the foreground color to # 949da6 and press Alt + Backspace to fill the new layer.
Select the Rectangular Marquee Tool (M)
 and draw a rectangle as shown below. Select the layer1 and press Del and then select Lock layer and press Del. Press Ctrl + D.

Your design should resemble the image shown below:
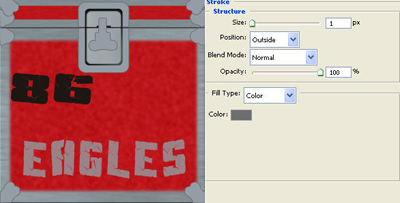
Again select the Pen Tool (P)
![]() and create a shape as shown in the image below. Set the color as # 1e2823.
and create a shape as shown in the image below. Set the color as # 1e2823.
Double click on the new layer in the layers palette. In the layer style window select the stroke option. Set the stroke color to 6c6f70, size 1px and position outside.
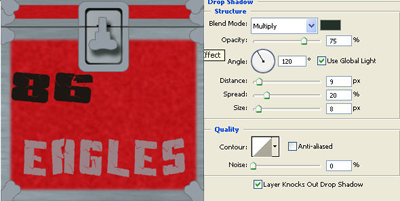
Then select the Drop shadow style. Set the shadow color to #000000, distance 9px, spread 20px and size 8px. Click Ok.
Select the Elliptical Marquee Tool (M)
![]() and create a small circle as shown below. Create a new layer and press Alt + Backspace to fill the circle with the foreground color. Press Ctrl + D.
and create a small circle as shown below. Create a new layer and press Alt + Backspace to fill the circle with the foreground color. Press Ctrl + D.
Double click on the new layer in the layers palette. In the layers style window select the Bevel and Emboss option. Set the style to Inner Bevel, depth 221%, size 1px and soften 0px. Set the highlight mode opacity to 54% and Shadow mode to 44%.

Then select the Drop Shadow option, set the Blend mode to Multiply, distance 3px, spread 0px and size 5px.

Right click on this layer in the layers palette and select Duplicate layer. Press Ctrl + T and reduce the size to width 40% and height 40% in the options bar. Press Enter twice.
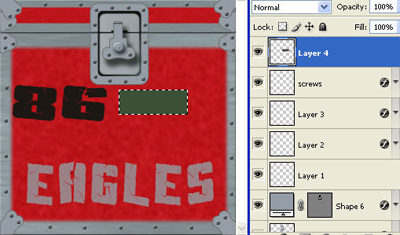
Next we will create the screws for the Crate. Select the Elliptical Marquee Tool (M)
![]() and in the tool options set the style to Fixed Size, width 5px and height 5px.
and in the tool options set the style to Fixed Size, width 5px and height 5px.
Then click on the box where you want the screws.

Set the foreground color to #575c61. Create a new layer
![]() and press Alt + Backspace to fill the color. Press Ctrl + D. Name the layer as Screws. Double click on the Screws layer in the layers palette and select the Bevel and Emboss option from the layer style. Set the style to Inner Bevel and depth 1%.
and press Alt + Backspace to fill the color. Press Ctrl + D. Name the layer as Screws. Double click on the Screws layer in the layers palette and select the Bevel and Emboss option from the layer style. Set the style to Inner Bevel and depth 1%.
Next we will create some tags for the Crate. Select the Rectangular Marquee Tool (M)
![]() and make a rectangle. Create a new layer.
and make a rectangle. Create a new layer.
![]() Set the foreground color to 3a5037 and press Alt + Backspace to fill the new layer. Press Ctrl + D.
Set the foreground color to 3a5037 and press Alt + Backspace to fill the new layer. Press Ctrl + D.
Select the Rectangular Marquee Tool (M)
![]() and make a rectangle. Create a new layer.
and make a rectangle. Create a new layer.
![]() Set the foreground color to f8ea97 and press Alt + Backspace to fill the new layer. Press Ctrl + D.
Set the foreground color to f8ea97 and press Alt + Backspace to fill the new layer. Press Ctrl + D.
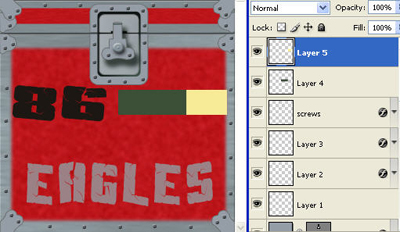
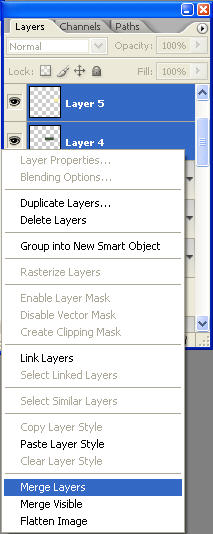
Press shift and select the Layer4 and layer5. Right click in the layers palette and select Merge Layers.
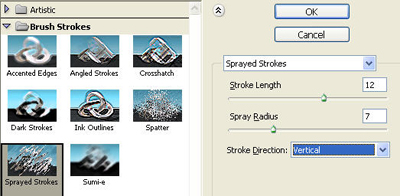
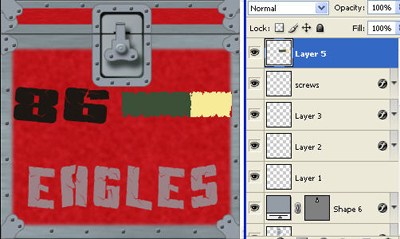
Set the background color to #c80f1c. Go to Filter > Brush Strokes > Sprayed Strokes. Set the length to 12, radius 7 and direction vertical. This will give a torn paper effect. Check you have set the appropriate background color to merge with the background.
Next select the Text Tool
![]() and type EAGLES in color # f8ea97and Live in #3a5037. You can use the font of your choice (I have used the font Andy).
and type EAGLES in color # f8ea97and Live in #3a5037. You can use the font of your choice (I have used the font Andy).

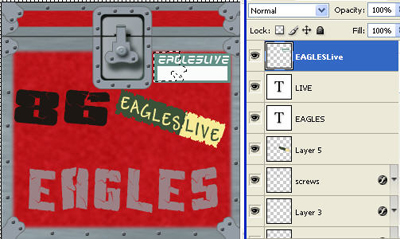
Press Shift and select the layers layer5, Eagles and Live. Press Ctrl + T and rotate the layers as shown in the image below.
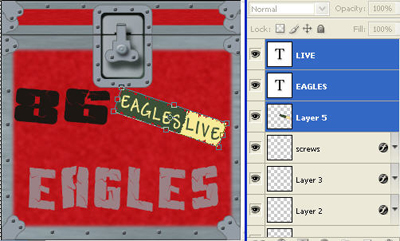
We will create few more torn tags. Select the Rectangular Marquee Tool (M)
![]() and make a rectangle. Create a new layer.
and make a rectangle. Create a new layer.
![]() Set the foreground color to #619387 and press Alt + Backspace to fill the new layer. Press Ctrl + D.
Set the foreground color to #619387 and press Alt + Backspace to fill the new layer. Press Ctrl + D.
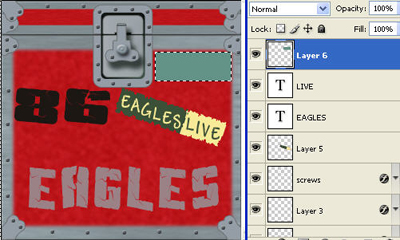
Select the Rectangular Marquee Tool (M)
![]() and make a rectangle. Set the foreground color to #ffffff and press Alt + Backspace to fill the new layer. Press Ctrl + D.
and make a rectangle. Set the foreground color to #ffffff and press Alt + Backspace to fill the new layer. Press Ctrl + D.
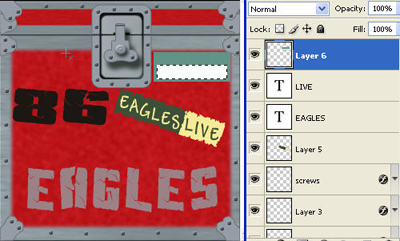
Select the Text Tool
![]() and type some text in color #ffffff.
and type some text in color #ffffff.
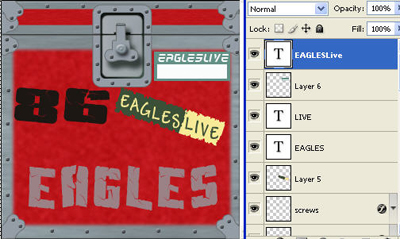
Press shift and select the layers layer6 and the text layer, right click on the layers in the layers palette and select Merge Layers. Select the Polygonal Lasso Tool (L)
![]() and create path as shown in the image.
and create path as shown in the image.
Press Ctrl + X. Create a new layer
![]() and press Ctrl + V. Rotate and position the 2 torn images as shown below:
and press Ctrl + V. Rotate and position the 2 torn images as shown below:
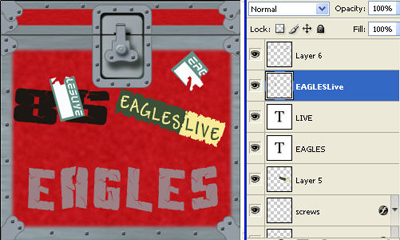
You can create few more tags like this following the step 9. Try to create tags of different colors. I have created these tags.
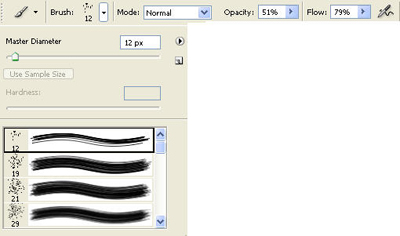
Finally we will create a mossy effect for our crate. Select the Brush Tool
![]() , set the foreground color to #2f4537. I have selected a natural brush of 12 px. Then draw few strokes as shown in the image below.
, set the foreground color to #2f4537. I have selected a natural brush of 12 px. Then draw few strokes as shown in the image below.
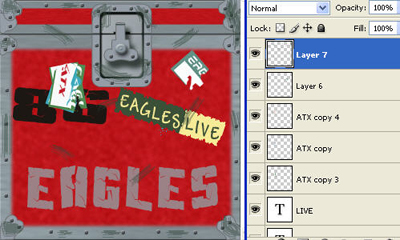
Select the Smudge Tool (R)
![]() and smoothen the strokes you have created using the brush. Then use the Burn Tool to darken some of the areas.
and smoothen the strokes you have created using the brush. Then use the Burn Tool to darken some of the areas.
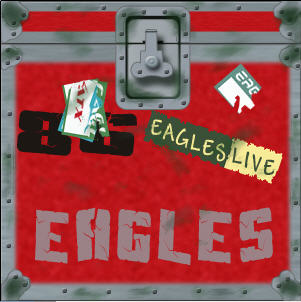
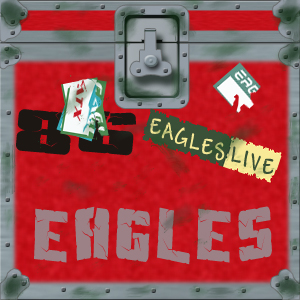
The final image should look like the one below: