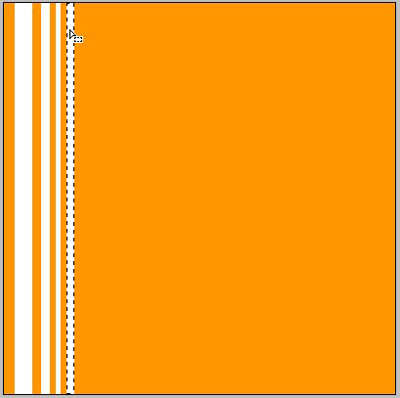
1. Take a new File of 400 pixels, 400 pixels, of resolution 72 dpi in the RGB mode.Fill it with the colour of your choice take the rectangular marquee tool and make selection and delete the area your image will be like this.
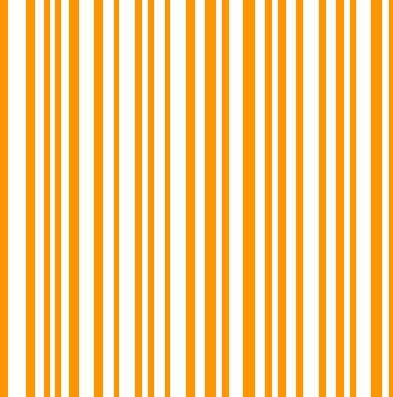
2. Make your image like this.
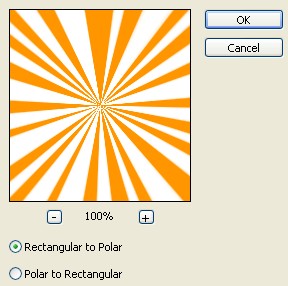
3. Goto Filter>Distort>Polar coordinates and use the rectangular to polar.
4. Make a new layer and fill the gradient as shown in the image below.

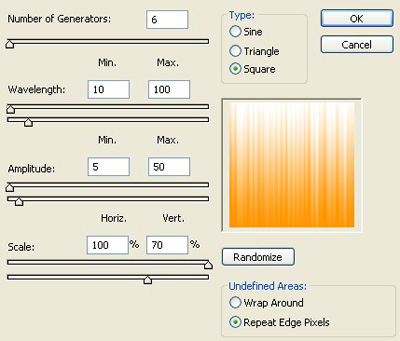
5. Goto Filter > Distort > Wave and use the settings which are given in the image below.
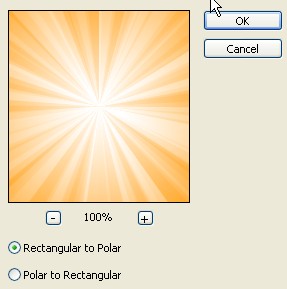
6. Now again goto Filter>Distort>Polar coordinates and use the rectangular to polar.
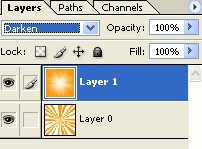
7. Use the Blending mode Darken.
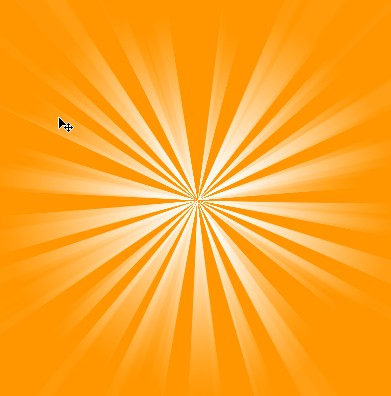
8. Your image will be like this.