Here's something you probably didn't know. Did you know that you could manipulate a head of cauliflower to look pretty darn close to that of a mushroom cloud. Follow the below instructions to find out how.
To begin this tutorial you will need a couple of images. I simply googled "sunset" and found the below image. I then googled "cauliflower" and found the image in step two. I resized both images so they would work together and moved on.

Place the cauliflower image above the sunset layer to begin.
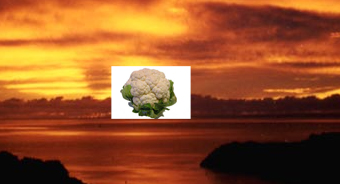
Next, eliminate the background of the cauliflower layer by whatever means you feel most comfortable. I would suggest the "Magic Wand Tool."

Now remove the green leafs from the bottom of the cauliflower as illustrated below. In this case, I used the "Eraser Tool" with a small soft brush.
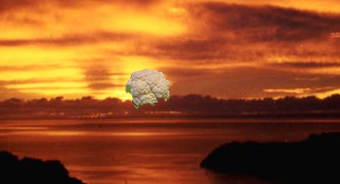
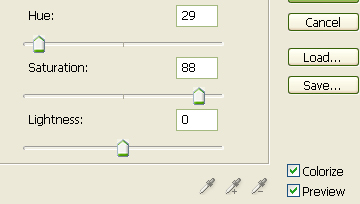
Then go to the main menu and select "Image" then "Adjustments" and lastly "Hue/Saturation" and use the below settings.
You should now have something similar to the below image.
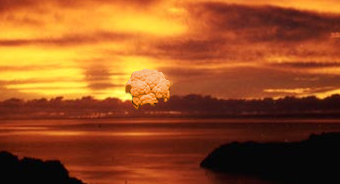
Now duplicate the cauliflower layer and change the Blending Mode to "Color Burn."
Duplicate the cauliflower layer once again and change the Blending Mode to "Color Dodge" and turn the Fill down to 50%.
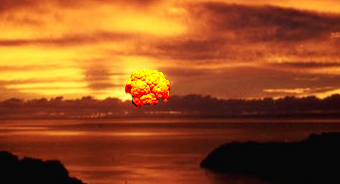
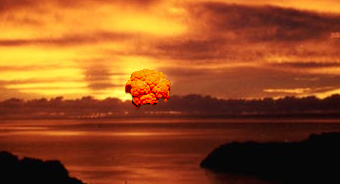
The Results!!!
To get the final result, I simply merged the cauliflower layers and blur a bit. Next, using the "Smudge Tool", I created the stem of the cloud. I then added some lighting behind the mushroom cloud.