1. First of all I have taken a new file of height = 400 pixels, width = 400 pixels and resolution of 72 dpi in the RGB mode.

2. Make a new layer from the layer palette.

3. Fill the new document with black color.

4. Click Filter>Noise>Add Noise Apply the following settings.

5. Your image will look like this.

6. Go to Image>Adjustments>Levels apply the following settings.

7. Your image will look like this.

8. Make a new layer from the layer palette.
9. Select the Elliptical marquee tool from the tool palette and draw the oval in the file as shown below in fig.

10. Fill the color coding # 000854 as given in the image below.

11. Your image will look like this.

12. Go to Blending Options>Pattern Overlay apply the following setting.

13. Your image will look like this.

14. Now go to Filter>Blur>Gaussian Blur Apply the following settings.

15. Your image will look like this.

16. Make a new layer from the layer palette.
17. Select the Elliptical marquee tool from the tool palette and draw the oval in the file as shown below in fig.

18. Fill the new document with color white color as shown below.

19. Now go to Filter>Stylize>Wind Apply the following settings.

20. Then press the Ctrl+F for more filter.
21. Now again go to Filter>Stylize>Wind Apply the following settings.

22. Then press the Ctrl+F for more filter.
23. Your image will look like this.

24. Go to Edit>Transform Rotate 90'CW now your image will look like this.

25. Now go to Filter>Stylize>Wind Apply the following settings.

26. Then press the Ctrl+F for more filter.
27. Now again go to Filter>Stylize>Wind Apply the following settings.

28. Then press the Ctrl+F for more filter.
29. Your image will look like this.

30. With the help of Transform tool make it small as you can see in the next image.

31. Go to Image>Mode>Grayscale.

32. Your image will look like this.

32. Go to Image>Mode>Indexed.
33. And again go to Image>Mode>Color Table>Black Body as shown in the fig. below.

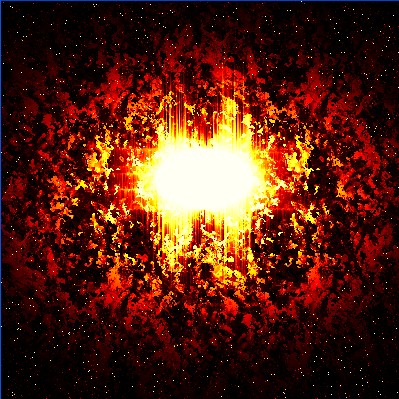
34. Your final image will be as attractive as mine as showing below.