


1. Take a new file of 400 pixels 400 pixels of resolution 72 dpi in the RGB mode.
2. First of all choose any picture you want.
3. And now select the Elliptical Marquee Tool
![]() .
.
4. And draw ellipse in such a way to cover the main portion of the image.

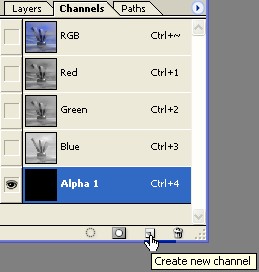
5. Then go to Channel create a new Channel.
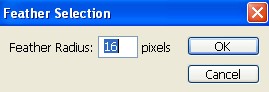
6. Now go to Select>Feather>Feather Selection use these following settings.
7. Fill with white color in the selection by pressing ALT+Backspace.

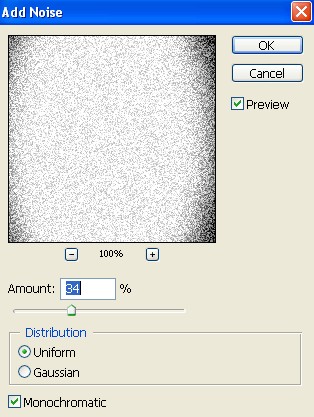
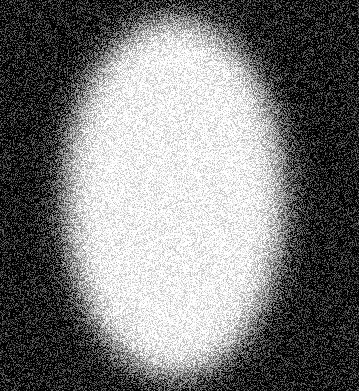
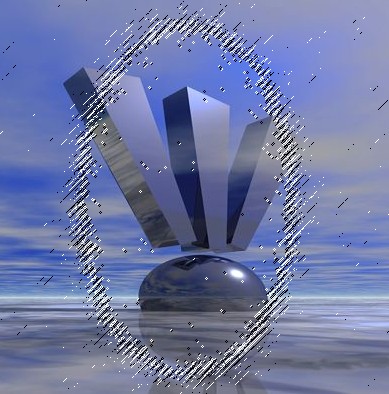
8. Then go to Filter>Noise>Add Noise apply the following settings.
9. Your image should be look like this.
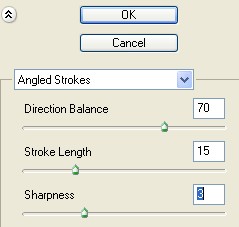
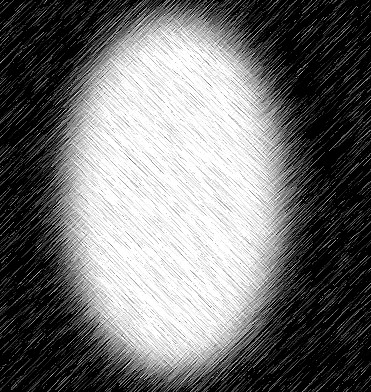
10. And now go to Filter>Brush Stroke>Angled Strokes use these settings.
11. Your image should be look like this.
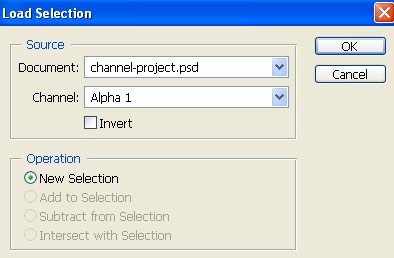
12. Select RBG Channel in the channel palette Click Layer Tab, select the image layer.
13. Then go to Select>Load Selection apply the following settings.
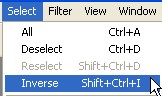
14. Your image should be look like this.
15. And now the finally set go to Select>Inverse.
16. Your image should be look like this.
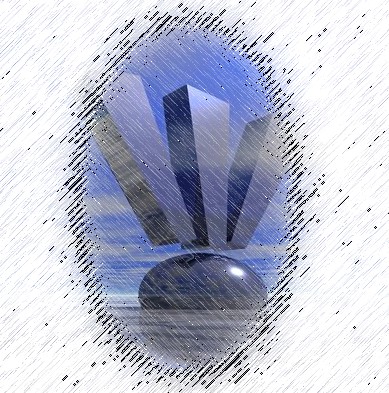
17. Then press Ctrl+D, deselect.
18. Your final image should be look like.
