


A friend of mine told me to show him how i cubed a apple for a television.
I think you will see the advertising in a few months.
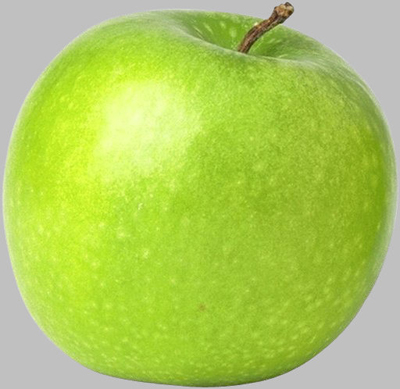
So let's start. I will use this apple in this tutorial. ( you can use also a tomato, orange )
Open a new document ( 1000 X 1000 pixels )
Delete the grey background with the " Magic Eraser Tool "
Then drag the Apple on your new document.
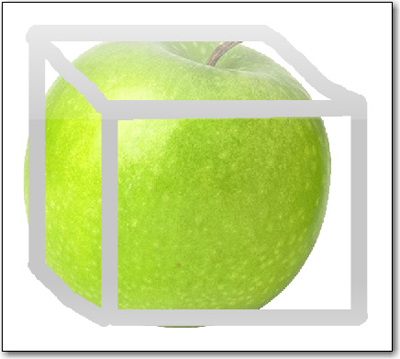
Now it will come the funny part.
Create a new layer. ( press Shift+Ctrl+N )
Select the Pencil Tool. Set the Master Diameter to 25 px
Choose a grey color and draw something like me.
I will use a grey color because it is better for you to see what i am doing.
So start creating a 3D box by hand. It doesn't have to be perfect.
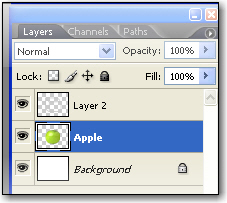
Select the Apple from the layer palette:
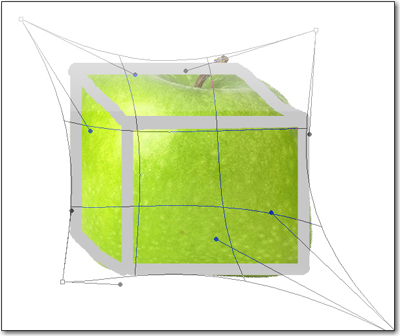
Now go to Edit > Transform > Warp.
You will notice that a Grid will appear on your apple.
Now with your mouse try to drag the points to fill the box. I recommend you to change the opacity on the grey box to 50 % so you can see what are you doing.
Then as i have told you try to drag the corners of the apple to fit with the box.
Now Select The layer with the Grey Box.
Change the opacity to 40 %.
Create a new layer, and with the Pencil Tool create the same a box like before but with a white color.
Now let's apply a filter effect. With the last white 3D box go to Filter > Blur > Box Blur and set the radius to 25 Pixels.
Now you can go one more time to Edit > Transform > warp and make some small change on the White box.
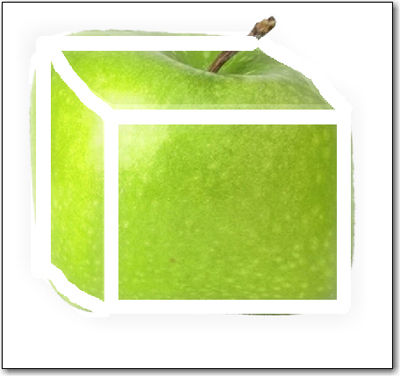
Here is my result:

I hope you like it.
You can tweak this yourself. you can add water drops or you can add a shadow.