Healing Brush Tool
The Healing Brush Tool works the same as the Clone tool to paint with sampled pixels of a near and similar area to correct imperfections, but also this one has the advantage that it is able to matches the texture, lighting, transparency, and shading of the sampled pixels to the pixels being healed.As a result, the repaired pixels blend seamlessly into the rest of the image.
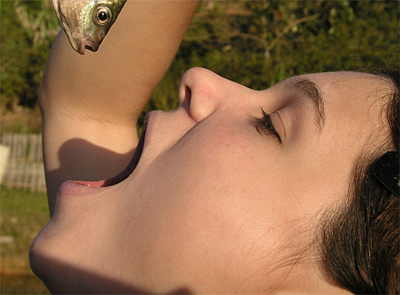
Let us see how it works in the following image courtesy of www.sxc.hu
Healing Brush Tool Options
Click on the Healing Brush Tool and make sure that the selected options are in the normal way. Here I will use a brush 19 px size, but it can be changed, to make it comfortable to you. Here you will se watch a call normal options.
Correcting the skin
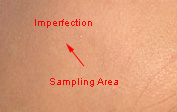
Let us correct the skin. We select an imperfection and we look for a similar texture, shadow and illumination skin area to the one that will be corrected.
Move the mouse to the sampling area, press the Alt key and click on it. This way photoshop sampled the area.
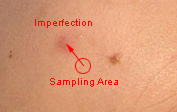
Move the mouse to the Imperfection Zone that is bigger than our brush size. Click on it and pass the mouse over. Try making small circles at the center.
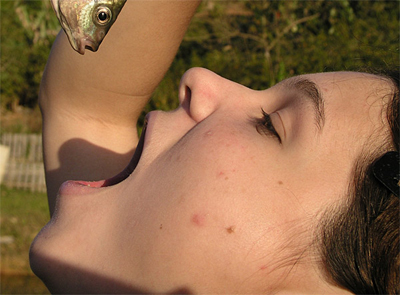
Lets see the result:
Just Takes 4 min to finish
Correct in a similar way the rest of the imperfections. It just takes 4 min to finish it completely.