

1. Start with a white to yellow(#fdfa8f) gradient background.

2. Create your text - I used 'Amerika Sans' font 72pt. Double click the layer and give it a 'gradient overlay' using red(#ff5002) and orange(#ffdf00) as the two colors.

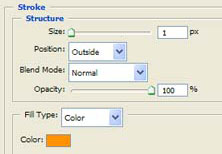
3. Use the following layer style to give your text a 1px outside stroke:
4. Ctrl+Click on the 'T' box on your layer, in my example it is circled in red. This will create a selection which is the shape of the text (hint: this technique can be used on any layer and is very useful).

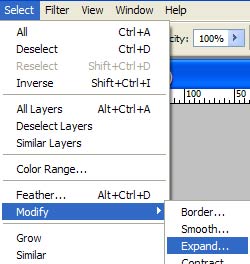
5. From the top menu, choose 'selection-modify-expand' and enter 2 in the box when prompted to enlarge your selection by 2px.
6. Create a new layer and using the paint bucket (white color - #ffffff) click anywhere inside your selection. This will fill the entire selection with white. Give it a 1px outside orange stroke like we did for the text.

7. Move your text layer on top of the new layer, and voila - we're done.
