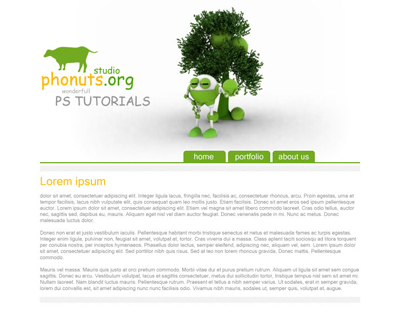
1. Create a new document (700*550).
2. Fill the background with #ffffff using the paint bucket tool.
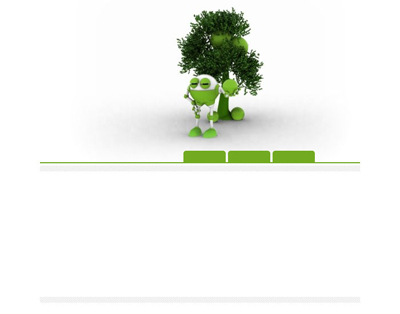
3. Add the following picture to your design (click on it to view the image in a bigger size) and place it like this.
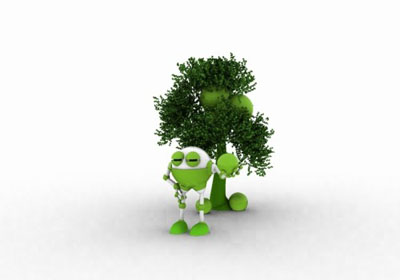
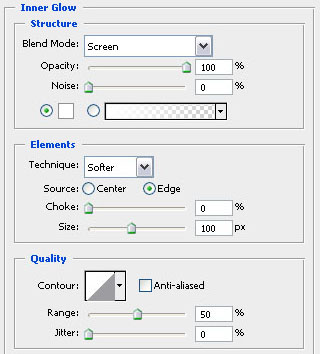
4. Adjust the blending options of the layer (layer - layer style - blending options) we've just created and add an inner glow with the following settings! This is needed to remove the shadows we don't need!
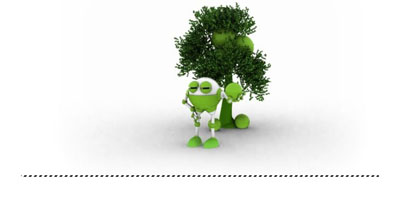
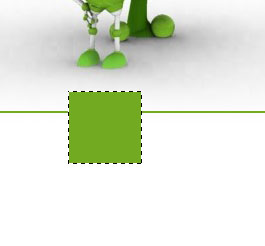
5. Now use your rectangular marquee tool to select a line with a height of 2px like this and fill the selection with #72aa21 on a new layer (layer - new layer)!
6. Now use the same foreground color to select your menu buttons and create a new layer… This isn't as east as it looks so let's get started. Select your rectangular marquee tool and select a shape like you can see in the first picture and fill it with #72aa21.
7. Now go to (select - modify - smooth) and change the sample radius to 3px and click ok! Now go to (select - inverse) and press the delete button so you end up with some smooth corners for your button! Duplicate that layer 2 times or more of you want to.
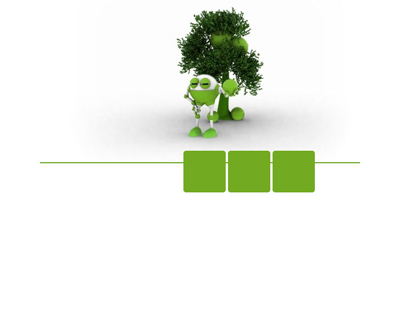
8. Now select all the button layers one by one and use your rectangular marquee tool to select everything under the green 2px line we've created in a previous step. Press the delete button to remove the part of the menu button that we won't need so you end up with the following!
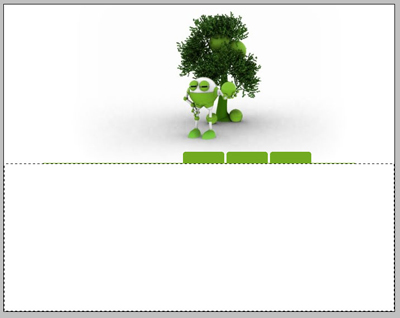
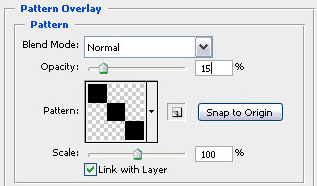
9. Now select a 10px high box under the menu and fill it with white #ffffff on a new layer, and then adjust the blending options and add a pattern overlay with the following settings!
10. If you want to, you can duplicate the previous layer we've created in step 9 and use it as a footer like I've done in this picture.
11. Our tutorial is already finished but I'm going to help you adding text using the right colors! So grab your horizontal type tool and type a site title next to the tree and the little man… The colors I used were (#4da300 = green), (#ffba00 = orange), (#b5b4b4 = light grey), (#949494 = dark grey).
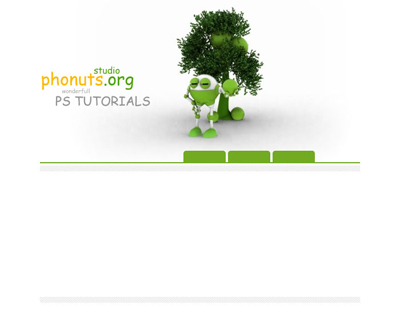
12. I've also added some sort of logo above the site title (it's just an example, don't use a cow on a real site), I used a brush and created it on a new layer in this #72aa21 color.
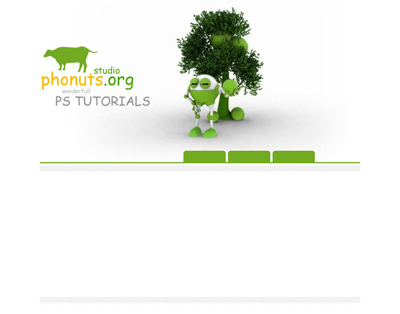
13. I've just added some more demo text to the content box and the menu in #888888 and #ffffff in this final step and we're finished!