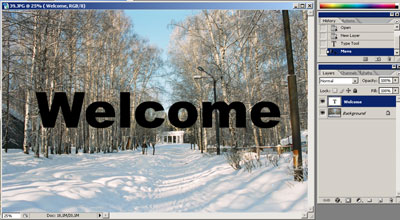
1. Create text layer using the Type tool.
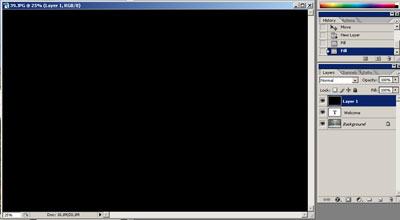
2. Create a new layer and fill it with black.
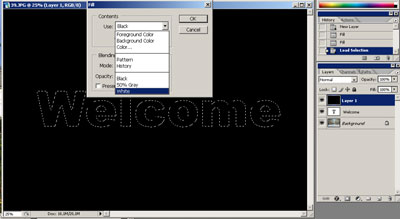
3. Staying in the top layer Ctrl+click the text layer and fill the resulted selection with white.
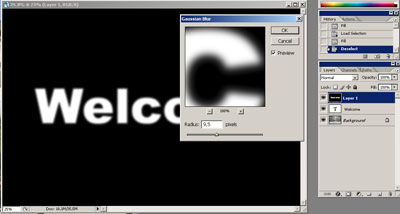
4. Go to Filters > Blur > Gaussian blur to blur the text a little.
5. Save your image as a psd file (glass.psd, for example). You will need it later.
6. Make your white text layer invisible. Duplicate your background layer and put it on top of text layer but under the invisible black layer.
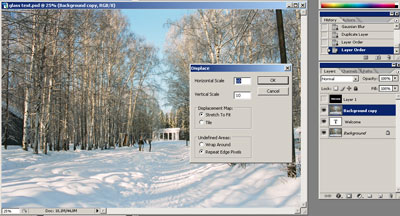
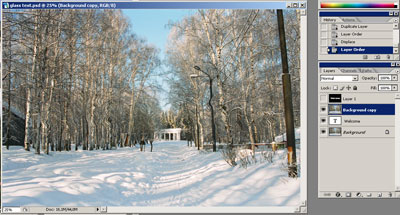
7. Use Filters > Distort > Displace filter with default settings on the background copy using the glass.psd file in the appearing Open/Save dialogue window. This image will be used for displacement.
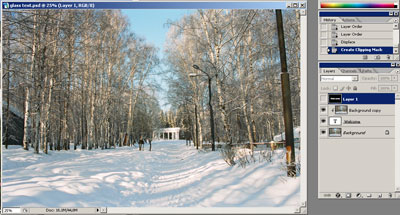
8. Alt+Click a line between text layer and the displaced background copy and create a clipping group.
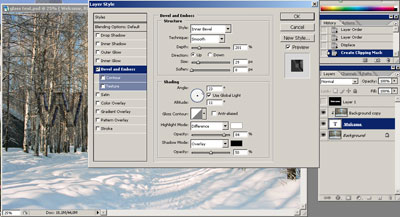
9. Add Bevel and Emboss layer effect to the text layer using the settings shown below.
10. Add the letters a shadow
11. Change the displaced layer blending mode to screen.
The work is complete.