Create a new file, having 450x245 px and 300dpi.

Make use of the next instrument
 to picture a heart’s silhouette of black color, like in the next image.

Copy the recently made layer.
Use the previous instrument to represent one more heart with the color FF0A29 and place everything like in the picture below.

Do the same thing, applying the next parameters.

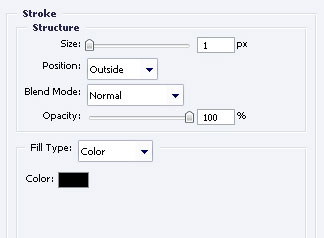
Fill 0% on the layer.
Blending Options-Stroke
Take the instrument
to draw a wing’s silhouette left to the heart.
Use the same instrument to represent a figure along the contour and paint in black. Then click on the icons shown below.
![]()
![]()
Create the inside contour (it will be the transparent one)

Copy the recently created layer and apply Free Transform option to turn it around and place it like it is demonstrated below.

Use the already known instrument
to represent a white rectangle inside the band, above all the layers, like in the next image.

The final result!