


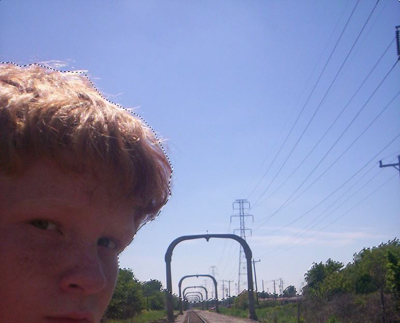
Step 1 - Select You Subject
First, open the image you want to edit. With the image open, make a selection around the part you want to stay in color once we convert to photo to black and white. This tutorial was user requested, so I will use the image he provided as the example. As you can see, I selected the sky to remain colored. My selection is quite choppy, however if you are careful when doing it your image will look much more crisp and realistic.
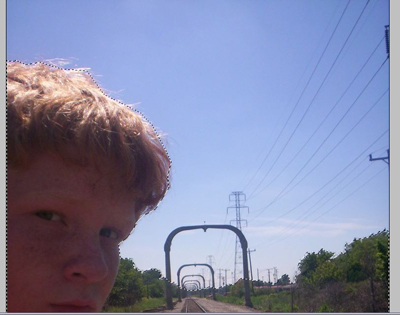
Step 2 - Create Your Black And White
No, select the Magic Wand Tool and right click on your selection. Click select inverse from the menu. This will select the parts you want to turn black and white.
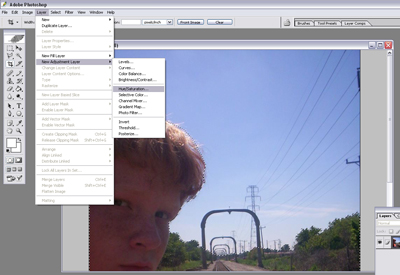
Step 3 - Adding The Adjustment Layer
With this section selected, go to Layer > New Adjustment Layer > Hue/Saturation. This will bring up a new layer dialog box. There is nothing we need to change in it so click ok.
Step 4 - Creating Your Black And White
Once we click ok, the Hue/Saturation box comes up. You want to take both the Hue and Saturation down as far as they will go, as shown here. Press ok and you should now have you final product, enjoy!
