Create a new file having 400x400 px and 72 dpi. Paint it in this shown color – 353535.

Take the next instrument  and create a circle having the same color the background has.
Blending Options-Stroke

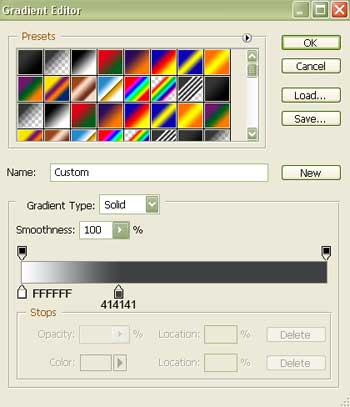
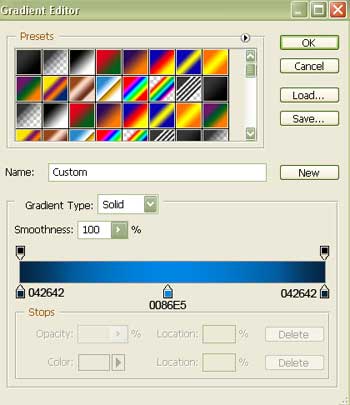
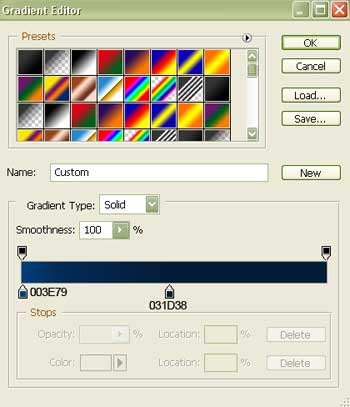
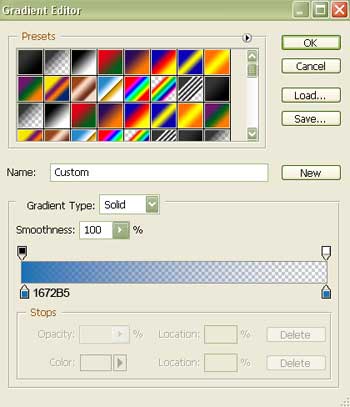
Gradient's parameters:
Select the previous instrument to create one more circle inside that one we already have.

Fill 0% on the layers.
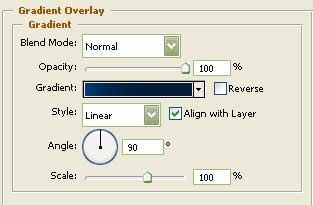
Blending Options-Gradient Overlay
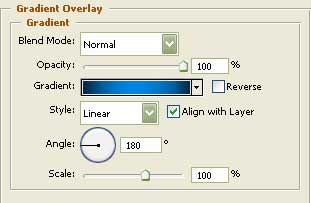
Gradient's parameters:
Draw one more circle with the same instrument used before.

Blending Options-Gradient Overlay
Gradient's parameters:
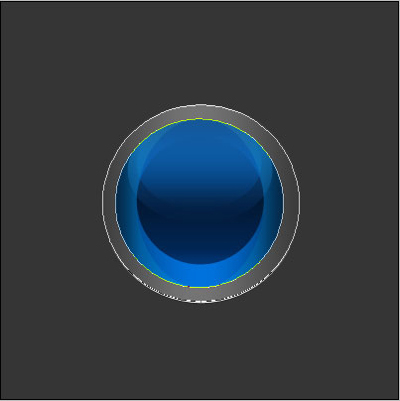
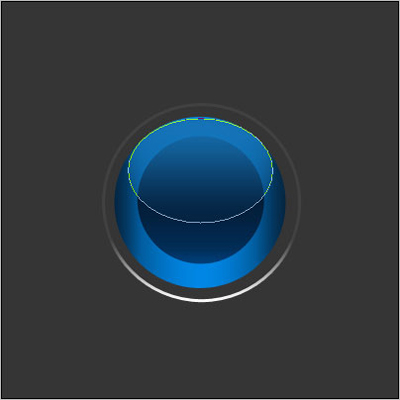
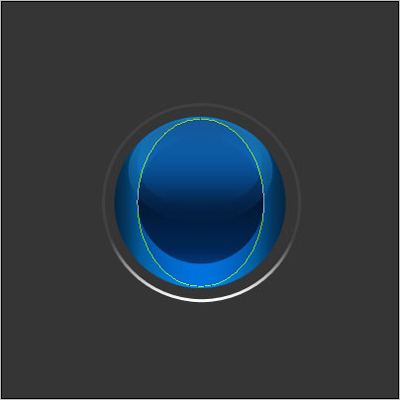
Represent now a flare having the shapes of an ellipse, the same way you may see in the next picture:

Fill 0% on the layers.
Blending Options-Gradient Overlay

Gradient's parameters:
Make a copy of the new made layer and make use of the Free Transform option to make it smaller and place it the same way it is shown in the picture below:

Take the following tool and represent an ellipse colored in 3BA1EA.

The Opacity on the layers should be of 40%.
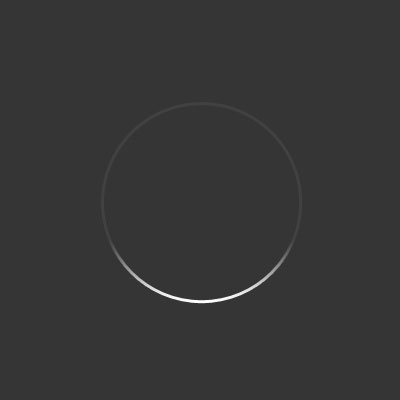
Now we should represent a ring (selecting first the same instrument and representing a circle along the edges and keeping pressed the Alt button erase the middle of the figure).